

How to Install Niwa on WordPress
Install the Niwa AI ZIP on an existing WordPress site, activate your licence and confirm the plugin is ready for model and customer-chat setup.
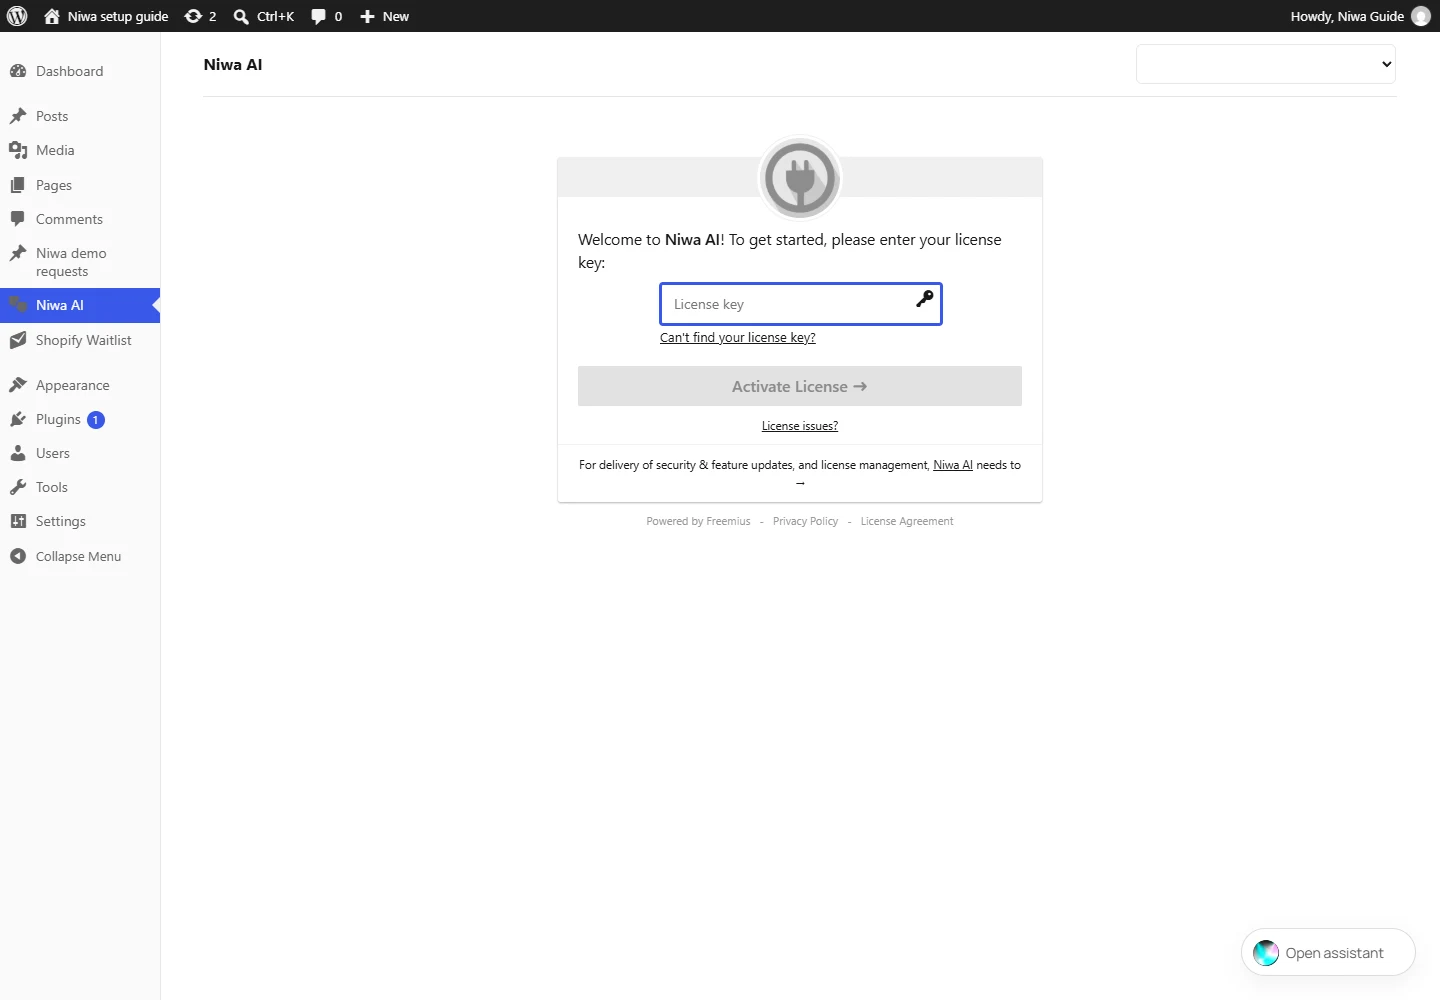
To install Niwa on WordPress, download the Niwa AI ZIP supplied with your licence, upload it through Plugins → Add Plugin → Upload Plugin, and activate it. Open Niwa AI, enter your licence key and complete any requested email confirmation. You can install the standalone plugin on your existing WordPress site.
Installing the files, activating the licence and connecting an AI account are separate tasks. This guide gets the plugin installed and its licence confirmed. Your customer chat becomes useful after you connect a model, prepare the site information and enable the public widget.
Prepare the site and your installation files
You need WordPress administrator access with permission to install plugins, the supplied niwa-ai.zip, your licence key and access to the email inbox associated with the licence. Keep the download link and the key separate. The licence field expects the key, not your email address or a URL.
Before changing a live site, take a backup that includes the database and website files. Know how you would restore it. If your host provides staging, install there first and check the site's main pages, cart and forms before repeating the process on production. WordPress backup guidance explains why both files and the database matter.
Check the installation requirements supplied with your package against your hosting. If someone else maintains your website, confirm who will install and update Niwa. Do not ask customers or ordinary staff accounts to perform administrator setup.
Upload the Niwa AI ZIP
Sign in to the intended site's WordPress dashboard and confirm the domain before uploading anything.
- Open Plugins → Add Plugin and choose Upload Plugin.
- Select
niwa-ai.zipfrom your computer. Keep this file zipped for the dashboard upload. - Click Install Now and wait for WordPress to finish.
- Select Activate Plugin.
- Open Plugins → Installed Plugins and confirm that Niwa AI is active.
WordPress documents this ZIP-upload method in its plugin installation instructions. You do not need to unpack the archive and upload individual files when using the dashboard installer.
If Niwa is already installed, you are handling an update rather than a first installation. Check the current plugin and licence state before replacing anything. Avoid creating another plugin folder or deleting the existing installation just to repeat these steps.
Activate your Niwa licence
Open Niwa AI in the WordPress sidebar. Copy the complete key from your Niwa licence email, paste it into the licence field and select Activate License.
Complete email confirmation if the screen requests it. Return to WordPress and check the status under Niwa AI → Account. Plugin activation in WordPress confirms that the files are enabled; it does not establish that the licence has been accepted.
If you cannot find the key, use Can't find your license key? on the licence screen. Check the associated inbox and spam folder. If activation still fails, retain the exact error message and use the licence support route rather than trying keys from a different account.
The Niwa setup handbook includes the licence screen and the next setup controls.
Confirm installation before configuring the assistant
A completed installation should leave you with an active Niwa AI plugin, an accepted licence and access to its settings. Open the normal public website as well and check that your pages still load.
Next, connect your supported AI account in Main Settings → Authentication. Save authentication, reload the settings and choose an available chat model. Then prepare the site knowledge and turn on Enable flyout chat in UI Settings when you are ready to test the customer interface.
These later controls explain why a successful installation may not immediately produce a visible, answering chat. The complete WordPress assistant setup guide covers the workflow after installation.
Keep customer-facing configuration separate from private administration. A visitor opening the chat should not receive your licence key, provider credentials or access to website management. Niwa's safety guidance describes the connected services and access boundaries to review.
Resolve an installation problem at the step that failed
If Upload Plugin is unavailable, check your WordPress role and the site's hosting or network restrictions. Ask the site's administrator to use the permitted installation method. Changing your role or disabling a restriction is a separate administration decision.
If WordPress rejects the ZIP, confirm that you selected the actual plugin package and that the download completed. Save the installer message. An upload-size or server-permission error needs attention from the hosting administrator; repeated uploads of the same file will not resolve it.
If installation completes but the licence fails, investigate the key and confirmation step. If both pass but the chat is absent, move to UI Settings and visibility checks. If the widget opens but does not answer, inspect the AI connection and indexing. Each result points to a different part of setup.
Get help with the right installation details
Send your website URL, the installation step that failed and the exact message through Niwa contact. Keep full licence keys and AI credentials out of public screenshots and messages.
The standalone plugin suits an existing WordPress website. If you also need a custom WordPress site or migration, Niwa Business is USD 150 and includes hosting, maintenance and AI tools adapted to your business. Contact Niwa to discuss your website or migration.

