

How to Turn AI-Generated HTML into a WordPress Theme
Convert AI-generated HTML into an editable WordPress block theme. Separate templates from content, rebuild layouts with blocks and test the installed theme.
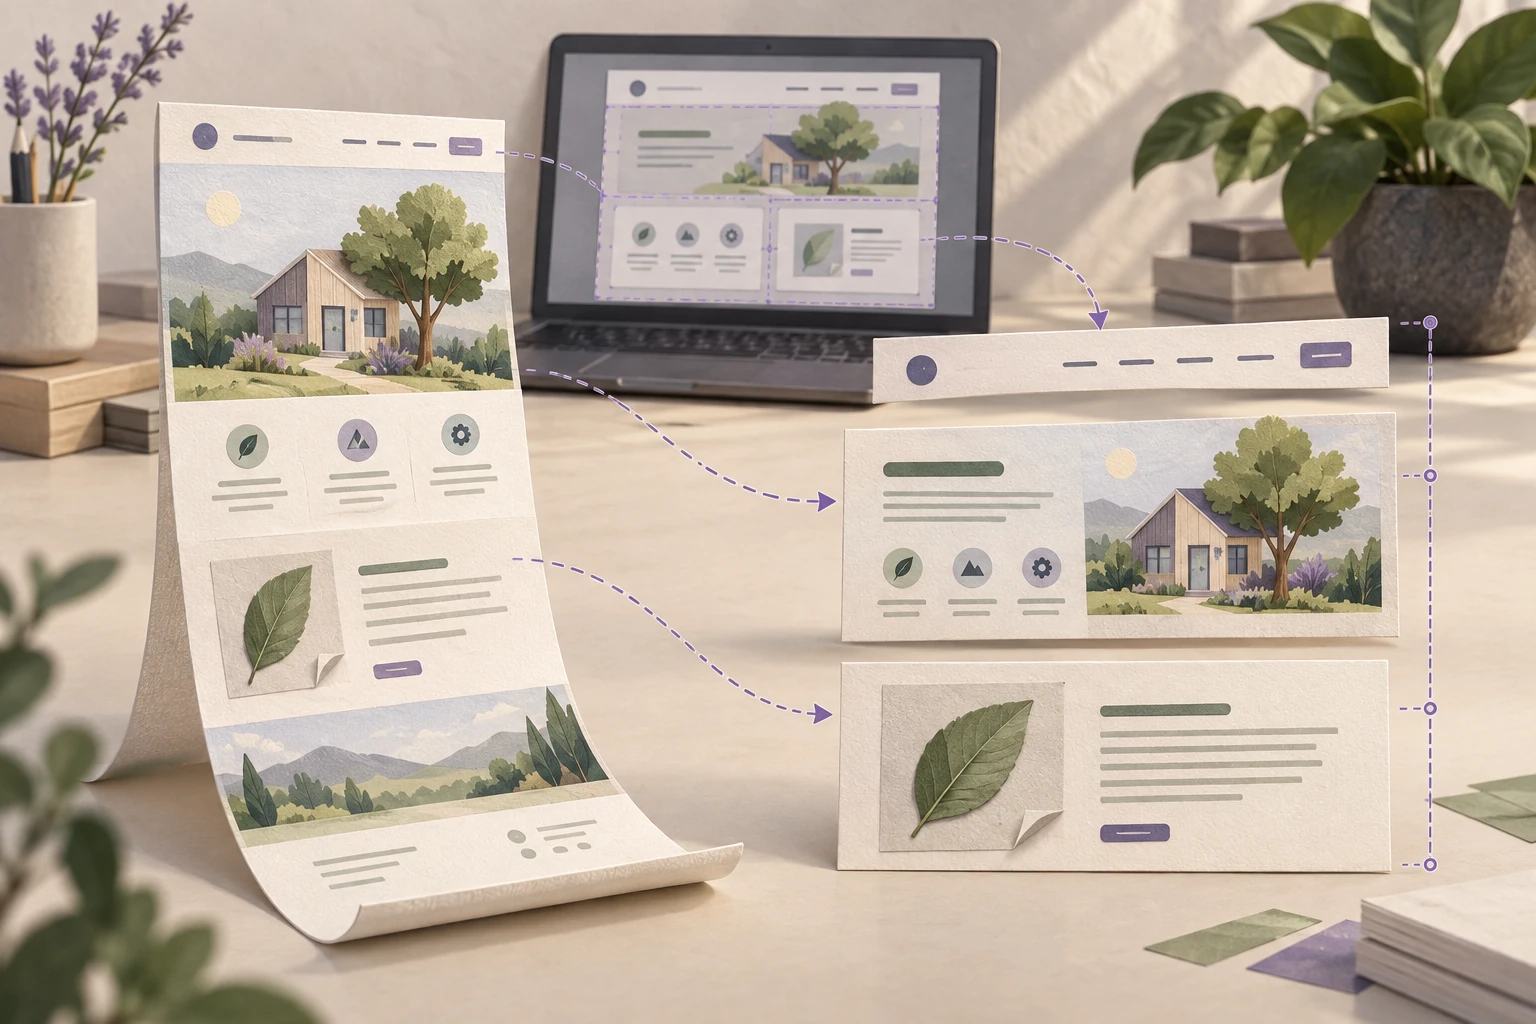
To turn AI-generated HTML into a WordPress theme, separate the design into reusable templates and editable content, then rebuild it using WordPress’s theme structure. For a new business site, a block theme is a practical route: preserve the approved visual design while using native blocks and the editor for content.
The finished site should let the owner change a service description or photograph without editing HTML. That also gives Niwa a useful WordPress environment for customer assistance and authorized website updates. A static file copied into a theme folder needs more work before it supplies those capabilities.
This guide follows a small brochure website. It covers the conversion itself, rather than moving an existing site’s records or choosing between website builders.
Inspect the generated design before converting it
Open the HTML locally and identify what it contains: page sections, styles, image files, navigation and interactive behavior. Check the approved design at a phone width. Remove unfinished demonstrations before using it as the reference.
Classify each part by purpose. The business logo and navigation belong in a shared header. The page’s service text belongs in editable content. A contact form needs its own real integration. A generated JavaScript animation is optional unless it supports an identified requirement.
Keep the original design as a reference, with the approved content and image sources. Do not make it the hidden permanent copy of all the website’s text. Once the conversion is complete, WordPress should be the source of truth for the content the owner edits.
If the design uses a full application framework, first identify its build output and dependencies. A folder of JSX components is not a folder of browser-ready HTML, and it is not a WordPress theme yet.
Choose the smallest native theme structure
A block theme needs a style.css file with theme metadata and a templates/index.html fallback. Template parts and theme.json provide useful places for shared structure and design settings. WordPress theme structure.
For this conversion, a working project can grow from:
studio-theme/style.css
studio-theme/theme.json
studio-theme/templates/index.html
studio-theme/templates/page.html
studio-theme/parts/header.html
studio-theme/parts/footer.html
Create it on a local or staging WordPress installation. Use a separate theme folder and preserve the currently active theme. The owner needs a recoverable baseline while you check the conversion.
An original example of the metadata in style.css is:
/*
Theme Name: Studio Theme
Version: 1.0.0
Text Domain: studio-theme
*/
This identifies the theme. Do not assume that placing every generated CSS rule below this header automatically supplies the correct asset loading or editor appearance. Prefer native block styling and add custom assets only where the remaining design needs them.
Rebuild the layout with editable blocks
Use Group and Columns blocks for structure, Heading and Paragraph blocks for text, and Image or Gallery blocks for approved photographs. Recreate a hero from those elements rather than storing the entire page in one Custom HTML block.
Start with one page in the WordPress editor. Match the information order, spacing and image treatment of the approved reference. Save it and open the public preview. Then change a sentence through the editor and verify that the preview changes. This establishes that the owner can operate the result.
The visual layout does not need to preserve every wrapper and generated class. Remove redundant containers when native blocks produce the same useful result. Keeping obsolete HTML alongside a second editable copy creates confusion about which version is actually displayed.
Build repeatable page sections as patterns where that helps the editor. A service-introduction pattern can supply a starting layout without turning each service into a hardcoded template. Review which parts an editor should be able to change. WordPress patterns documentation.
Separate page content from template structure
Templates control the page frame; the Post Content block displays the content entered for that page. Shared template parts keep header and footer work in one place. WordPress’s template system selects the appropriate structure for the requested page. WordPress templates guide.
Here is an original minimal templates/page.html example for a page that uses its WordPress title as the heading:
<!-- wp:template-part {"slug":"header","tagName":"header"} /-->
<!-- wp:group {"tagName":"main","layout":{"type":"constrained"}} -->
<main class="wp-block-group">
 <!-- wp:post-title {"level":1} /-->
 <!-- wp:post-content {"layout":{"type":"constrained"}} /-->
</main>
<!-- /wp:group -->
<!-- wp:template-part {"slug":"footer","tagName":"footer"} /-->
Create the corresponding header and footer parts with native blocks, including a usable navigation. Keep the page body free of a second H1 when the template already renders the title. A special homepage hero can use its own template with a deliberately chosen heading structure.
The required index.html must also have an appropriate fallback layout. For a site with posts and archives, create a Query Loop in the Site Editor with an inherited query, post titles linked to their posts, excerpts and pagination, then save the block markup in that template. Do not copy one service page into the fallback and expect it to serve every archive correctly.
Move the design settings into theme.json
Define the shared colors, typography and layout widths through the theme’s native settings. The aim is for the editor and frontend to use the same design decisions. A custom CSS rule that makes the public page readable but leaves the editor unusable is incomplete. WordPress theme.json documentation.
Keep the first configuration small. You can add a restrained palette and content widths, then test those values against the approved layout. Add only the controls and block styles the owner needs. Use the current WordPress schema and documentation for the site’s installed version rather than accepting an arbitrary generated schema URL.
Ask your AI development tool to explain each remaining stylesheet or script. Reuse core block behavior where it works. A navigation menu should not need a new framework simply to open on a phone.
When custom assets are necessary, load them through WordPress’s supported asset APIs. Fix hardcoded development paths and confirm that the same files load on staging. Keep credentials and service logic out of browser assets. WordPress asset-loading guide.
Replace demonstrations with real integrations
Connect a contact form using the site’s chosen form tool and verify delivery. If a button says Book, it should lead to a working booking flow with real availability. Replacing a button’s label is not the implementation of that workflow.
Install and configure Niwa on the WordPress site according to the setup guidance. Adapt it to the approved business content and test questions whose answers you can check. Confirm that the assistant appears on the intended public pages after the theme is activated.
For later authorized content changes, the website maintenance agent is relevant to the editable WordPress setup. Verify both the changed content and the page that renders it. A separate static copy of the same text would make that result harder to trust.
Test the theme before handing it over
Activate the theme on staging and check the homepage, ordinary page, blog list, individual post and a missing URL. Verify headers, footers, images and navigation at desktop and phone sizes. Use the keyboard to reach the main actions and confirm that focus is visible.
Ask someone who will maintain the site to change a page title, paragraph and image through WordPress. Check that the public result remains usable. Test a longer title and more than one page of posts; these expose layouts that only work with the original sample content.
Record the accepted theme version, installation package and connected services. Deploy the approved version to the named website, preserve a rollback copy and inspect the served pages again. Theme activation alone does not establish a successful conversion.
Existing WordPress owners can use the standalone Niwa plugin. Niwa Business is USD 150 for a custom WordPress website or migration, hosting, maintenance and AI adaptation. To discuss a conversion, send the Niwa team your approved HTML, assets and requirements for what the owner must edit.

