
A clear first step.
And every step after.
This Niwa setup handbook takes you from the licence email to your first conversation. Follow the walkthrough, then explore every plugin screen at your own pace.
For Niwa AI 0.13.1024 · Updated 26 September 2026
Your licence is the first connection.
Step 1. Have the ZIP file, your licence key and access to the licence email inbox ready. Installing the plugin and confirming the licence are separate steps.
WordPress → Plugins → Add Plugin → Upload Plugin, then Niwa AI
Install the ZIP and activate the plugin
Downloadniwa-ai.zipusing the link supplied with your licence. Keep it zipped. In WordPress choose Plugins → Add Plugin → Upload Plugin → Choose File, select the ZIP, then click Install Now → Activate Plugin.Enter the complete licence key
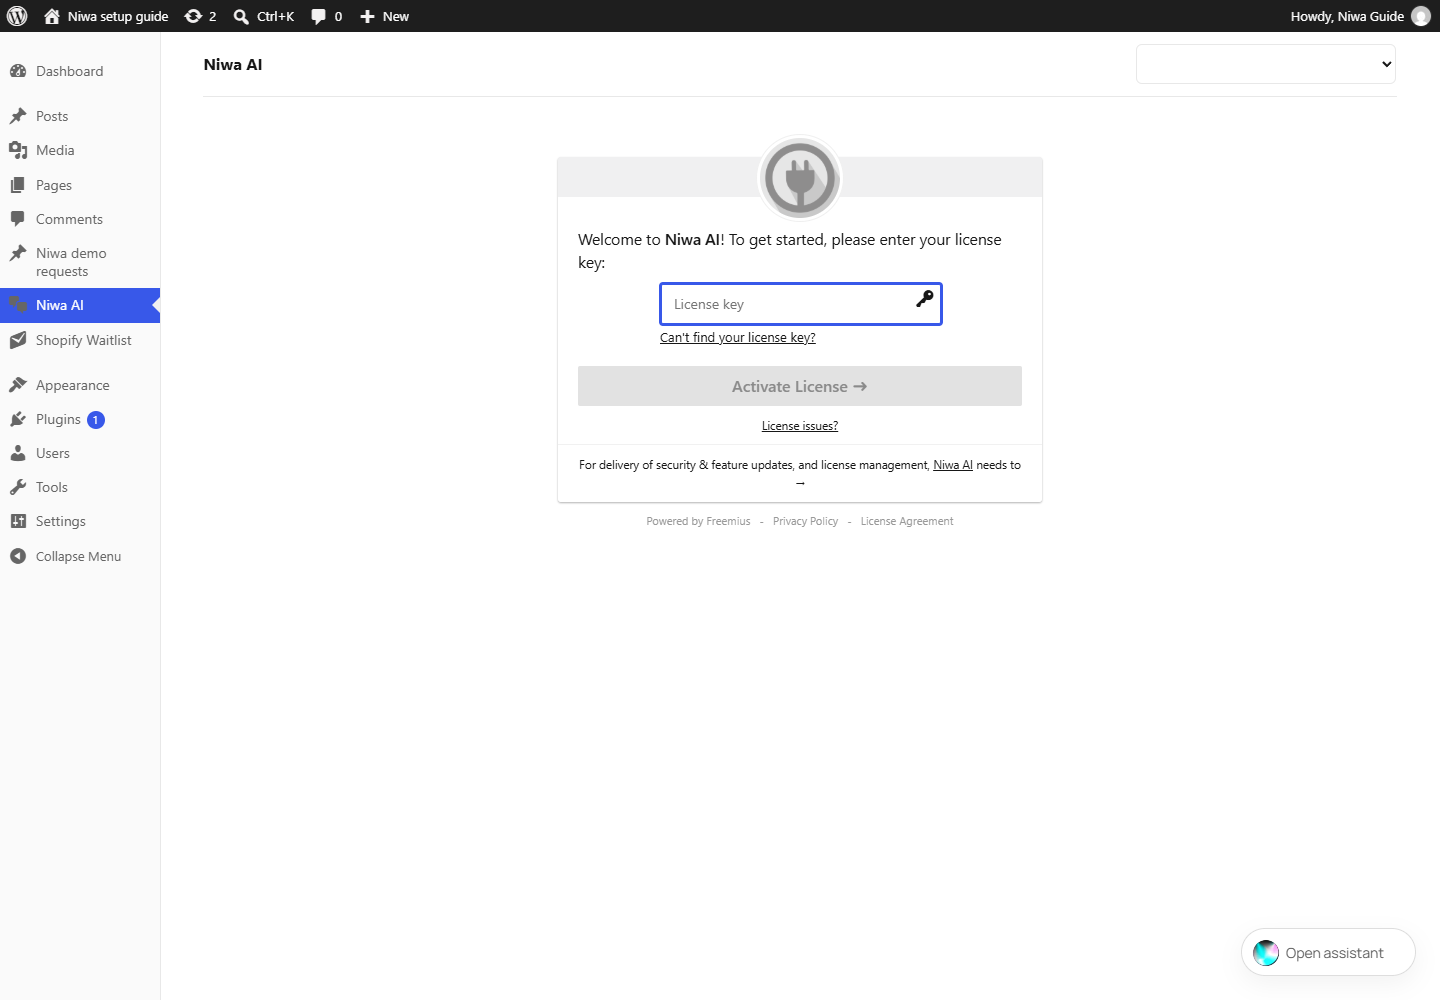
Open Niwa AI in the WordPress sidebar. Copy the key from your Niwa licence email, paste it into the licence field and click Activate License. Do not paste the download link or your email address into this field. Can’t find your license key? opens licence recovery; License issues? opens activation help.Confirm the activation email when requested
If the screen says confirmation is pending, open the inbox for the exact address shown. Find the confirmation email and click its activation button. The earlier email containing the key may be a different message. Return to WordPress and reload Niwa AI after confirming.Check Spam, Junk and Promotions
If the message is missing, check those folders before retrying. Mark a misplaced message as not spam. Verify the recipient address on the activation screen and use Re-send activation email if necessary. Use the newest confirmation message. For a company mailbox, also check its quarantine with your mail administrator.Check your account status
Once activation completes, open Niwa AI → Account to review the connected site, licence and expiry shown for your plan. If an activation limit or expired licence is reported, resolve it there or contact support. Use the validity shown in your own licence email rather than assuming every licence lasts the same number of days.
Before you continue
Niwa’s settings open, and the licence is active rather than waiting for email confirmation.
Give Niwa a model to work with.
Step 2. Choose Codex OAuth to sign in with your ChatGPT account, or use an OpenAI API key. The active connection mode determines which credentials Niwa uses.
WordPress → Niwa AI → Main Settings → Authentication
Allow the Codex device connection in ChatGPT
Sign in to ChatGPT with the account you intend to connect. Open your profile menu, then Settings → Security and enable device-code login for Codex if it is offered or required. In a managed workspace, the owner controls this in workspace permissions. Niwa’s Codex connection uses this authorization flow; adding an unrelated app in the connector directory will not finish it.Choose Codex OAuth in Niwa
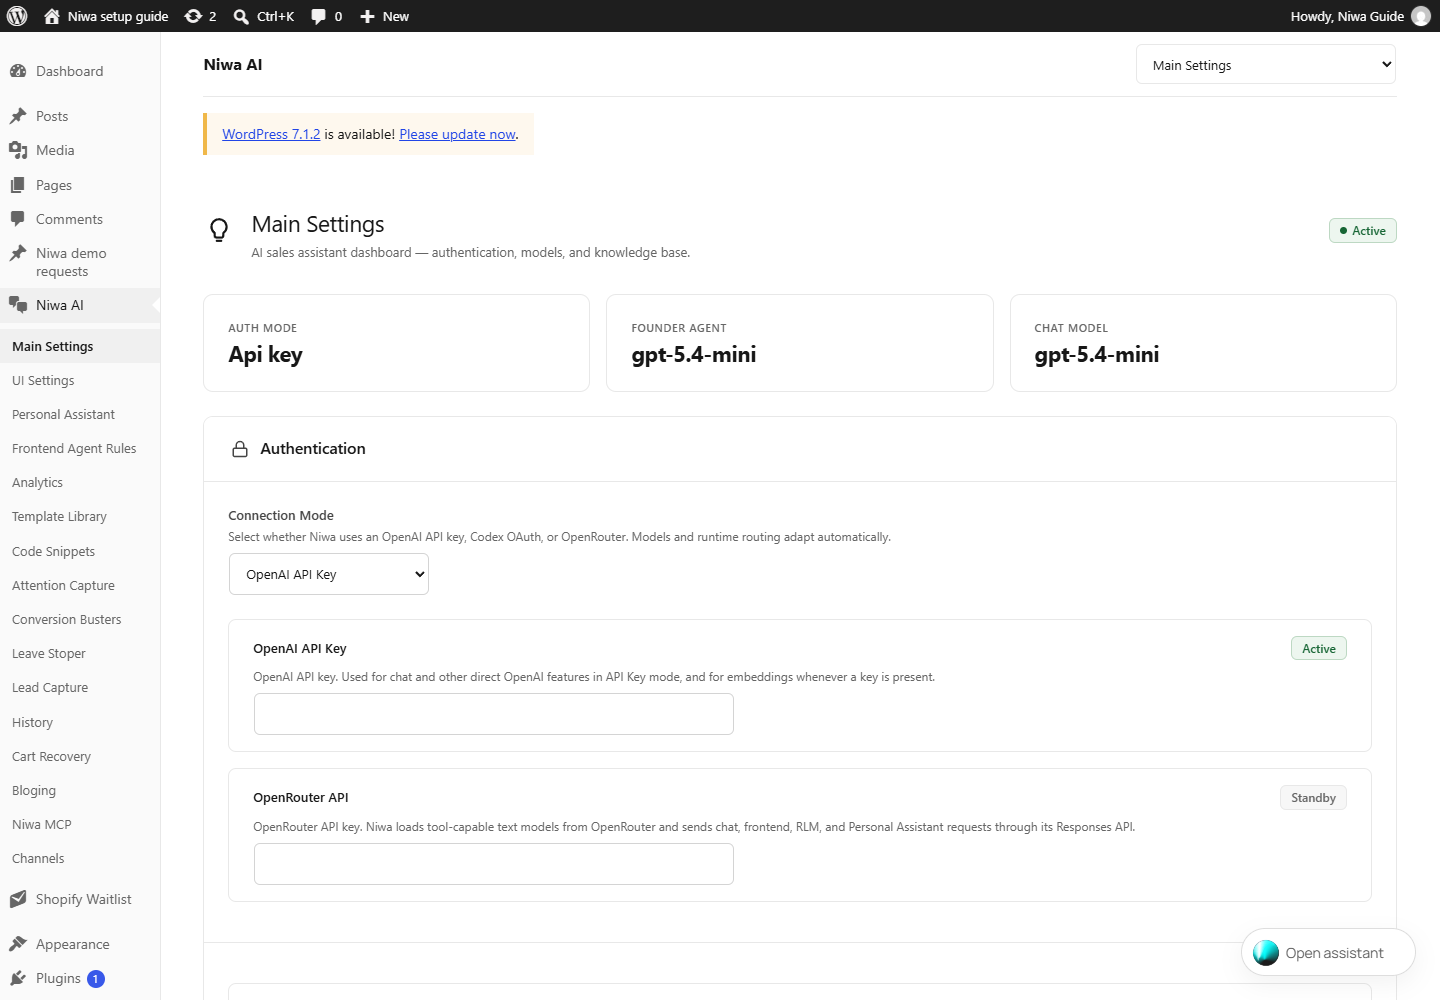
In Main Settings → Authentication, set Connection Mode → Codex OAuth and click Save Auth Settings. Then click Connect Codex OAuth. Keep the WordPress page open. Niwa displays a one-time verification code and an Open Verification button.Approve the connection on OpenAI’s page
Click Open Verification, confirm that the page belongs toauth.openai.com, sign in, enter the code shown by your own Niwa installation and approve the connection. Return to WordPress and wait for Connected. If the code expires, use Restart to begin a new attempt. Reconnect renews an existing connection; Disconnect removes the saved connection.Review ChatGPT’s data controls
In ChatGPT, open Settings → Data controls → Improve the model for everyone, turn it off and select Done. On personal plans, this choice applies to new ChatGPT conversations and Codex tasks. In Codex settings, review the separate Include environments option and turn it off if you do not want environment context used for training. Workspace policies may control availability.Or connect an OpenAI API key
Open OpenAI Platform → API keys, choose the correct project and create a secret key. Check that API billing and the project’s usage limits are configured. Paste it into OpenAI API Key in Niwa, choose Connection Mode → OpenAI API Key and click Save Auth Settings. ChatGPT access and API billing are separate. For OpenRouter, use its own API key field and select OpenRouter API.Choose models, save, then index the site
Reload Main Settings after saving authentication. Choose the Chat Model from the list available to your connection and save General Settings. Click Run Full Index + Embeddings and follow the progress. The personal admin agent has a separate Founder Connection Mode and Founder Model in Personal Assistant → Setup & Access. Set those to the connection and model you want it to use.
Before you continue
Your chosen connection is active, OAuth says Connected if you use it, and the model settings have been saved.
Turn on the chat your visitors will see.
Step 3. An active licence and connected model do not by themselves make the public chat visible. The frontend widget has its own switch.
WordPress → Niwa AI → UI Settings → Frontend Chathead
Enable the frontend chat
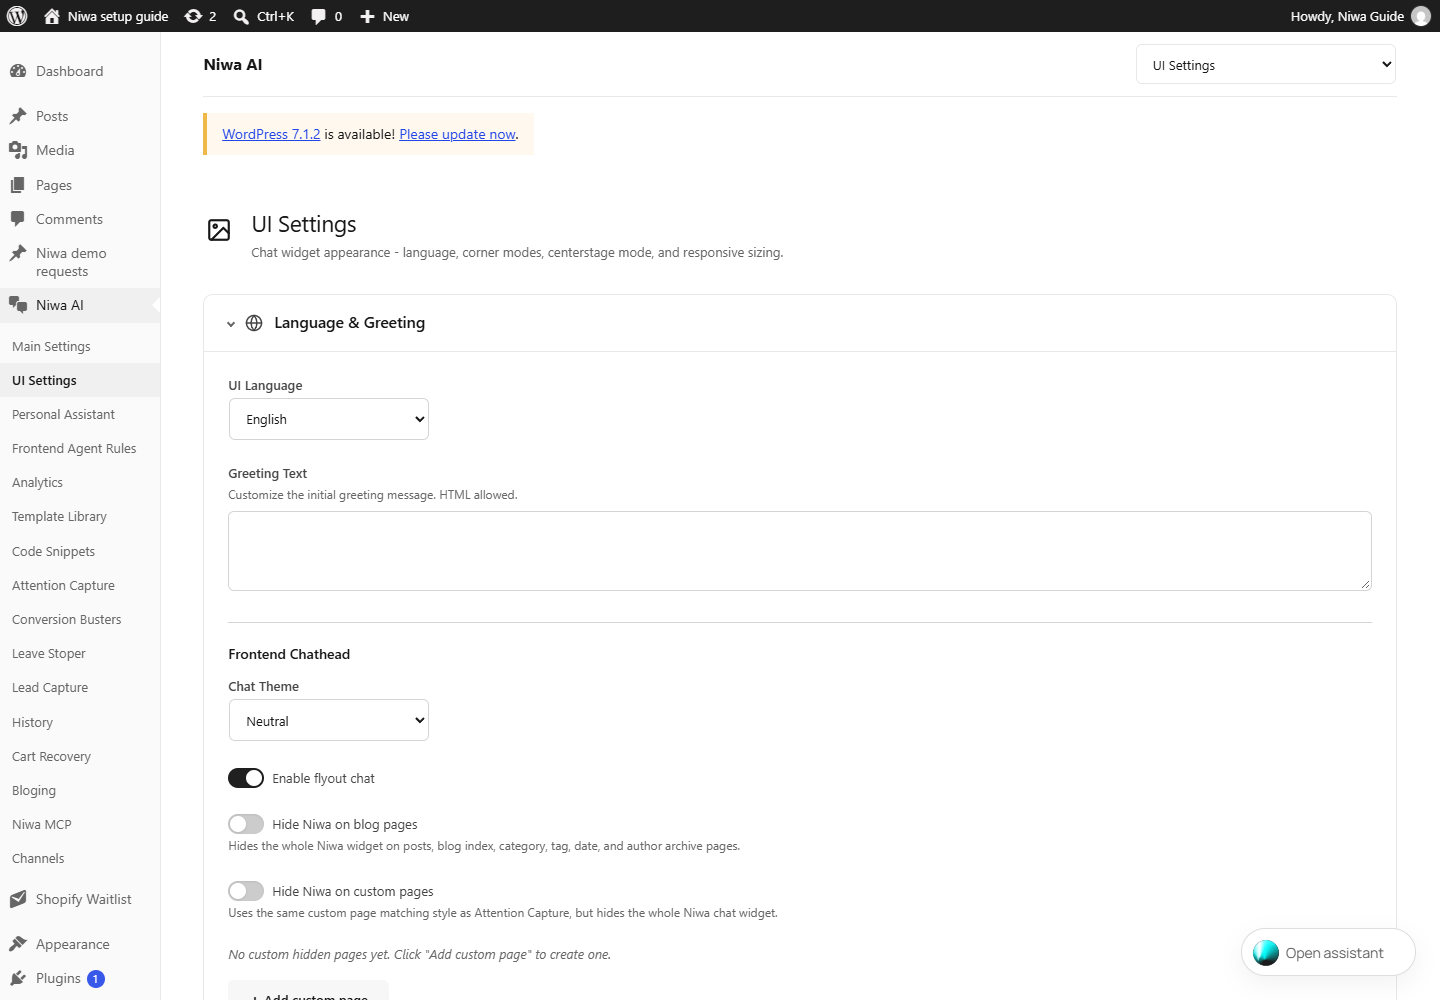
Turn on Enable flyout chat and click Save UI Settings. This is the switch for the visitor-facing floating chat. The Personal Assistant chat inside WordPress is a separate interface.Choose the language, greeting and appearance
Set UI Language and write the Greeting Text if you want a custom opening message. Choose a Chat Theme and Chathead Image. Under Launcher Style, choose the text pill or the compact orb dot. Use Default Settings keeps the built-in translated pill text and theme colors.Check visibility and device positions
Review Hide Niwa on blog pages and Hide Niwa on custom pages. A matching rule hides the whole widget. Open Desktop Positioning, Tablet Positioning and Mobile Positioning to adjust the corner, offsets and size. If you want the centered launcher, configure Centerstage Pill → Enable Centerstage Mode too.Tell the visitor assistant about your business
Open Frontend Agent Rules. Fill in your company, products or services, FAQ, policies, tone, sales rules and human handoff details. Write the meaning of the rules in your own language. Save the profile. Keep private admin instructions in Founder Notes, separate from visitor-facing guidance.Save and check the public site
Save each page you changed. Clear WordPress, hosting and CDN caches, then open a private browser window. Check a page where the widget is allowed, on desktop and mobile. Open the chat and ask a simple question about a published product or service. If the answer is incomplete, check indexing and your business rules.
Before you continue
A visitor in a private browser window can see the launcher, open it and receive a useful reply.
Create a bot. Then tell Niwa who owns it.
Step 4. The bot token connects Telegram. Your numeric Chat ID grants access to the admin agent. You need both.
Telegram → @BotFather, then WordPress → Niwa AI → Personal Assistant → Setup & Access
Open the official BotFather
Open @BotFather in Telegram and tap Start. Send/newbot. Enter a display name, then a unique username ending inbot, for exampleYourShopNiwaBot. The display name can be friendly; the username follows Telegram’s character rules.Copy the bot token to Niwa
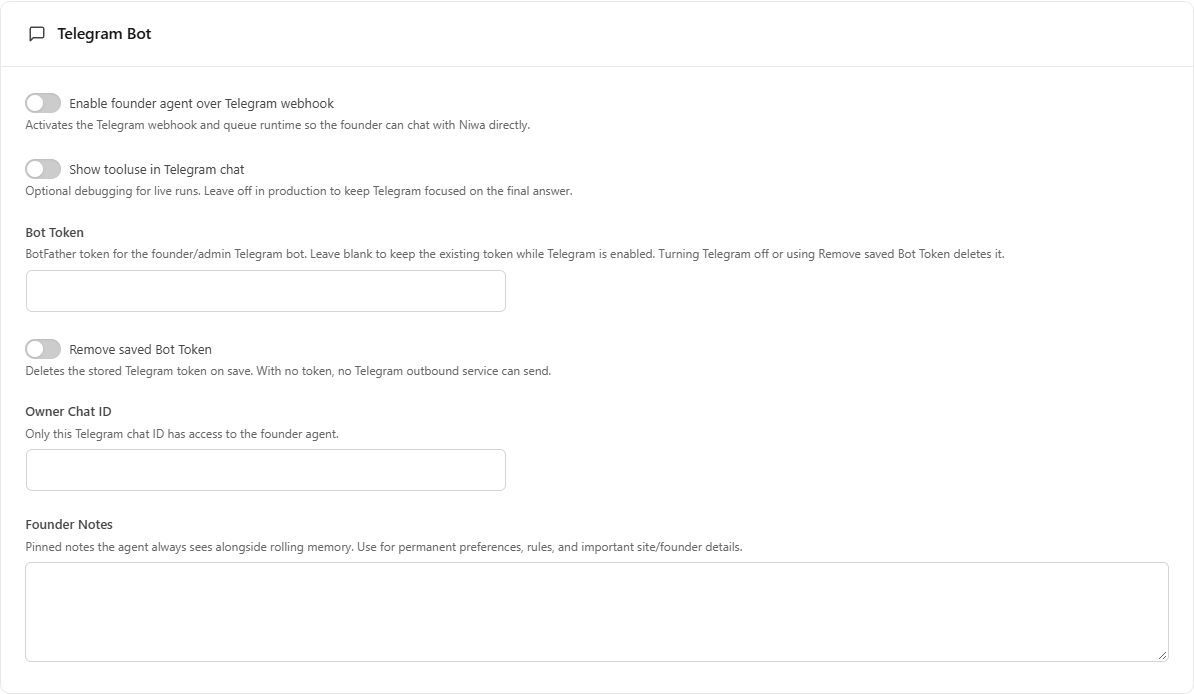
BotFather returns a token and a link to your new bot. Keep the token private. In Personal Assistant → Setup & Access → Telegram Bot, turn on Enable founder agent over Telegram webhook and paste the token into Bot Token. Choose your Founder Connection Mode and Founder Model. Click Save Personal Assistant Settings.Get your own numeric Chat ID
In Niwa, enable Auto-reply to unauthorized users with their Telegram ID and save. Open the link to your new bot from BotFather, press Start and send it a message. Before you are authorized, its introduction can return your numeric Chat ID. You can also read Recent unauthorized users in Niwa. Copy your own ID, not another visitor’s.Assign the owner and save again
Paste that number into Owner Chat ID and click Save Personal Assistant Settings. A username such as@yournameor a phone number is not a Chat ID. For a colleague who should only manage products, use + Add Stock Manager, enter their numeric Chat ID and a label, then save.Test a harmless request and check Runtime
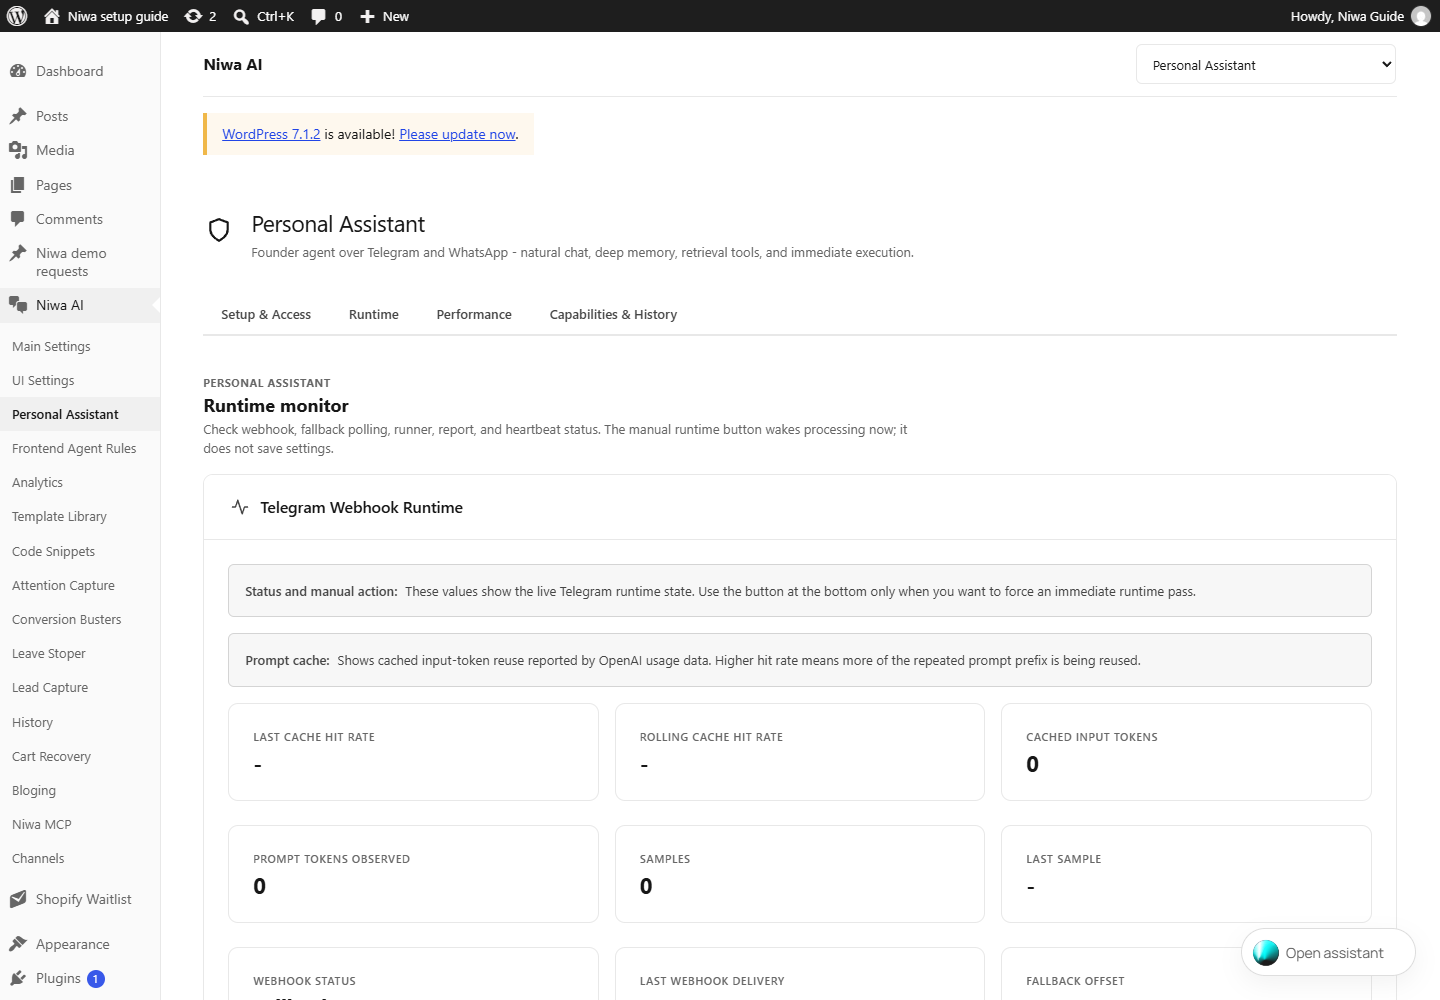
Send a read-only request such as “Tell me the title of my website.” Check that your bot replies. In Personal Assistant → Runtime, inspect webhook status, last delivery and the last error. Normal messages arrive through the webhook; fallback polling is used when the webhook is unhealthy. The site must be publicly reachable over HTTPS.Add your working preferences
Use Founder Notes for permanent instructions. Configure daily reports and heartbeat only if you want proactive activity. The avatar has a separate save action; the main Save Personal Assistant Settings button saves Telegram, access, mail and reporting settings together.
Before you continue
Your own Telegram account receives a reply from Niwa, and only intended users appear in the owner or stock-manager access lists.
Scan in WhatsApp. Set access in Niwa.
Step 5. WhatsApp pairing and permission to use the admin agent are separate. First connect the account, then decide which senders can do what.
WordPress → Niwa AI → Personal Assistant → Setup & Access → WhatsApp Web
Enable WhatsApp and add permitted senders
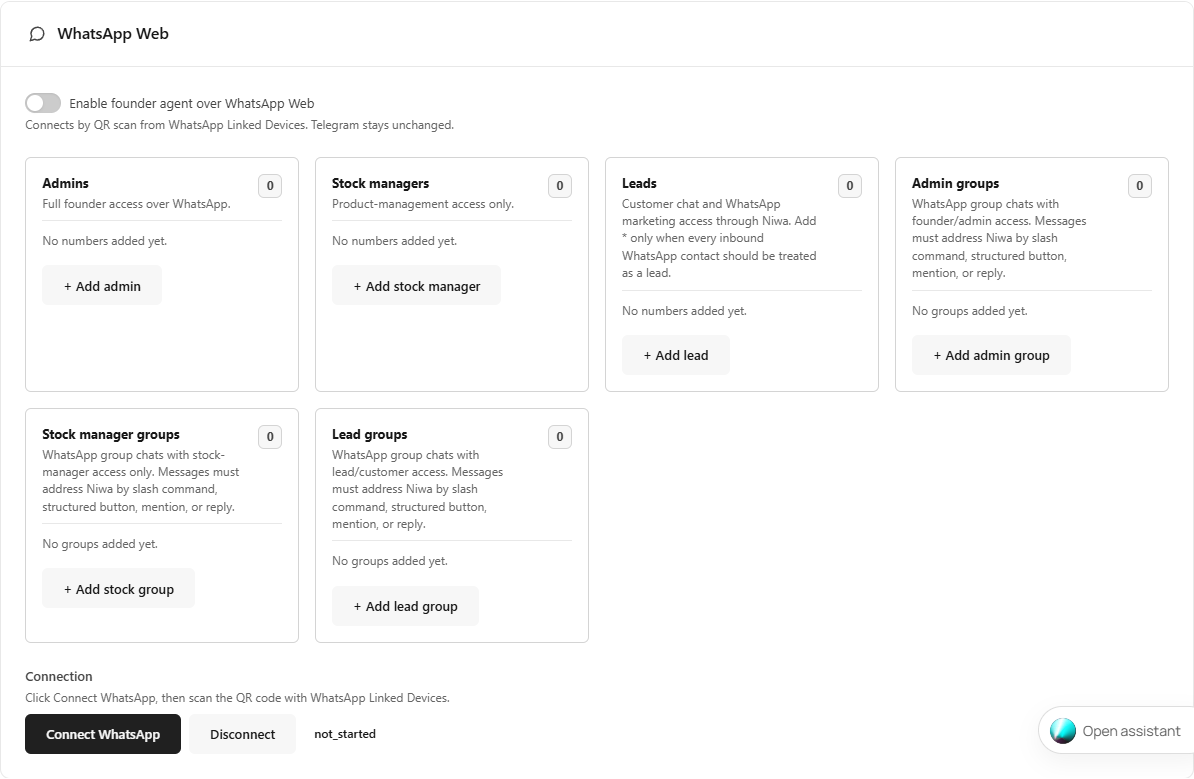
Turn on Enable founder agent over WhatsApp Web. Use + Add admin for full founder access, + Add stock manager for product management, or + Add lead for customer chat. Enter the sender’s number with country code and a useful label, then save. The number you pair is the receiving WhatsApp account; sender access still comes from these lists.Generate the QR code in WordPress
Under Connection, click Connect WhatsApp. Keep this screen open while the gateway starts. The pairing QR appears in this panel when the runtime is ready. If the page shows a hosting capability error, resolve the exact requirement shown before retrying.Open the Linked devices scanner on your phone
On the phone that owns the WhatsApp account, open WhatsApp. On Android, use the three-dot menu → Linked devices → Link a device. On iPhone, use Settings → Linked Devices → Link a Device. Confirm the phone’s unlock request if prompted.Scan the code shown by your own Niwa installation
Point the WhatsApp scanner at the QR code on the WordPress screen. Do not use the regular camera app and do not scan a screenshot from this guide. Wait for the Niwa connection status to update. If the QR expires, request a fresh code with Connect WhatsApp.Test from an allowed sender
Send a simple read-only request to the paired number from a sender listed under Admins. Verify the response and the assigned role. Group chats use separate Admin groups, Stock manager groups and Lead groups lists. Add the group JID, not its display name, and address Niwa by the supported mention, reply, slash command or structured button.Know how to disconnect
Disconnect stops the Niwa connection. You can also remove the linked device from WhatsApp on your phone. If you reconnect later, check the saved access lists again before using the agent.
Before you continue
The account is connected, an allowed sender receives a reply, and the sender has the intended role.
A few checks before you invite customers.
Step 6. Test each channel in the role it will actually use. A working admin conversation does not prove the storefront is ready.
Public website + Personal Assistant + Main Settings + Lead Capture
Check the customer conversation
Open a private browser window. Confirm the widget appears on intended pages and stays hidden where you configured it. Ask about a real product, a delivery policy and a service. Repeat on a phone-sized screen. Review the conversation in History.Check the knowledge and model connection
In Main Settings, verify the selected connection, saved Chat Model and indexing progress. Confirm the Personal Assistant uses the intended Founder Connection Mode. A configured API key needs usable API credit; OAuth needs an eligible account and available usage.Check roles without changing store data
From the owner account, ask for a read-only site summary. Verify staff use Stock Managers rather than the owner ID. For WhatsApp, review both number and group lists. Keep lead/customer access separate from administration.Check mail, forms and appointments if you use them
In Lead Capture, inspect notification recipients and form destinations. Use a test contact you control. For Scheduler, define services, team members, working hours and timezone before offering slots. Complete the Google connection and data consent only if you want Google Calendar sync. Local booking remains a separate feature.Enable optional sales modules intentionally
Review Attention Capture, Conversion Busters, Leave Stoper and Cart Recovery before enabling them. Check coupon amounts, expiry, usage limits and reminder timing. A recovery tick may send real messages. Turn off test modes before inviting customers.
Before you continue
The public chat, chosen admin channels and any enabled forms or booking flows have each passed their own test.
Know what each setting does.
Explore the complete workspace: open a screen below for its controls, save actions and practical notes. Labels match the English plugin interface; your WordPress language may translate them.
Images show the real plugin in a clean local documentation installation. Connections are intentionally unconfigured. No private keys, customer conversations or working pairing codes are shown.
Watch the plugin screen tour
A silent walkthrough of the plugin screens. The chapters and control descriptions below are its text companion.
Licence & Account6 controls
WordPress → Niwa AI → activation screen / Account
The screenshot shows the initial licence screen. After activation, Account displays the site and licence details supplied by Freemius; available account actions depend on your plan and account state.
- Licence key / Activate License
- Enter the complete key supplied in your licence email and start activation. Complete the separate email confirmation if the screen requests it.
- Can’t find your license key? / License issues?
- Opens the licence recovery or activation-help flow. Use the email address associated with the licence.
- Re-send activation email
- Appears when confirmation is pending. Check the named inbox and its Spam or Junk folder, then use the newest activation email.
- View License Essentials / Plugin State / optional diagnostic details
- Expands the explanation of information shared for licensing and updates. Review optional diagnostic or plugin-list sharing separately.
- Account / licence status / expiry / connected site
- Review the licence attached to this installation and the status shown for your plan. Resolve expired licences or activation limits before expecting the settings to work.
- Account licence-management actions
- Freemius may show activation, deactivation, plan or billing actions for your account. Read the exact confirmation before changing them; deactivation or plan changes can affect this site’s access.
Main Settings16 controls
WordPress → Niwa AI → Main Settings
Authentication, model selection and the site knowledge index. Save authentication first, reload, then choose the models available to that connection.
- Connection Mode
- Select whether Niwa uses an OpenAI API key, Codex OAuth, or OpenRouter. Models and runtime routing adapt automatically.
- OpenAI API Key
- Paste the secret key from your OpenAI Platform project. Used for chat in API Key mode and for supported direct OpenAI features. Save Auth Settings after changing it.
- OpenRouter API Key
- Paste the key from your OpenRouter account, choose OpenRouter API as the connection mode and Save Auth Settings. OpenAI-specific services can still use their separate OpenAI credential.
- Connect Codex OAuth
- Starts a one-time OpenAI device-code login. Open the verification page, approve your own code and return here for Connected status.
- Save Auth Settings
- Saves the active connection mode and API credentials. Reload before selecting models.
- Chat Model
- This group contains the customer-chat Model and Reasoning selectors. It is separate from the Personal Assistant’s Founder Model.
- Model
- Chooses the model used for customer conversations. Save authentication and reload first to see models available to your active connection, then Save General Settings.
- Reasoning
- Selects the model’s supported reasoning effort. Higher effort can take longer and use more of your allowance. Available levels depend on the selected model; save the containing settings form.
- Frontend stage timing Measure response stages during troubleshooting
- Stores one timing trace per frontend request ID. Turn this off when troubleshooting is complete.
- Save General Settings
- Saves the chat model and general diagnostic settings. It does not save authentication fields.
- Run Full Index + Embeddings
- Starts a full rebuild of the searchable site knowledge and embeddings. Follow Indexed, Embedded and Pending counters; keep an eye on service errors.
- Test Query
- Enter a question to inspect retrieval with RLM Demo. Run Demo submits the test and can use the configured model service.
- Run Demo
- Enter a question to inspect retrieval with RLM Demo. Run Demo submits the test and can use the configured model service.
- Connected / Standby / Active
- Connected describes the OAuth login. Active means that connection mode is selected. A saved connection can be in Standby while another mode is used.
- Reconnect / Restart / Open Verification / Disconnect
- Reconnect renews saved OAuth access. Restart replaces an expired or unfinished code. Open Verification opens OpenAI’s approval page. Disconnect removes Niwa’s saved OAuth connection.
- Indexed / Embedded / Pending
- Indexed counts searchable content records, Embedded counts available vectors and Pending shows remaining embedding work. These are progress indicators, not switches.
UI Settings45 controls
WordPress → Niwa AI → UI Settings
The visitor-facing widget. Open the expandable Centerstage, Desktop, Tablet, Mobile and Product Cards sections to see their controls. Save UI Settings after editing.
- UI Language
- Selects the language of the widget interface and built-in UI messages.
- Greeting Text
- Customize the initial greeting message. HTML allowed.
- Chat Theme
- Chooses the chat color treatment. Auto follows the visitor’s system preference.
- Enable flyout chat
- Enables the public floating chat. Turn it on and save for Niwa to appear on allowed pages.
- Hide Niwa on blog pages
- Hides the whole Niwa widget on posts, blog index, category, tag, date, and author archive pages.
- Hide Niwa on custom pages
- Uses the same custom page matching style as Attention Capture, but hides the whole Niwa chat widget.
- Chathead Image
- Changes the frontend assistant image shown in the floating pill and chat messages.
- Launcher Style
- Use the full pill with text, or a compact dot that shows only the glowing orb. Centerstage mode is unchanged.
- Custom Pill Text
- Controls the text shown on the floating frontend pill. Leave empty to keep the current language-based default.
- Pill Text Color
- Overrides the floating pill text color independently from the active theme. When default settings are enabled below, the theme colors are used instead.
- Use Default Settings
- When enabled, the floating frontend pill uses the built-in translated text and theme-based text color.
- Enable Centerstage Mode
- Turns on the bottom-center centerstage mode. Leave it off to use the left/right corner launcher positions configured per device below.
- Pill Text
- The label inside the Centerstage pill. Keep it short enough for mobile.
- Desktop · Responsive Pill Dimensions
- Set separate centerstage pill sizes for desktop, tablet, and phone.
- Tablet · Responsive Pill Dimensions
- Set separate centerstage pill sizes for desktop, tablet, and phone.
- Mobile · Responsive Pill Dimensions
- Set separate centerstage pill sizes for desktop, tablet, and phone.
- Desktop · Responsive Expanded Morph Dimensions
- Set the opened Centerstage size for desktop and wider tablets. Centerstage remains fullscreen at the mobile breakpoint.
- Tablet · Responsive Expanded Morph Dimensions
- Set the opened Centerstage size for desktop and wider tablets. Centerstage remains fullscreen at the mobile breakpoint.
- Centerstage pill text color
- Sets the Centerstage text or arrow color shown beside the field. Maintain readable contrast.
- Centerstage arrow color
- Sets the Centerstage text or arrow color shown beside the field. Maintain readable contrast.
- Desktop · Position
- Chooses the launcher’s placement for this device size.
- Desktop · Position Offsets
- Sets horizontal and vertical spacing from the chosen corner. X is horizontal and Y is vertical.
- Desktop · Launcher Pill Size
- Sets the launcher width and height for this device size. Check the result at that viewport.
- Desktop · Expanded Chat Size
- Set the expanded chat window size in pixels.
- Tablet · Position
- Chooses the launcher’s placement for this device size.
- Tablet · Position Offsets
- Sets horizontal and vertical spacing from the chosen corner. X is horizontal and Y is vertical.
- Tablet · Launcher Pill Size
- Sets the launcher width and height for this device size. Check the result at that viewport.
- Tablet · Expanded Chat Size
- Set the expanded chat window size in pixels.
- Mobile · Position
- Chooses the launcher’s placement for this device size.
- Mobile · Position Offsets
- Sets horizontal and vertical spacing from the chosen corner. X is horizontal and Y is vertical.
- Mobile · Launcher Pill Size
- Sets the launcher width and height for this device size. Check the result at that viewport.
- Mobile · Expanded Chat Size
- Set the non-fullscreen size relative to the visible mobile viewport. Default: 95vw x 95dvh.
- Mobile · Fullscreen on mobile
- When enabled, chat uses the complete mobile viewport. When disabled, the vw and dvh values above are used and the remaining space is split evenly around the chat.
- Delivery Days
- Number of days shown when footer mode is set to Delivery.
- Catalog mode - show View Details only
- Use this when the WooCommerce site is a product catalog, not a shop. Product cards will link to product detail pages instead of showing Buy Now or Add to Cart actions.
- Footer Info Mode
- Choose what is shown on the left side of the product card footer: delivery info, score/reviews, or nothing.
- Banner Content Mode
- Choose whether the top banner shows custom text, WooCommerce sale percentage, or the exact amount off for each product.
- Custom Banner Text
- Used when Banner Content Mode is set to Text. This is a custom free-text value, so clients can enter it directly in their own language.
- Banner Background
- Controls the color and opacity of the top banner background on product cards.
- Save UI Settings
- Saves widget language, appearance, visibility, Centerstage and responsive layout settings.
- Choose Image / Remove
- Choose Image opens the WordPress Media Library for the chathead. Clear the custom selection with the available reset action to use the default avatar.
- + Add custom page
- Creates a visibility rule. Enable the row, choose its URL match type and enter the page URL or path. Remove deletes the rule from the form; Save UI Settings commits the change.
- Desktop / Tablet / Mobile size fields
- Width and Height set the launcher or expanded chat dimensions under the named device section. Mobile viewport values use vw and dvh. Fullscreen uses the entire mobile viewport.
- Expandable sections
- Click Centerstage Pill, Desktop Positioning, Tablet Positioning, Mobile Positioning or Product Cards to open that group. Expanding a group does not enable it or save it.
- Enable this custom page / Page address / Match type
- Enable activates this exclusion row. Page address is the URL or path to hide. Contains matches a part of the address; Equals requires an exact address or path; Regex accepts an advanced URL pattern. Save UI Settings applies the rule.
Personal Assistant · Setup & Access51 controls
WordPress → Niwa AI → Personal Assistant → Setup & Access
The private admin agent, Telegram, WhatsApp, email and staff access. The chathead image has its own save button. The main save button stores the other setup fields together.
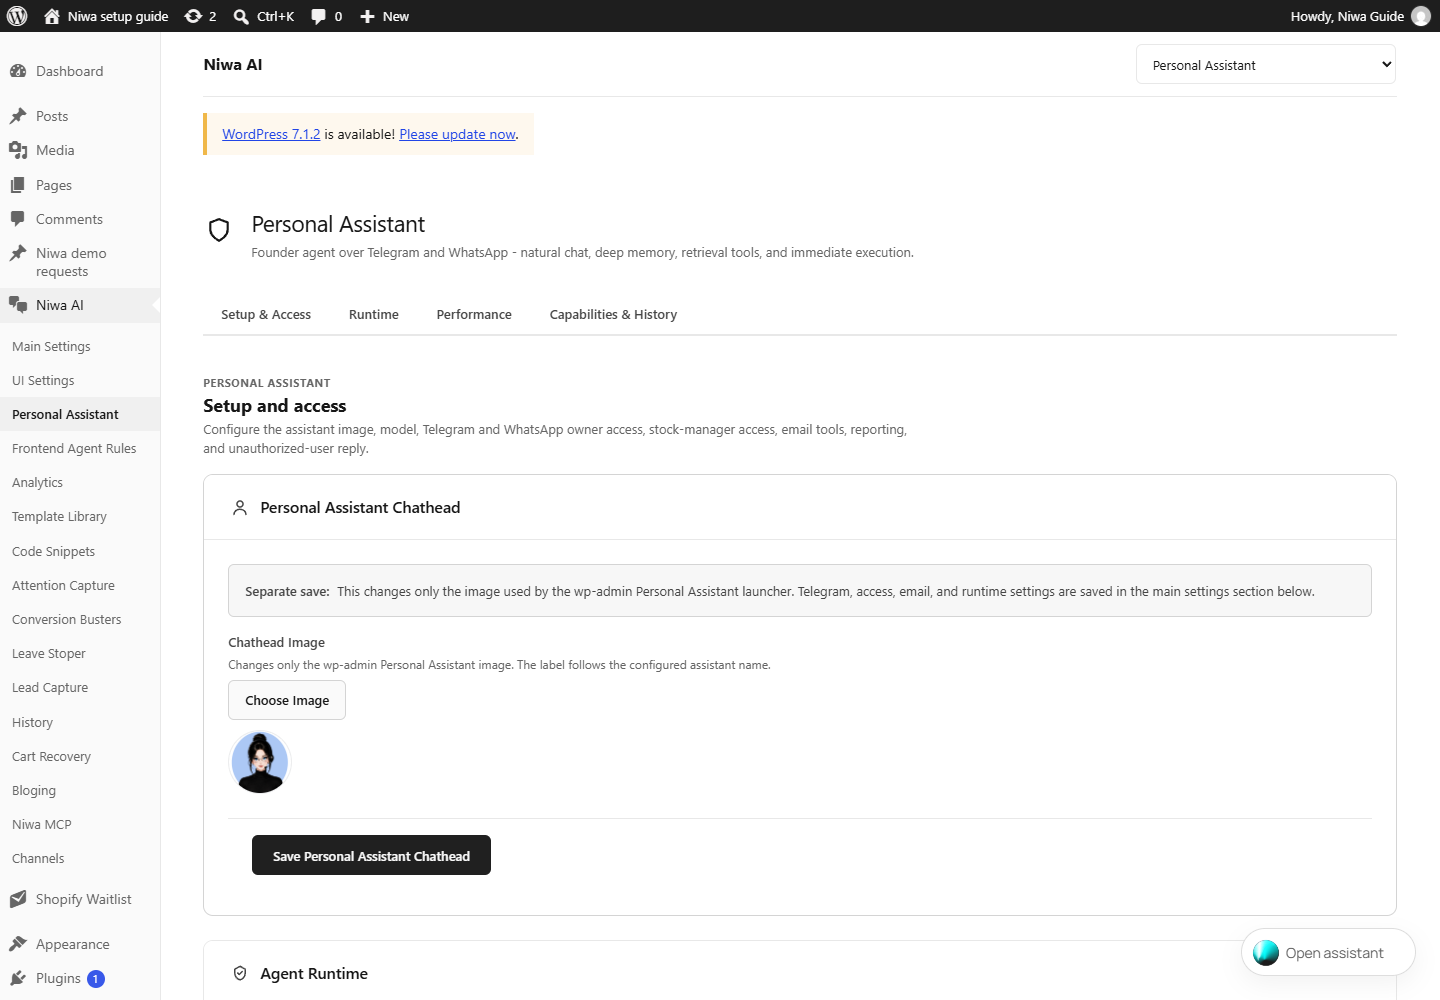
- Chathead Image
- Changes only the wp-admin Personal Assistant image. The label follows the configured assistant name.
- Save Personal Assistant Chathead
- Saves only the private wp-admin assistant image. It does not save the main setup form.
- Founder Connection Mode
- Uses the global OpenAI, Codex OAuth, and OpenRouter credentials; choose which connection the founder agent should run through.
- Founder Model
- Only chat-capable models are shown here. GPT-4 and GPT-4o variants are intentionally hidden for Personal Assistant.
- Model
- Chooses the model used by the private Personal Assistant. Availability follows Founder Connection Mode and the connected account. Save Personal Assistant Settings after changing it.
- Reasoning
- Selects the model’s supported reasoning effort. Higher effort can take longer and use more of your allowance. Available levels depend on the selected model; save the containing settings form.
- Image Generation Quality
- Default quality for generated images created by the Personal Assistant through Codex OAuth / GPT Image 2.
- WP Admin Chat Display
- Choose where the floating Personal Assistant chat appears inside WordPress admin.
- Enable founder agent over Telegram webhook
- Activates the Telegram webhook and queue runtime so the founder can chat with Niwa directly.
- Show tooluse in Telegram chat
- Optional debugging for live runs. Leave off in production to keep Telegram focused on the final answer.
- Bot Token
- BotFather token for the founder/admin Telegram bot. Leave blank to keep the existing token while Telegram is enabled. Turning Telegram off or using Remove saved Bot Token deletes it.
- Remove saved Bot Token
- Deletes the stored Telegram token on save. With no token, no Telegram outbound service can send.
- Owner Chat ID
- Only this Telegram chat ID has access to the founder agent.
- Founder Notes
- Pinned notes the agent always sees alongside rolling memory. Use for permanent preferences, rules, and important site/founder details.
- Enable founder agent over WhatsApp Web
- Connects by QR scan from WhatsApp Linked Devices. Telegram stays unchanged.
- + Add admin
- Adds a WhatsApp sender row with full founder access. Enter the number with country code and a label, then save.
- + Add stock manager
- Adds a WhatsApp sender with product-management access only. Enter their number and label, then save.
- + Add lead
- Adds a WhatsApp sender for customer chat. The wildcard * includes all inbound contacts as leads; use it deliberately.
- + Add admin group
- Adds a WhatsApp group JID with founder/admin access. This is separate from individual sender numbers.
- + Add stock group
- Adds a WhatsApp group JID limited to product-management work.
- + Add lead group
- Adds a WhatsApp group JID for customer/lead conversations.
- Connection
- Shows the WhatsApp gateway and pairing state. Connect WhatsApp requests a QR code; scan it using WhatsApp Linked Devices on the phone that owns this account.
- Webhook Fallback Poll Parameters
- Only used when the Telegram webhook is unhealthy or unavailable. Controls how long one fallback getUpdates request waits and how many updates it can fetch.
- Rate Limiting
- Maximum founder messages per window and the window duration in seconds.
- Enable morning report
- Send a founder briefing every morning when there are meaningful positive changes. Uses WooCommerce, Niwa analytics, and external providers hooked into niwa_ai_admin_autonomy_external_metrics.
- Report Time
- Time is in the WordPress timezone.
- Enable proactive heartbeat
- Runs the built-in proactive workspace check once daily at 14:00 by default, plus due runtime maintenance on background ticks.
- Enable outbound email
- Allow Niwa to send email. When Niwa SMTP is enabled below, outbound mail does not require a separate SMTP plugin.
- From Name
- Optional sender name. Leave blank to use existing WordPress/SMTP setting.
- From Email
- Optional sender address. Leave blank to use the active mail transport.
- Known Recipients
- One contact per line. Example: bookkeeper | books@example.com or admin@example.com
- Enable Niwa SMTP sending
- Niwa will configure PHPMailer only for its own email sends. If SMTP username/password are blank, Niwa uses the IMAP username/password below as fallback.
- SMTP Host
- The outgoing mail server supplied by your email provider, for example smtp.example.com.
- SMTP Connection
- Enter the provider’s outgoing-mail port and encryption. Use its documented combination; do not guess from the domain name.
- SMTP Username
- Leave blank to use the IMAP username.
- SMTP Password
- Leave blank to keep the existing SMTP password; if no SMTP password is stored, Niwa uses the IMAP password.
- Enable IMAP inbox read
- Allows the Personal Assistant to read this mailbox through IMAP. The server must provide the PHP IMAP extension; the status on your own screen reports its availability.
- IMAP Host
- The incoming mail server supplied by your email provider, for example imap.example.com.
- IMAP Connection
- Enter the incoming-mail port and encryption required by the provider. IMAP also requires server-side PHP IMAP support.
- IMAP Username
- The mailbox login, commonly the full email address. Use the value supplied by the mail provider.
- IMAP Password
- Leave blank to keep the existing password.
- IMAP Mailbox
- Usually INBOX.
- + Add Stock Manager
- Adds a Telegram staff member. Enter their numeric Chat ID and a label. They receive product-only access, not full founder access.
- Auto-reply to unauthorized users with their Telegram ID
- Sends an introductory reply with the sender’s own Chat ID so you can authorize them. It does not itself grant access.
- Custom message template (optional)
- Available placeholders: {chat_id}, {username}, {username_raw}, {first_name}. Telegram HTML formatting is supported (<b>, <i>, <code>, etc.).
- Save Personal Assistant Settings
- Saves the main Telegram, WhatsApp, access, email and report configuration. Enabling channels may activate their runtime.
- Number / Group JID / Label / Remove
- Access-list rows identify the sender or group and its role. Number uses international country code; Group JID is the WhatsApp group identifier. Label is for your recognition. Remove takes the entry out of the form; save to revoke that row’s access.
- Connect WhatsApp
- Starts or reconnects the gateway and requests a QR pairing code when needed. Scan it in WhatsApp → Linked devices → Link a device.
- Disconnect
- Stops the WhatsApp connection. Reconnecting may require a fresh QR scan.
- Recent unauthorized users
- Shows recently seen Telegram IDs that have no access. Copy the verified person’s numeric ID to the owner or stock-manager field, then save. Do not authorize every row automatically.
- Daily report / heartbeat status
- These statuses show background attempts and results. Report time follows the WordPress timezone. Check Runtime for delivery errors rather than repeatedly enabling the switches.
Personal Assistant · Runtime1 controls
WordPress → Niwa AI → Personal Assistant → Runtime
A read-only monitor of Telegram delivery, runner activity, prompt-cache usage, reports, operative heartbeats and scheduled jobs. Read the last error before trying a manual runtime pass.
- Run Telegram Runtime Now
- Wakes the Telegram runtime immediately. It processes available work; it does not save settings.
Personal Assistant · Performance8 controls
WordPress → Niwa AI → Personal Assistant → Performance
Tune background job intervals and browser polling. Longer intervals reduce server load but delay fallback recovery or scheduled work. Saving reschedules the relevant WordPress cron events.
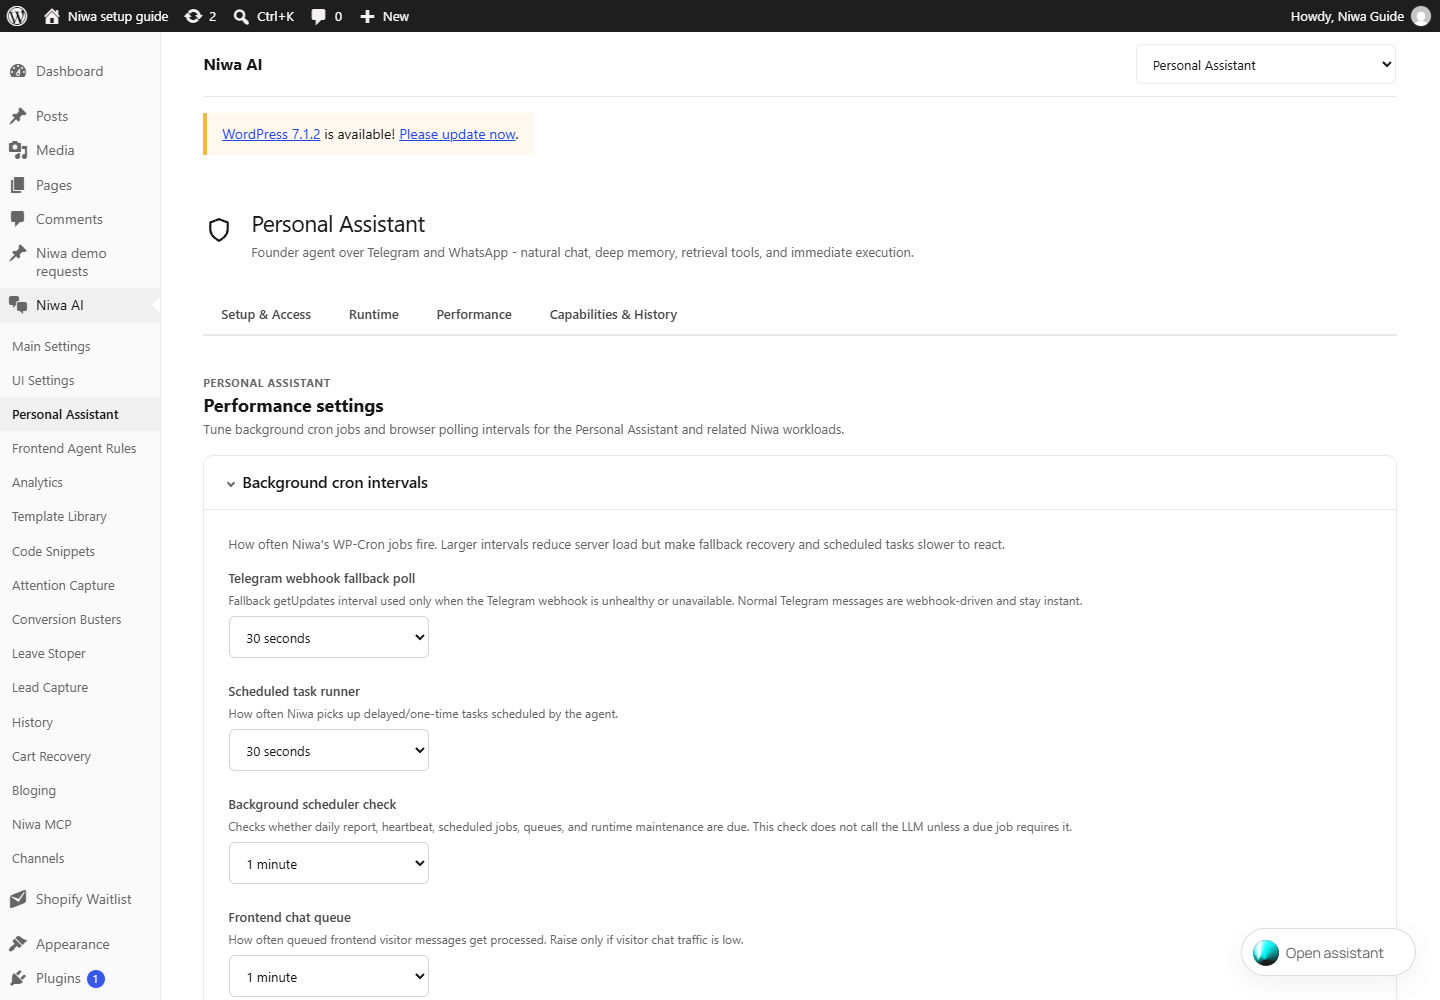
- Telegram webhook fallback poll
- Fallback getUpdates interval used only when the Telegram webhook is unhealthy or unavailable. Normal Telegram messages are webhook-driven and stay instant.
- Scheduled task runner
- How often Niwa picks up delayed/one-time tasks scheduled by the agent.
- Background scheduler check
- Checks whether daily report, heartbeat, scheduled jobs, queues, and runtime maintenance are due. This check does not call the LLM unless a due job requires it.
- Frontend chat queue
- How often queued frontend visitor messages get processed. Raise only if visitor chat traffic is low.
- Memory embeddings worker
- Builds vector embeddings for the knowledge index. Safe to run hourly on most sites.
- Admin chat history poll
- Interval between automatic history syncs in wp-admin Niwa tab while the chat is open. Default 60s.
- Embeddings status poll
- How often the embeddings progress widget refreshes. Default 5s.
- Save Performance Settings
- Saves intervals and reschedules Niwa’s WordPress background jobs.
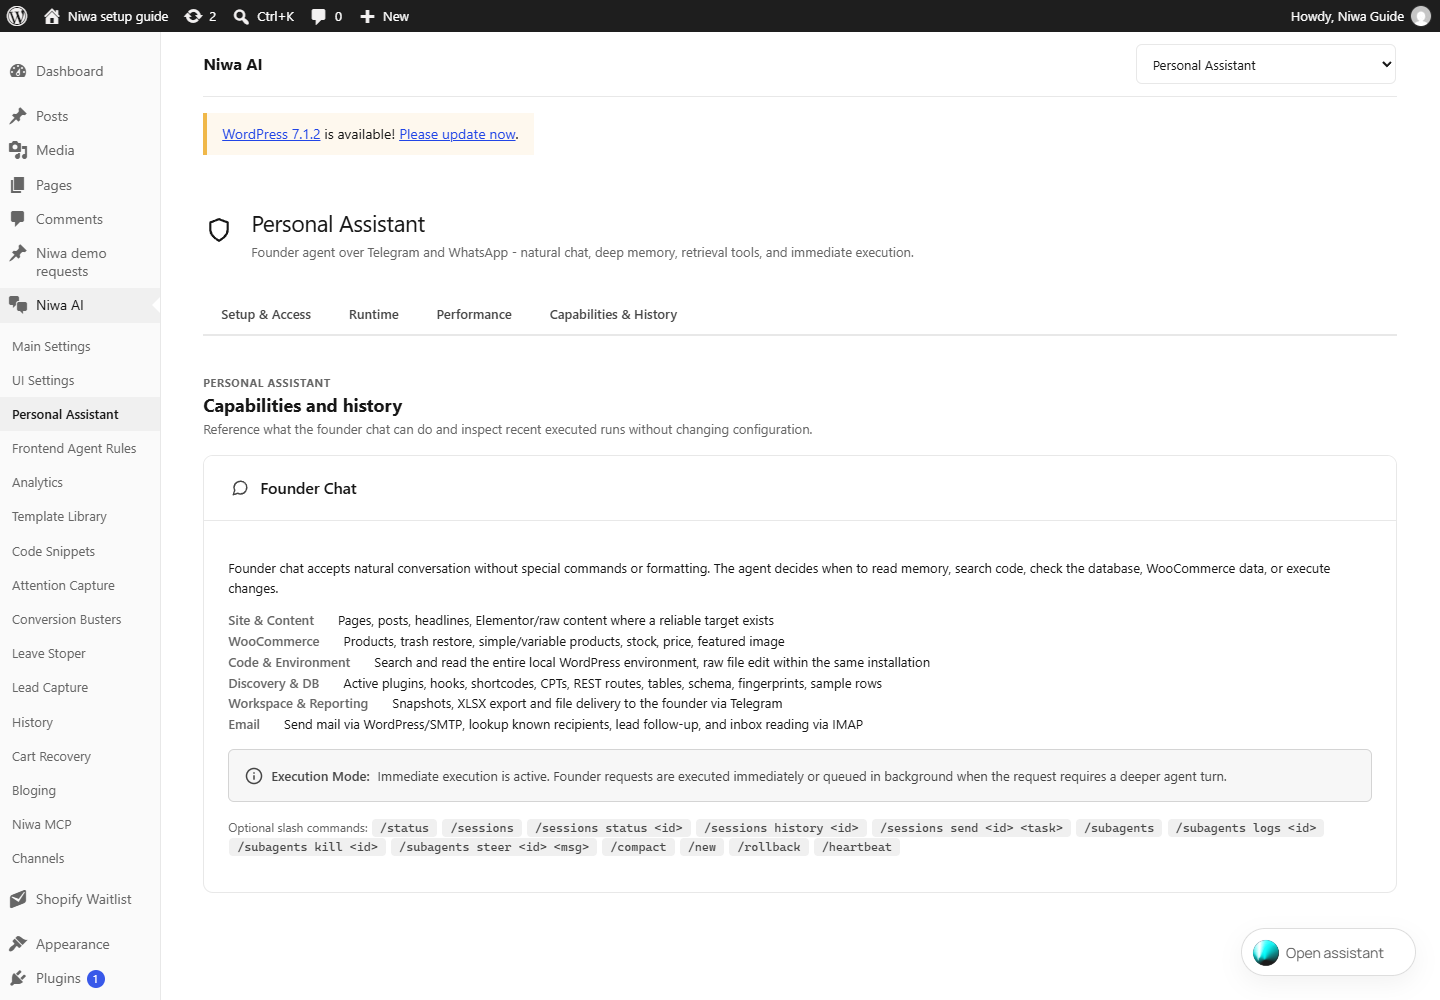
Personal Assistant · Capabilities & History0 controls
WordPress → Niwa AI → Personal Assistant → Capabilities & History
Review the tools and recent admin activity available in this installation. Capabilities depend on installed integrations and the caller’s role. Inspect a completed run to understand what Niwa changed. This screen is informational; it does not grant Telegram or WhatsApp access.
Frontend Agent Rules13 controls
WordPress → Niwa AI → Frontend Agent Rules
Business knowledge and instructions for customer conversations. These rules guide the public assistant; private admin instructions belong in Founder Notes. Save this page separately.
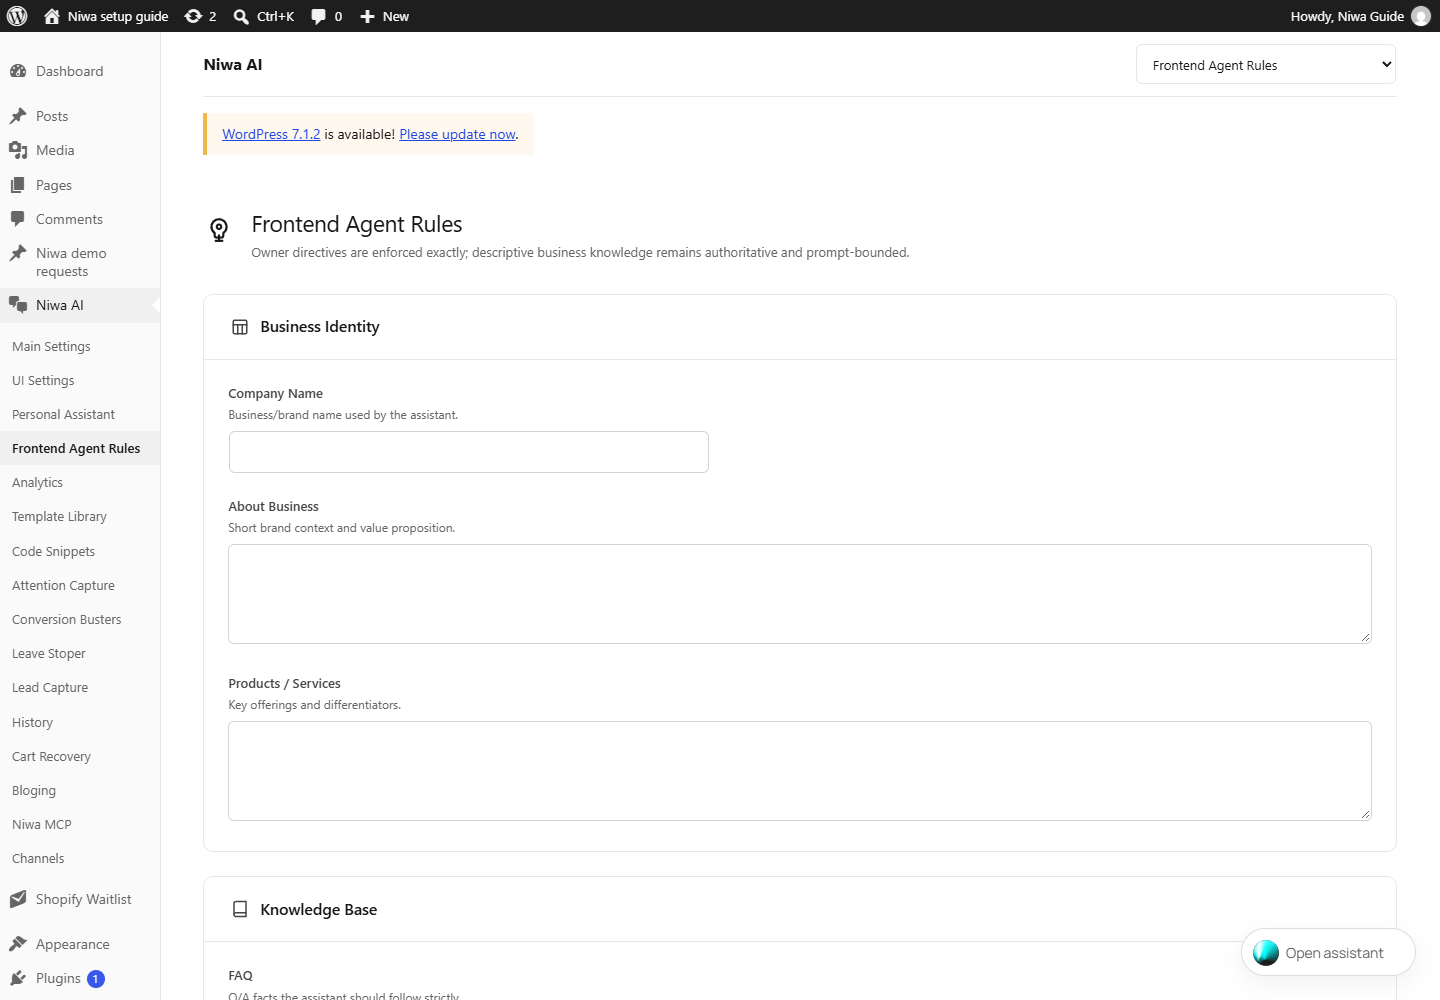
- Company Name
- Business/brand name used by the assistant.
- About Business
- Short brand context and value proposition.
- Products / Services
- Key offerings and differentiators.
- FAQ
- Q/A facts the assistant should follow strictly.
- Policies
- Shipping, returns, payment, support policy details.
- Tone / Style
- How the assistant should communicate.
- DO / DON'T Rules
- Behavior constraints and mandatory response rules.
- Coupon Rules
- When and how coupons should be offered.
- Bundle Rules
- Cross-sell / bundle strategy and limits.
- Human Handoff Rules
- Escalation conditions to human support.
- Human Support Hours
- Working hours for human support team.
- Additional Instructions
- Any extra priorities, CTAs, or business-specific notes.
- Save Frontend Agent Rules
- Saves the business profile and mandatory instructions for customer-facing conversations.
Analytics4 controls
WordPress → Niwa AI → Analytics
Review visitor activity, chat engagement, recommendations, conversion paths and influenced orders for the selected period. Influenced revenue is an attribution measure, not proof that every sale was caused by chat.
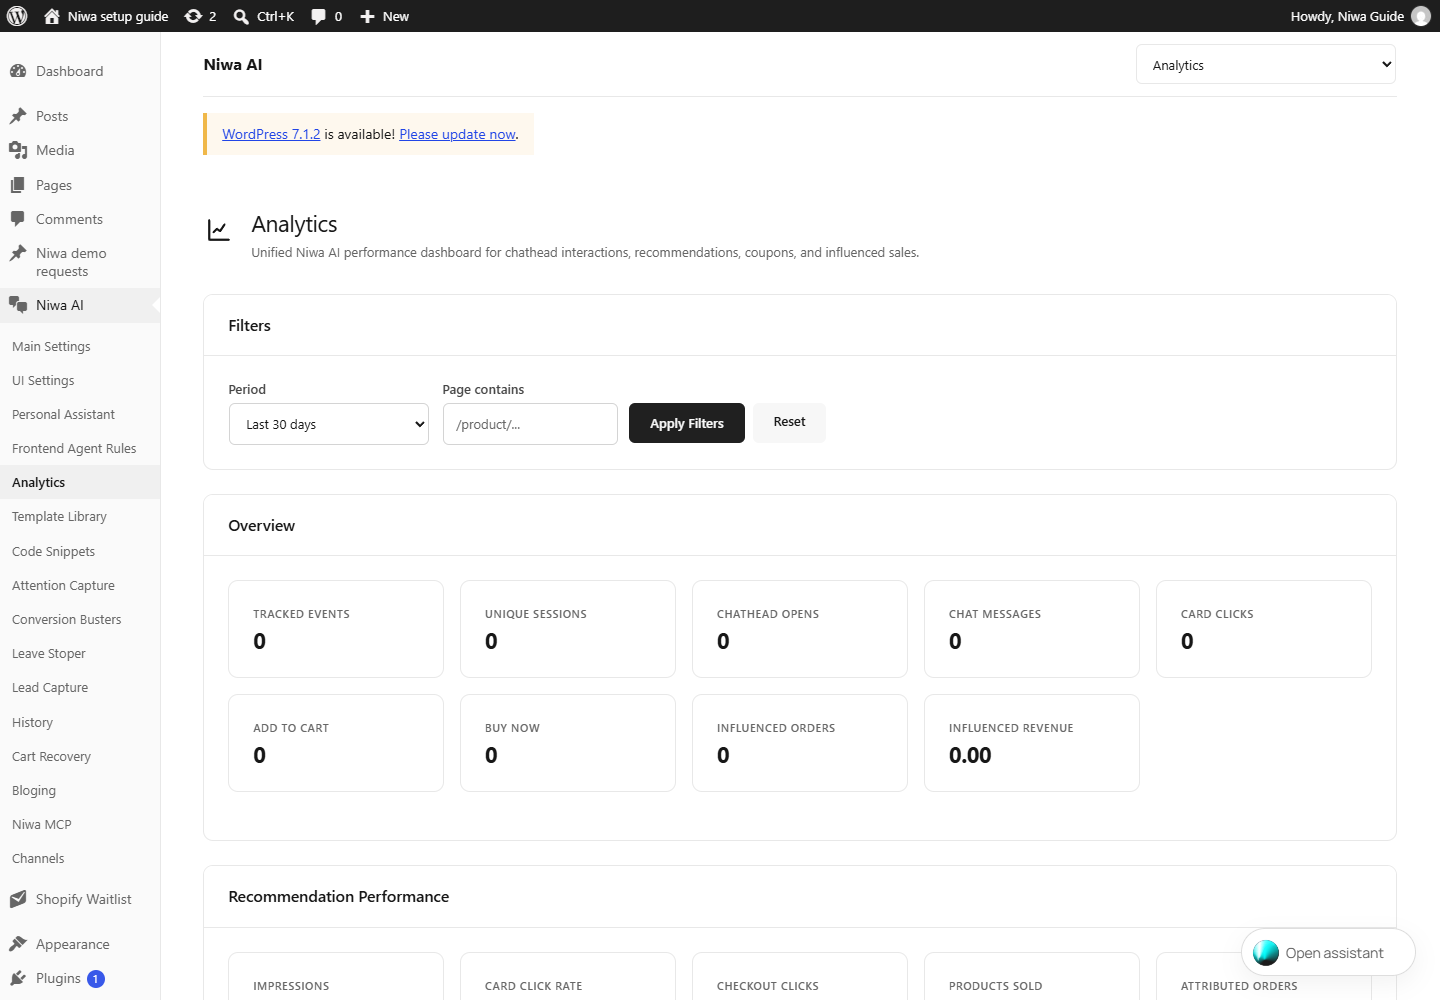
- Period
- Selects the reporting time window. Apply Filters refreshes the report with this period.
- Page contains
- Restricts analytics to page paths containing the text you enter. Leave blank for all pages.
- Apply Filters
- Applies the selected analytics time window and page filter.
- Reset
- Clears report filters and returns to the default view. It does not erase analytics records.
Template Library8 controls
WordPress → Niwa AI → Template Library
Choose a reusable prompt, adapt it to your site and open it in Niwa chat. A template card is a starting request, not an already published change.
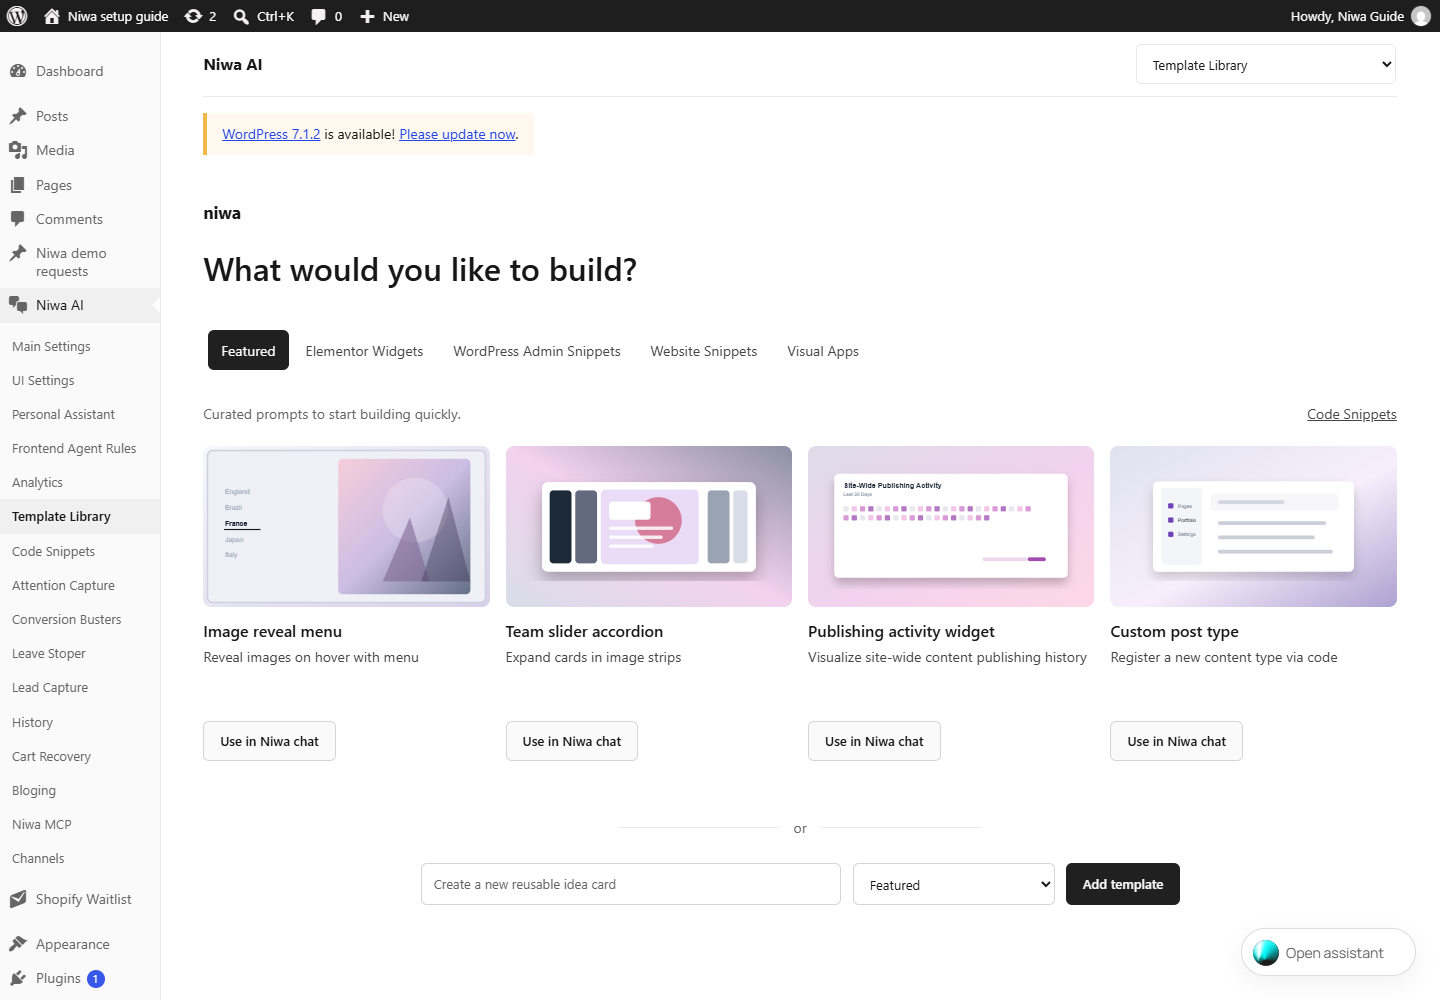
- Featured / Elementor Widgets / WordPress Admin Snippets / Website Snippets / Visual Apps
- Filters the prompt library by the type of artifact you want. Selecting a category does not install or publish anything.
- Template card
- Opens its description and starting prompt. Read the request and adapt it to the site before using it.
- Use in Niwa chat / Open in Niwa chat
- Places the selected template request into the private Niwa assistant workflow. Review the request before submitting it.
- Niwa chat template request
- Editable prompt text that describes the result to build. Include the actual page, content and constraints.
- Copy prompt
- Copies the template text for reuse. Copying does not execute it.
- Add template
- Opens the form for a reusable idea card.
- Title / Type / Prompt / Description
- Names the card, chooses its category and supplies the instructions and explanation. Save the card to make it reusable.
- Code Snippets
- Opens the generated-artifact list, where you can validate and publish the result.
Code Snippets4 controls
WordPress → Niwa AI → Code Snippets
Review the artifacts created through Niwa or Template Library. The list shows type, files, state and shortcode. Available actions depend on the artifact and its validation state.
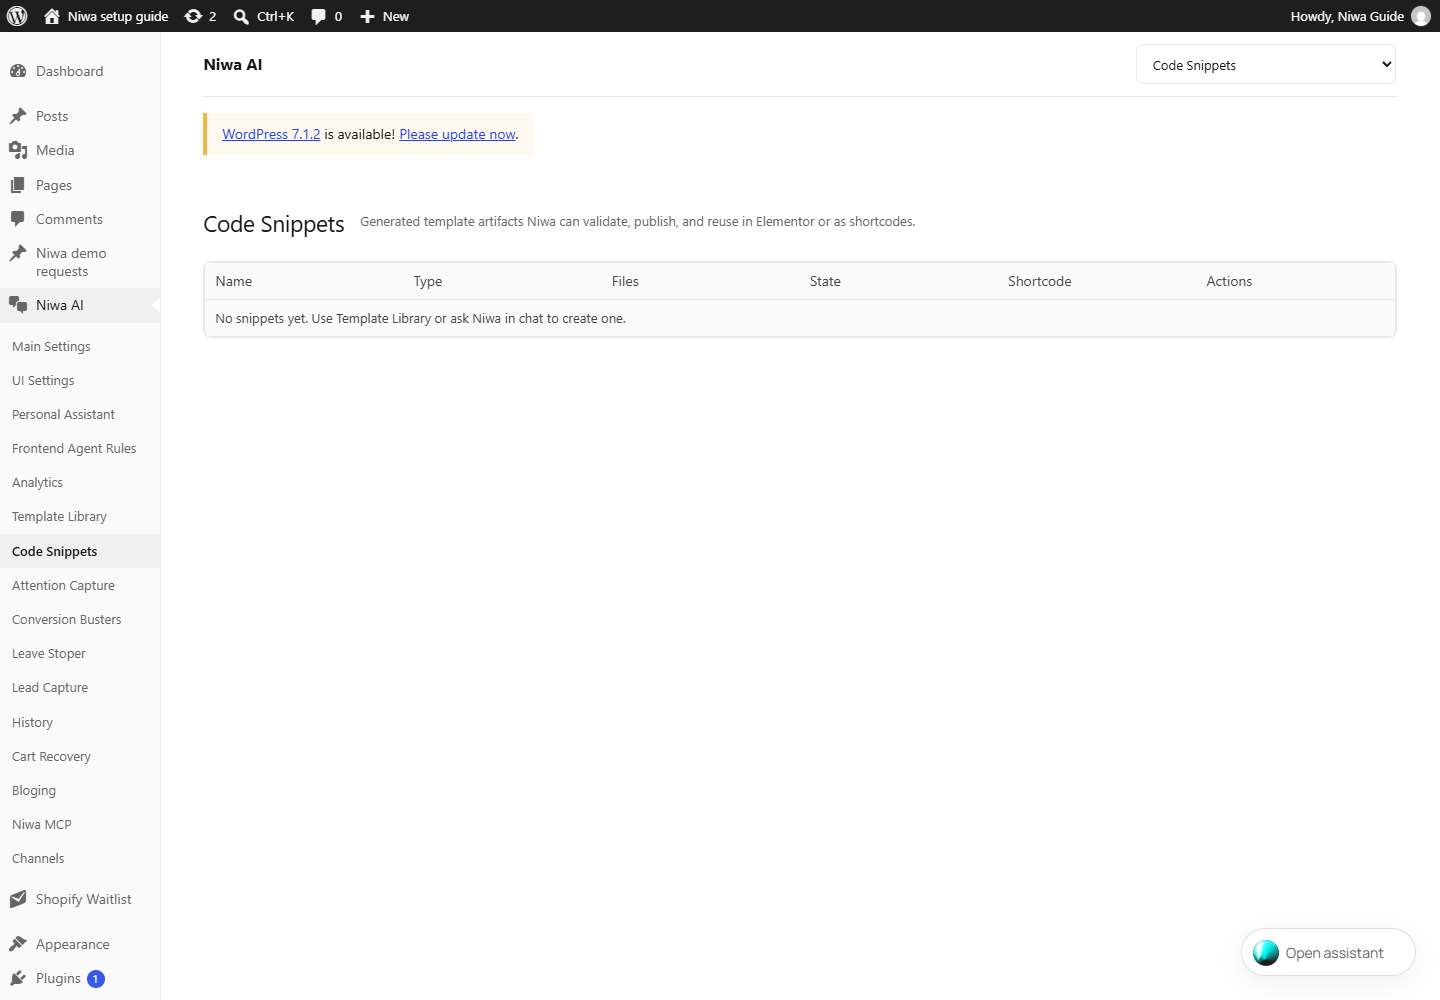
- Name / Type / Files / State
- Identifies each artifact, its format, the files it contains and its current validation or publication state.
- Shortcode
- The insertion code for a compatible published artifact. Add it to a WordPress Shortcode block where you want it to render.
- Validate
- Checks the selected generated artifact before publishing it. Read the validation result and fix reported problems.
- Publish
- Publishes the selected artifact for use on the site. Review and validate the code first. This action changes live site behavior.
Attention Capture44 controls
WordPress → Niwa AI → Attention Capture
Configure welcome bubbles, inactivity nudges, product-page prompts and checkout messages. Ignore Pages hides these prompts on matching pages. The main chat has its own visibility settings.
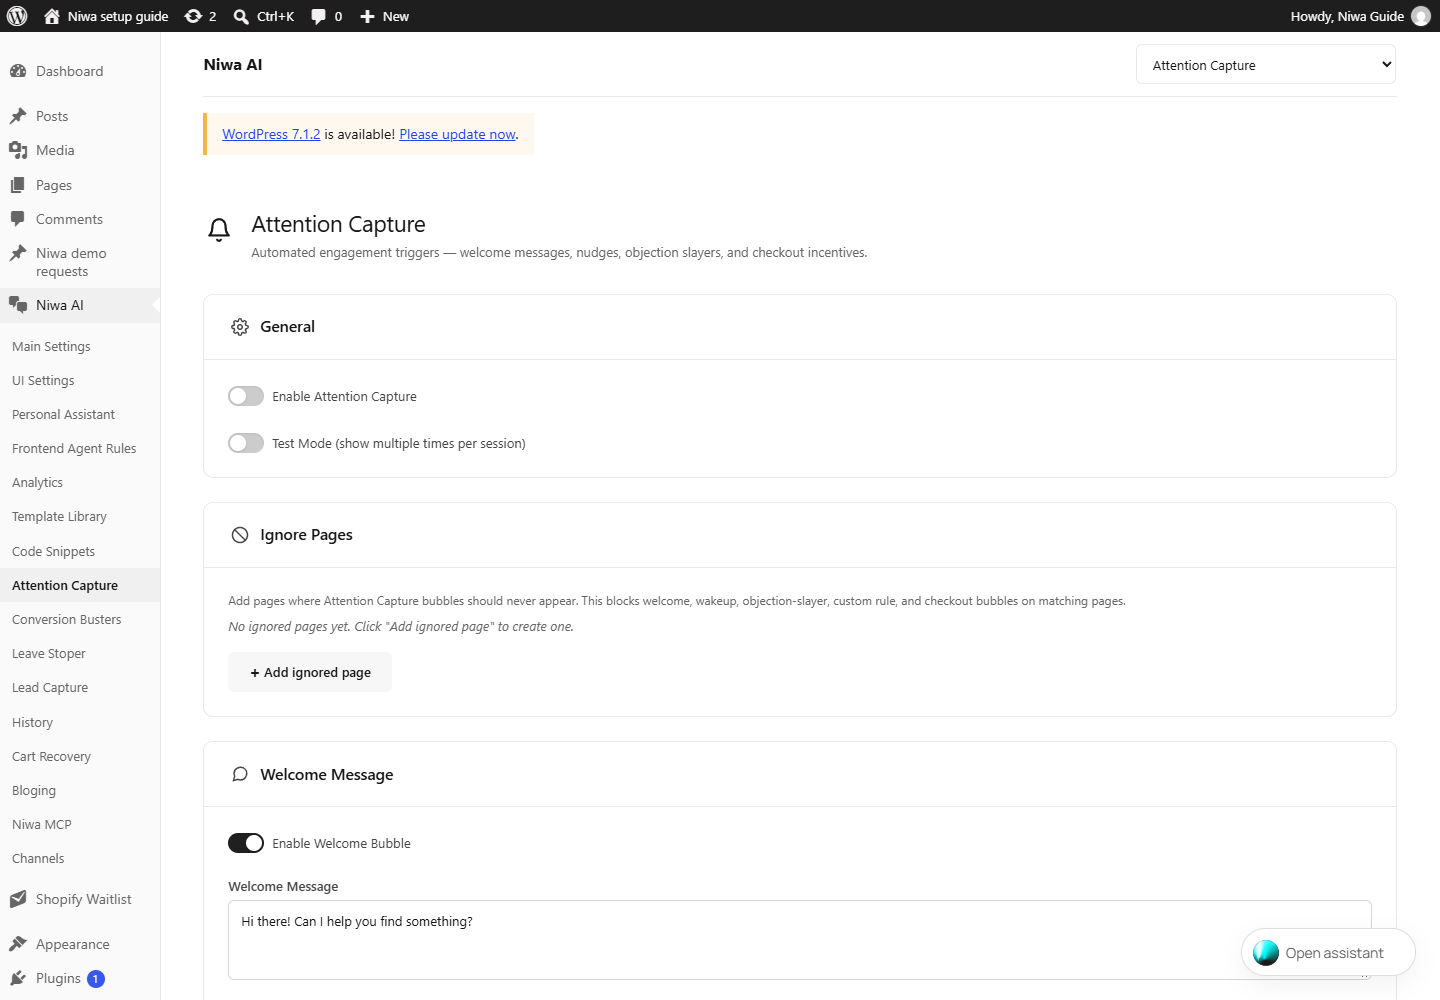
- Enable Attention Capture
- Master switch for this page’s proactive website prompts.
- Test Mode (show multiple times per session)
- Allows repeated prompt display during testing. Turn it off for ordinary visitors.
- + Add ignored page
- Add pages where Attention Capture bubbles should never appear. This blocks welcome, wakeup, objection-slayer, custom rule, and checkout bubbles on matching pages.
- Enable Welcome Bubble
- Allows the configured welcome message to appear to visitors.
- Welcome Message
- The visitor-facing welcome bubble text. Write a useful invitation relevant to your site.
- Enable Wakeup Nudge
- Allows a follow-up message after the configured period of visitor inactivity.
- Inactivity Timeout (seconds)
- Number of idle seconds before the wakeup nudge becomes eligible.
- Wakeup Message
- The text shown after the inactivity timeout.
- Enable Objection Slayers
- Master switch for the OS1, OS2 and OS3 prompt groups configured below.
- Enable OS1
- Enables the product-page nudge. Expand its section to set timing and message.
- AI-led message for each product
- Niwa reads the current WooCommerce product, its attributes and available options, then addresses the most likely purchase concern in the frontend language selected in UI Settings.
- Delay (seconds)
- How long this specific prompt waits before becoming eligible. Each expanded section has its own delay.
- Manual / fallback message
- Shown as written when AI mode is off, or if a product-specific AI message cannot be generated.
- Enable OS2
- Enables the scarcity-appeal message. Describe only real stock or time constraints.
- Message
- Visitor-facing text for this prompt. Keep any stock, delivery or offer claims accurate.
- Enable OS3
- A bubble that offers a discount code. When the visitor confirms in chat, Niwa generates a WooCommerce coupon using the settings below. Requires WooCommerce.
- Offer message
- The bubble text that offers the discount, e.g. "Want a discount code for this order?". You can use {product}.
- Clarify message (when the reply is unclear)
- If the visitor answers something that is not a clear yes/no, Niwa sends this nudge to ask them to confirm. Leave empty to use the built-in default.
- Discount type
- Choose a percentage or fixed-cart amount. The amount field uses the units of this selection.
- Discount amount
- The coupon’s percentage or currency value, depending on Discount type.
- Valid for (minutes)
- How long the generated coupon stays valid.
- Coupon code prefix
- A short prefix added in front of the random code, e.g. NIWA.
- Max uses per coupon
- Maximum number of times one generated coupon may be redeemed.
- Minimum cart amount
- 0 = no minimum.
- Confirmation message
- Shown after the coupon is created. Placeholders: {coupon_code}, {duration}, {discount_amount}. Leave empty for the built-in default.
- Button text
- Leave empty for no button.
- Button reply sent to chat
- The message sent on the visitor's behalf when they click the button (e.g. "Yes, I want the code").
- Button delay (seconds)
- Delay before the offer’s action button becomes available.
- + Add rule
- Each rule shows a chat bubble on the product or page you target, after the delay you set, with the message you write. Add as many rules as you like.
- Enable Checkout Incentive
- Allows the configured checkout encouragement message.
- Incentive Message
- Visitor-facing checkout encouragement. State only offers that the store will honor.
- Enable Order Complete Message
- Allows a message after a completed order.
- Order Complete Message
- The post-order text, such as a thank-you or the next delivery step.
- Save Settings
- Saves the options on this module’s page. Check its success notice before leaving.
- + Add ignored page / Remove
- Adds or removes a page exclusion row. Choose the URL match mode and enter the path or URL. Save Settings applies the exclusions to all Attention Capture bubbles.
- Conditional Rules / Add rule
- Adds an explicit page or product-targeted prompt rule. Configure its enabled state, target, delay, message and action in the rule card, then save.
- Product link / page address
- Enter the product URL or page path where this rule should appear. Advanced → Match type controls how it matches the current address. This is an address rule, not a test of the visitor’s language.
- OS1 / OS2 / OS3 section headings
- Expand a prompt group to configure it. OS1 is the product-page nudge, OS2 the scarcity appeal and OS3 the small coupon offer. Each group has its own enable switch and timing.
- Enable this rule / Remove
- Enable or disable this individual rule. Remove deletes it from the form. Save Settings commits the change.
- Show on all product pages (ignore the link below)
- Applies this rule to every WooCommerce product page instead of comparing the Product link / page address field.
- Quick-reply button text (optional) / Button reply sent to chat (optional)
- Button text is the visible label; Button reply is the message sent on the visitor’s behalf when clicked. Leave the label empty for no button. Button delay controls when the button appears.
- Advanced / Match type
- Open Advanced for Contains, Equals or Regex URL matching. Contains checks part of the page address; Equals requires the address or path to match exactly; Regex accepts an advanced pattern.
- Priority (lower wins)
- If several link rules match one page, only the rule with the lowest priority number runs.
- Enable this ignored page / Page address / Match type
- Activates an exclusion row and defines its matching URL or path. Remove deletes the exclusion; Save Settings applies all rows.
Conversion Busters13 controls
WordPress → Niwa AI → Conversion Busters
Offer cart incentives under the configured conditions. Review the discount, cart threshold, coupon lifetime, usage limits and cooldown together before enabling it. Requires WooCommerce for coupons.
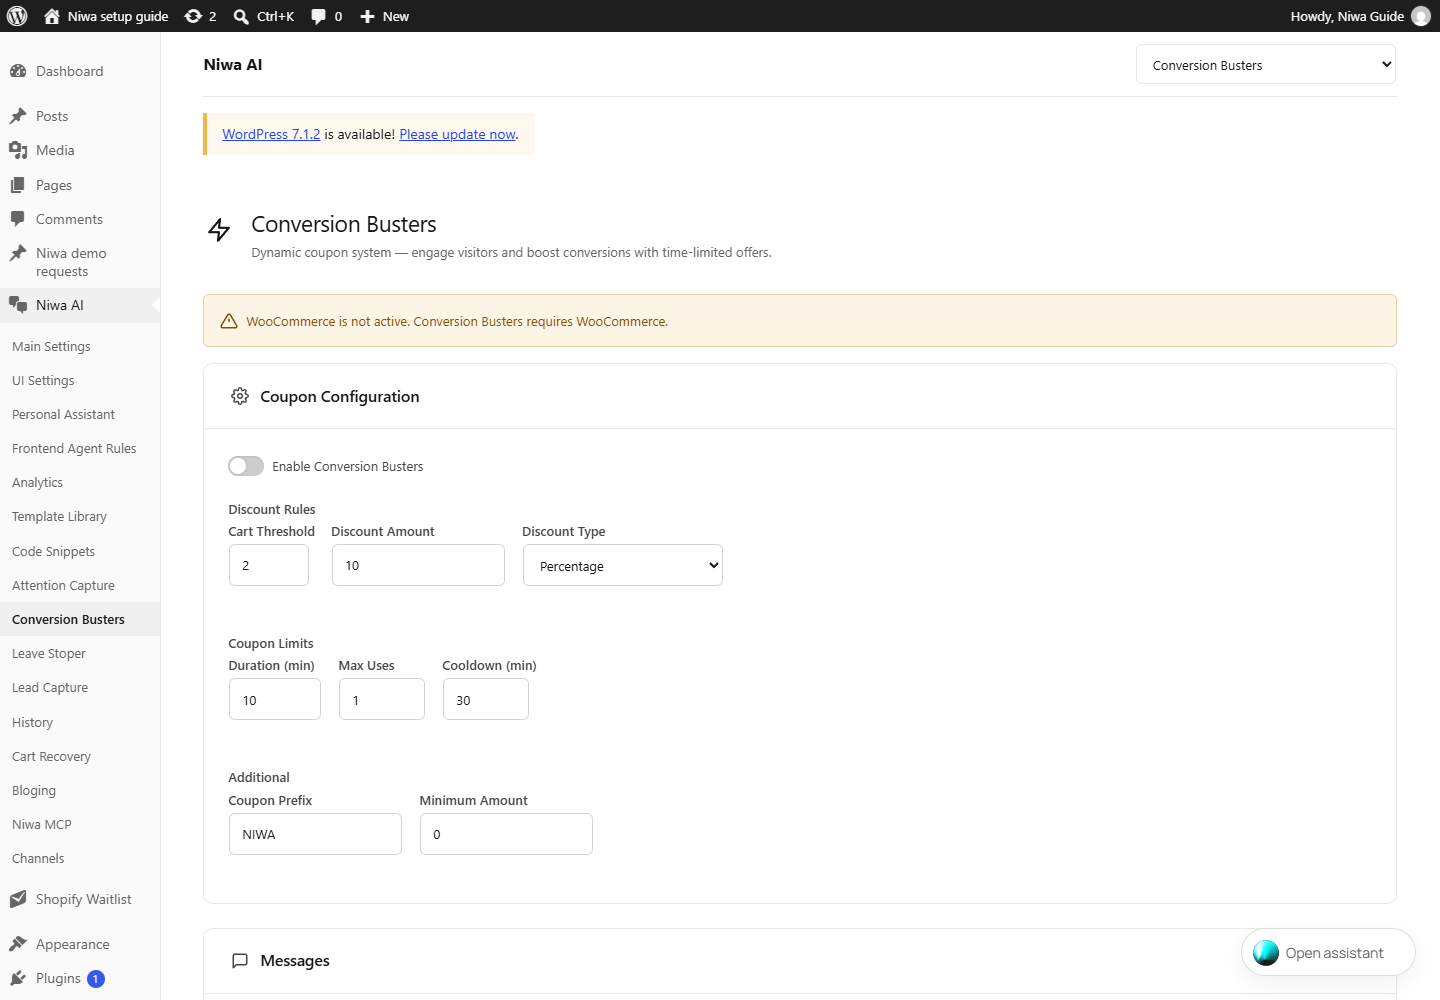
- Enable Conversion Busters
- Enables this cart-based incentive module. Review its coupon settings before turning it on.
- Cart Threshold
- Cart-value threshold used to decide when the offer can be shown. Use your store’s currency.
- Discount Amount
- Value of the generated discount. Interpret it as a percentage or currency amount according to Discount Type.
- Discount Type
- Select the kind of WooCommerce coupon: percentage or fixed-cart discount.
- Duration (min)
- How many minutes the generated coupon stays valid.
- Max Uses
- Maximum redemptions allowed for each generated coupon.
- Cooldown (min)
- Minimum interval before the visitor session can receive another offer.
- Coupon Prefix
- Text at the start of generated coupon codes, useful for identifying this campaign.
- Minimum Amount
- Minimum cart spend required to redeem the coupon.
- Initial Message
- Message shown when Conversion Busters starts the offer flow.
- Confirmation Message
- Message shown after coupon creation. You can use placeholders: {coupon_code}, {duration}, {discount_amount}.
- Clarify Message (fallback when user is undecided)
- If empty, Attention Capture OS3 Clarify Message will be used automatically.
- Save Settings
- Saves the options on this module’s page. Check its success notice before leaving.
Leave Stoper12 controls
WordPress → Niwa AI → Leave Stoper
Show a message when exit intent or inactivity is detected. Configure timing, media, mobile behavior and cooldown, then save.
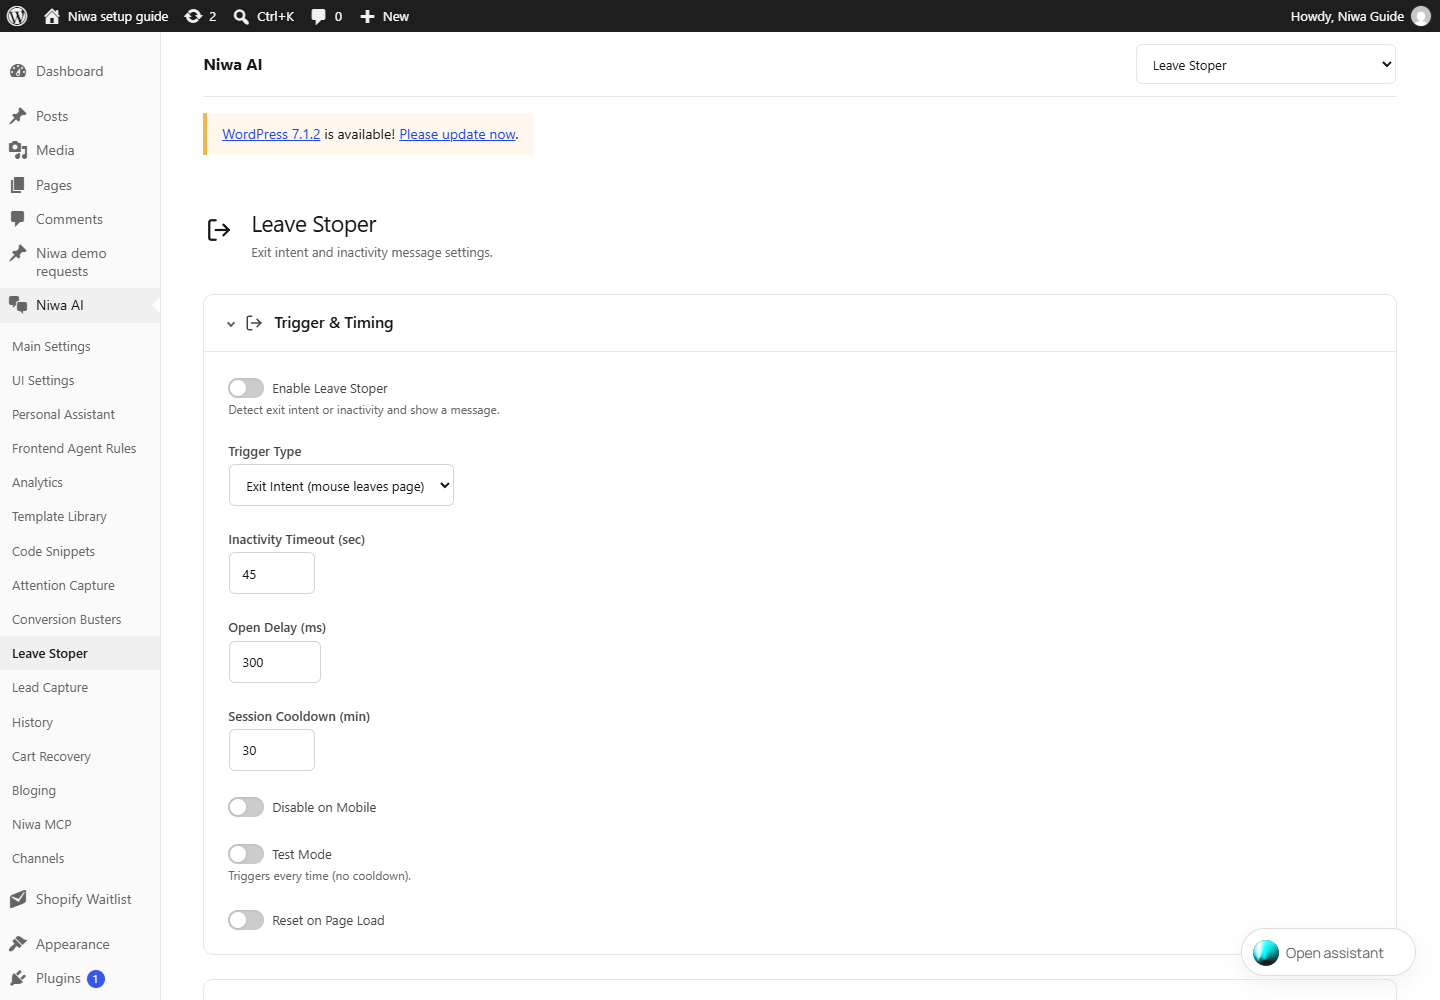
- Enable Leave Stoper
- Detect exit intent or inactivity and show a message.
- Trigger Type
- Choose exit intent, inactivity, or both. Mouse exit intent is a desktop interaction.
- Inactivity Timeout (sec)
- Idle seconds before the inactivity trigger fires.
- Open Delay (ms)
- Delay in milliseconds between the trigger and opening the message.
- Session Cooldown (min)
- Minimum minutes between displays in the visitor session.
- Disable on Mobile
- Suppresses Leave Stoper on mobile devices.
- Test Mode
- Triggers every time (no cooldown).
- Reset on Page Load
- Resets the module’s display state when another page loads. Review together with cooldown and test mode.
- Media (Image/GIF/Video)
- Choose an image, GIF, or video shown with the Leave Stoper message.
- Message Text
- The message shown when Leave Stoper triggers.
- Alt Text (optional)
- Alt text for accessibility. If empty, attachment alt text will be used.
- Save Settings
- Saves the options on this module’s page. Check its success notice before leaving.
Lead Capture · Settings11 controls
WordPress → Niwa AI → Lead Capture → Settings
Configure contact capture, coupon delivery, missing-product waitlists and lead notification mail. Forms and appointment scheduling have separate tabs.
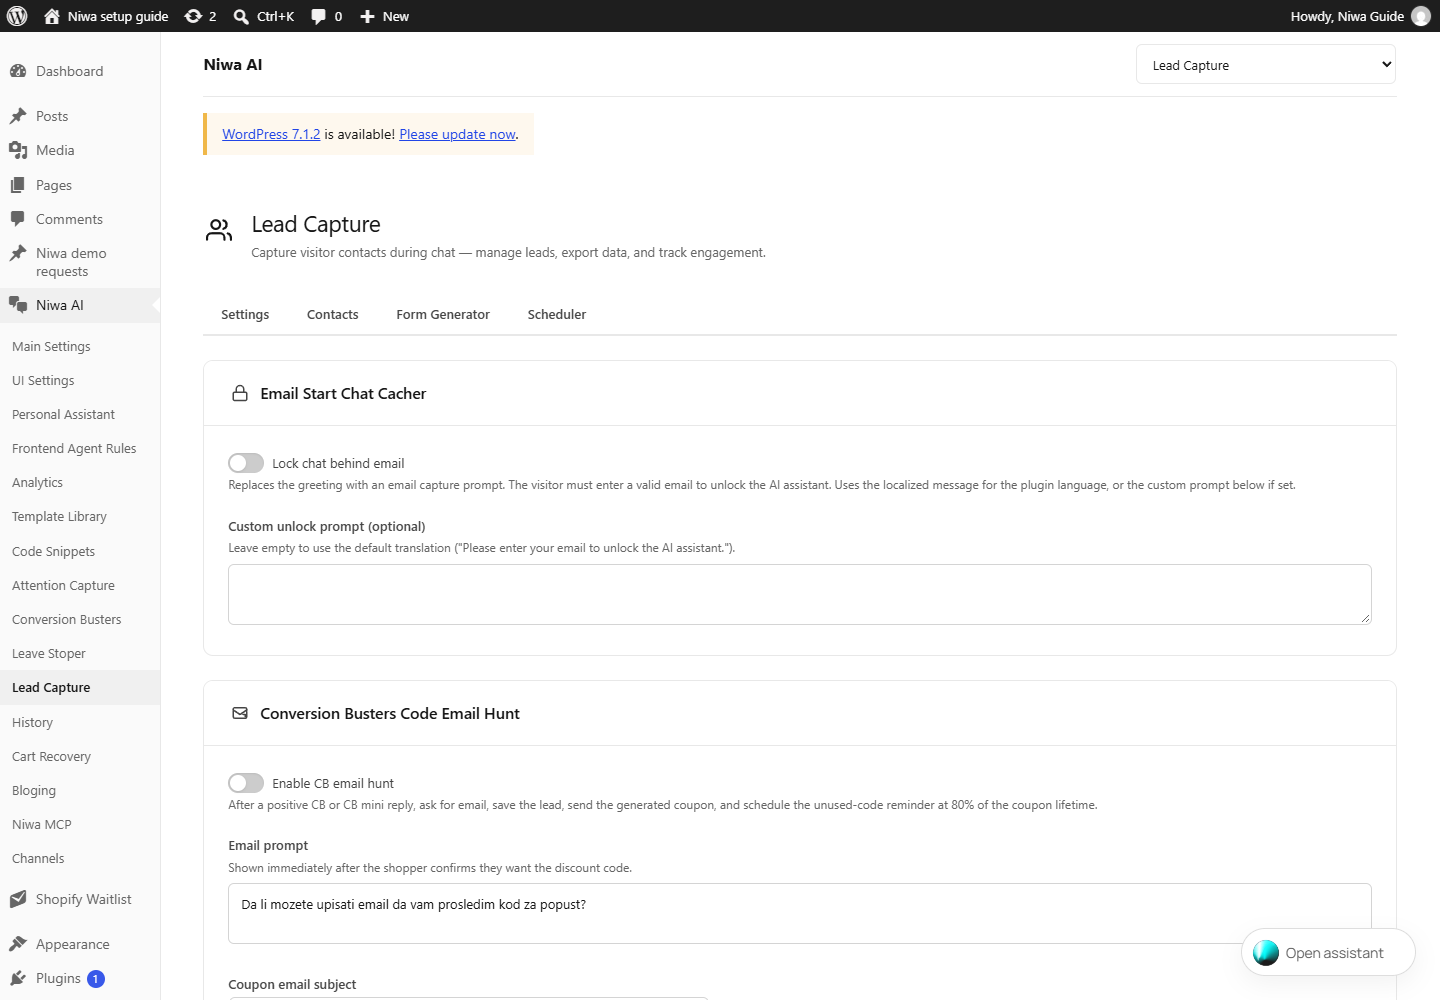
- Lock chat behind email
- Replaces the greeting with an email capture prompt. The visitor must enter a valid email to unlock the AI assistant. Uses the localized message for the plugin language, or the custom prompt below if set.
- Custom unlock prompt (optional)
- Leave empty to use the default translation ("Please enter your email to unlock the AI assistant.").
- Enable CB email hunt
- After a positive CB or CB mini reply, ask for email, save the lead, send the generated coupon, and schedule the unused-code reminder at 80% of the coupon lifetime.
- Email prompt
- Shown immediately after the shopper confirms they want the discount code.
- Coupon email subject
- Subject line for the message that delivers the captured visitor’s coupon.
- Coupon email body
- Available placeholders: {coupon_code}, {duration}, {discount_amount}, {site_name}.
- Reminder email subject
- Subject line for the unused-coupon reminder.
- Reminder email body
- Sent after 80% of the coupon lifetime if the coupon is still unused. Available placeholders: {coupon_code}, {remaining_minutes}, {site_name}.
- Enable missing product waitlist capture
- When enabled, the AI agent proactively offers to notify the visitor as soon as it detects a requested product is not in the catalog or the visitor refuses a proposed alternative. The agent formulates the ask in the visitor's own language and only requests an email if one has not already been captured elsewhere in the session (email capture / CBEH / lead form). On completion the email is saved as a new contact and a notification is sent to the Notification Email above. The exact trigger rules are built into the AI tool. no further configuration is required.
- Notification Email
- Email address that receives a notification whenever a new lead is captured. Leave empty to disable notifications. Failed emails are automatically retried via cron (max 3 retries).
- Save Settings
- Saves the options on this module’s page. Check its success notice before leaving.
Lead Capture · Contacts & calendar17 controls
WordPress → Niwa AI → Lead Capture → Contacts & calendar
Review contacts, export the selected range and manage appointments in the weekly or monthly calendar. A blank calendar is expected before appointments exist.
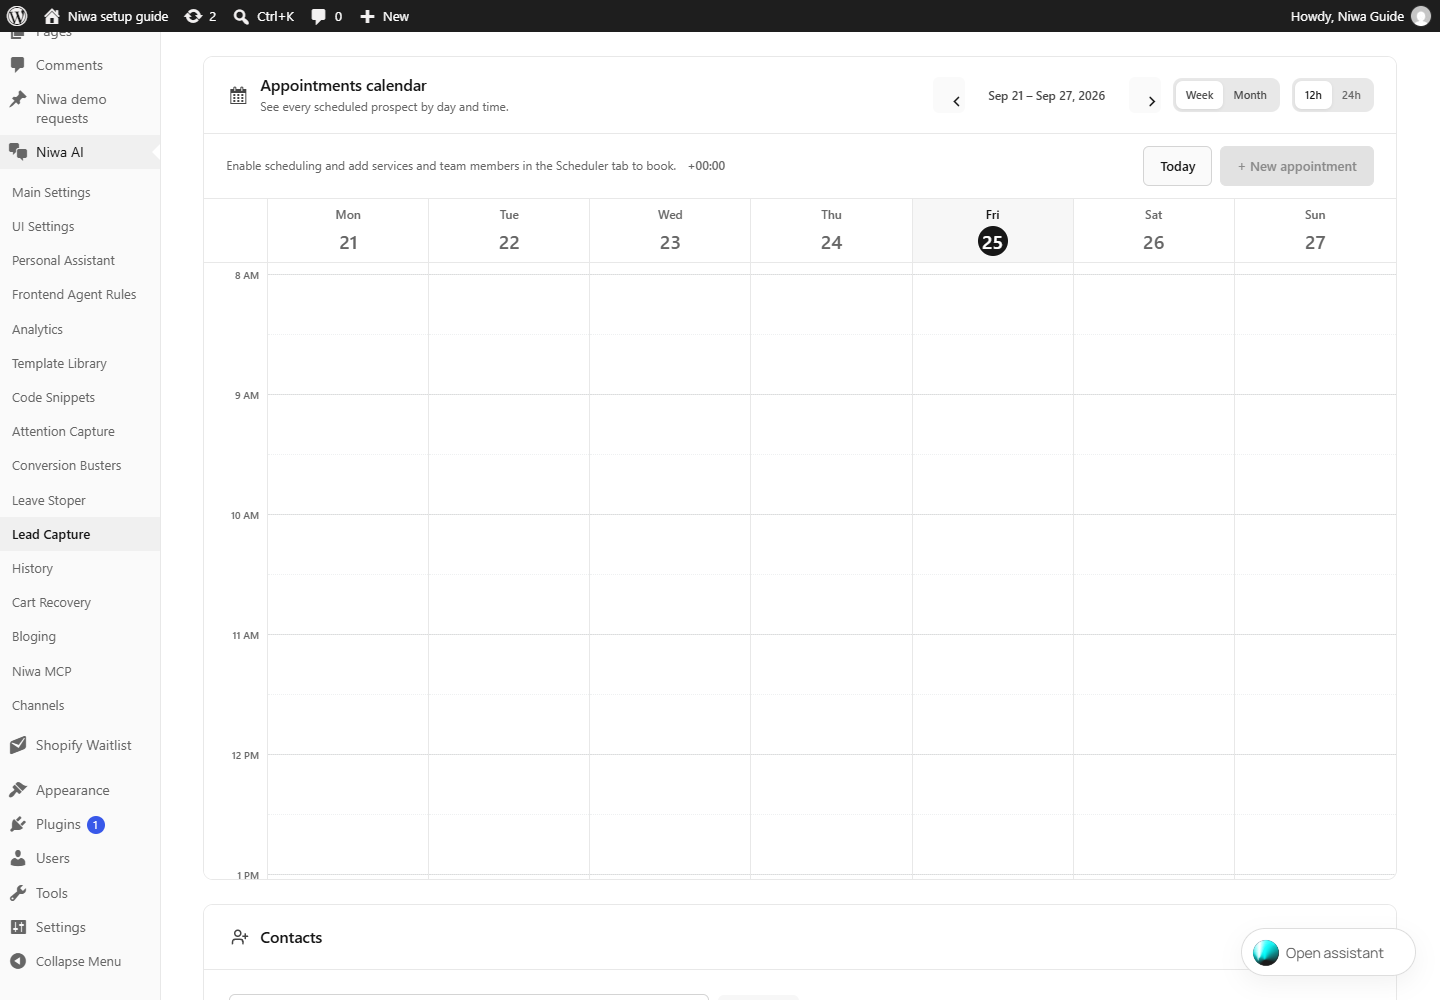
- Last 24h / Last 7 Days / Last Month / Last 2 Months / All Time
- Limits the contact/export view to the selected date range.
- Emails Only
- Selects the email-only contact export format.
- Export CSV
- Downloads the selected contact data. Store it privately because it contains customer contact details.
- Search contacts / Search
- Filters contact records using the entered search text.
- Week / Month
- Changes the appointment calendar view. Week displays a day-and-time grid; Month gives a date overview.
- Previous period / Next period / Today
- Moves to the adjacent week or month, or returns to the current period.
- 12h / 24h
- Changes how appointment times are displayed, not the stored appointment time.
- Calendar time slot / + New appointment
- Opens the appointment editor. Clicking a slot preselects its day and time; no booking is created until you save.
- Service
- Choose a saved service. Its duration and assigned team members determine availability.
- Team member
- Choose an eligible person or Any available member.
- Date / Available time
- Choose the appointment date, then one of the offered time slots. Busy periods and configured breaks affect availability.
- Name / Email / Phone
- The attendee details for this appointment. Confirmation delivery needs the corresponding contact detail.
- Appointment notes
- Private context attached to the appointment.
- Status
- Pending, Confirmed, Completed, Cancelled or No show records the booking state. Review before changing an existing booking.
- Save details
- Commits the appointment details. Creating or updating an appointment can affect availability and connected calendars.
- Cancel / Close
- Closes the editor without submitting the unsaved changes.
- Existing appointment
- Opens that booking for review or editing. Read the selected attendee and time before changing it.
Lead Capture · Form Generator23 controls
WordPress → Niwa AI → Lead Capture → Form Generator
Build a sequence of questions shown inside the visitor chat. Choose when to offer the form, how it appears, which answers are required and what happens after completion.
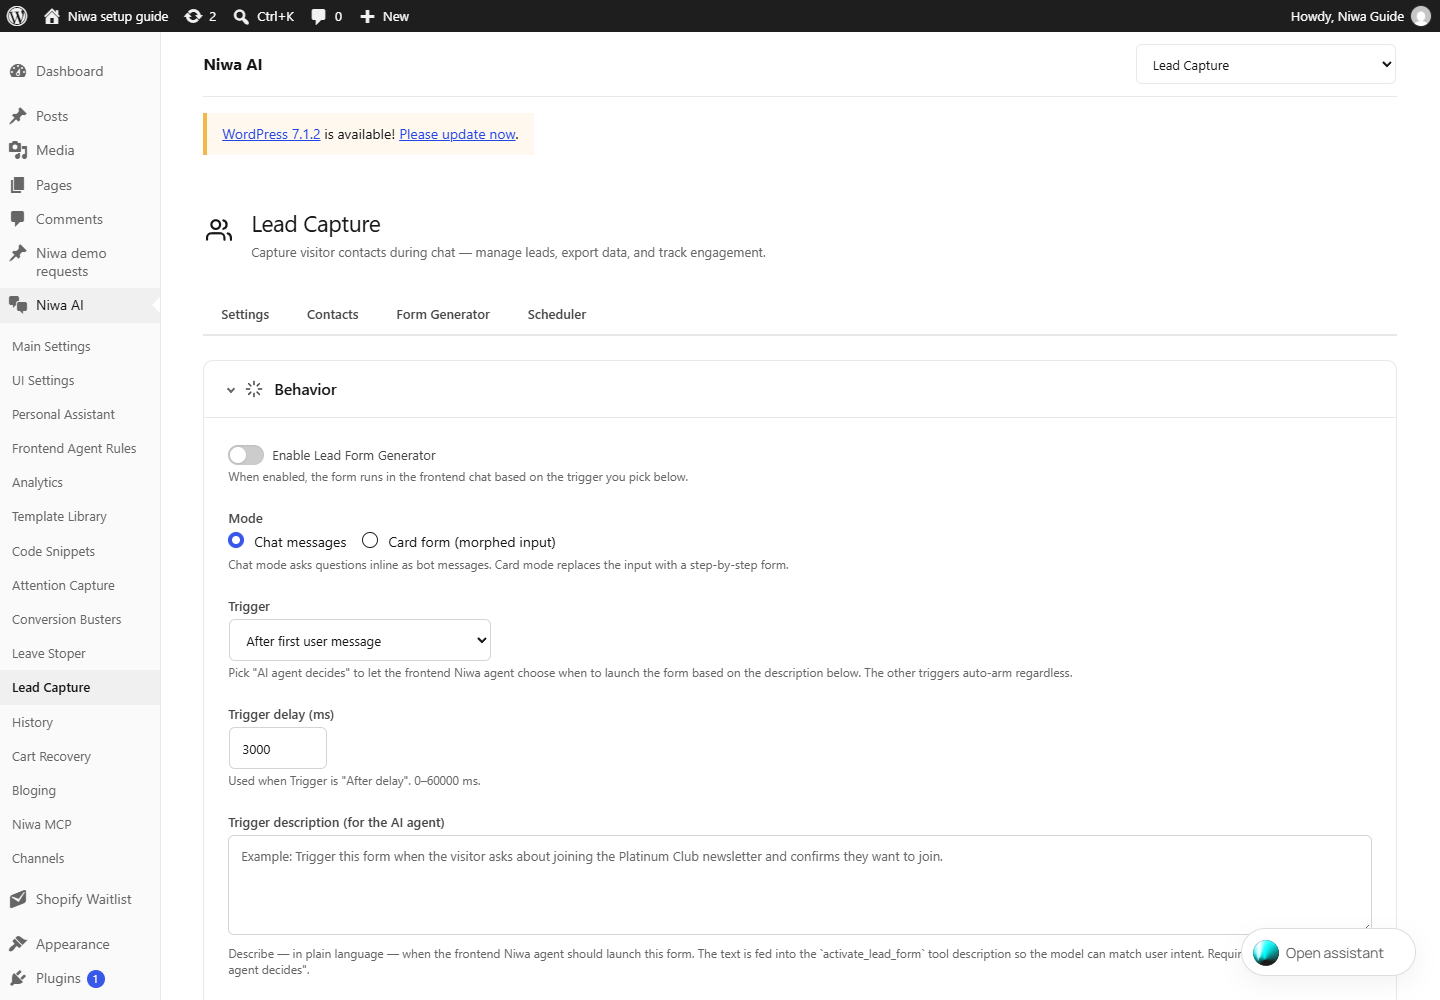
- Enable Lead Form Generator
- When enabled, the form runs in the frontend chat based on the trigger you pick below.
- Chat messages
- Chat mode asks questions inline as bot messages. Card mode replaces the input with a step-by-step form.
- Card form (morphed input)
- Chat mode asks questions inline as bot messages. Card mode replaces the input with a step-by-step form.
- Trigger
- Pick "AI agent decides" to let the frontend Niwa agent choose when to launch the form based on the description below. The other triggers auto-arm regardless.
- Trigger delay (ms)
- Used when Trigger is "After delay". 0–60000 ms.
- Trigger description (for the AI agent)
- Describe. in plain language. when the frontend Niwa agent should launch this form. The text is fed into the `activate_lead_form` tool description so the model can match user intent. Required when Trigger = "AI agent decides".
- Partial submit on email/phone
- As soon as a valid email or phone answer is captured, send the lead (marked as partial) even if the visitor abandons the form before finishing.
- Completion text
- Shown to the visitor after they finish the form.
- Completion media (image / GIF / video)
- Optional celebratory GIF or image shown next to the completion text.
- + Add Step
- Adds a question to the lead form. Set its type, label, required status and available choices, then Save Form.
- Save Form
- Saves the form’s trigger, presentation, questions and completion behavior.
- Step label / Add Question / Delete step
- Name the step, add its questions or remove the step. Save Form persists the structure.
- Question label / Type / Required / Placeholder
- Set the visible question, input type, whether an answer is required and the example shown in an empty input.
- Options / Add Option / option value / label / Delete option
- Build the choices for selectable questions. The label is shown to visitors; the option value identifies the saved choice.
- Min / Max / Regex validation
- Adds length, numeric or explicit format constraints where supported. Use format validation only for the required data format, not to infer a visitor’s language or intent.
- Delete question
- Removes that question from the draft form. Save Form applies the change.
- Contact-field mapping
- Mark the appropriate question as the name, email or phone field so its answer is saved to the correct contact detail.
- Conditional routing / Add rule / Delete rule
- Controls the next question using the structured rule’s field, operator, value and destination. Review every destination after reordering or deleting questions.
- Guidance for the AI
- Describes the meaning of the route in natural language when AI routing is enabled.
- Which questions may the AI route to? / Select all / Clear
- Limits the set of allowed next questions. Select all includes all available candidates; Clear removes the selection.
- Choose Media / Remove
- Selects or clears completion media in the WordPress Media Library. It does not submit the form.
- Question order
- Move steps or questions using their drag controls, then save. Keep contact capture and required information in an order visitors can understand.
- Next in order / Rules (if / then) / AI decides / Rules first, then AI
- Choose sequential questions, explicit answer conditions, semantic AI routing, or rules followed by AI when no rule matches. Describe intent in Guidance for the AI and constrain its allowed destination questions.
Lead Capture · Scheduler26 controls
WordPress → Niwa AI → Lead Capture → Scheduler
Define services, team members, work schedules and booking confirmations. Local scheduling works independently from optional external calendar connections. Save the member and email before sending that member a connection invitation.
- Enable frontend scheduling
- Lets the visitor assistant and lead forms recommend services and offer appointment slots. Save Scheduler to apply.
- Name / Phone / Email contact switches
- Choose which attendee fields Scheduler collects. Disabled fields are not displayed or stored by this module.
- Email confirmation / WhatsApp confirmation
- Choose delivery channels. A channel is skipped if its contact detail is not collected or its connection is unavailable.
- Add team member / Name / Email
- Creates a member record. Enter the person’s name and working email, then save before sending a calendar connection invitation.
- Mon / Tue / Wed / Thu / Fri / Sat / Sun
- Enables or disables work on that weekday and opens its working-hours editor. An off day offers no availability.
- Start time / End time
- Defines the member’s available work interval for that weekday, using the site’s WordPress timezone.
- Add break / Break start / Break end / Remove break
- Creates or removes unavailable intervals within the workday. No appointment should occupy a saved break.
- Copy schedule to the next day
- Copies the current day’s work and break arrangement to the next day. Review the destination before saving.
- Individual days off / Remove date
- Adds or removes a single unavailable date, such as a holiday.
- Date ranges / Range start / Range end / Range label
- Blocks a multi-day period. Give it a useful label, such as annual leave.
- Remove range
- Removes that unavailable date range from the form. Save to apply.
- Remove member
- Removes the selected member from the settings form. Check service assignments and existing bookings before saving.
- Add service / Service name
- Adds the bookable service or appointment type customers can choose.
- Duration (minutes)
- Length of the service. It is used when calculating available slots.
- Description
- Explains the service to the frontend assistant so it can recommend the appropriate booking.
- Assigned team members
- Selects which people can perform this service. Their schedules determine available times.
- Remove service
- Removes the service from the settings form. Save to apply the change.
- Time between appointments
- Adds preparation time after a service so consecutive appointments do not touch.
- Save Scheduler
- Saves local services, team schedules, breaks, exclusions, collection fields and confirmation preferences.
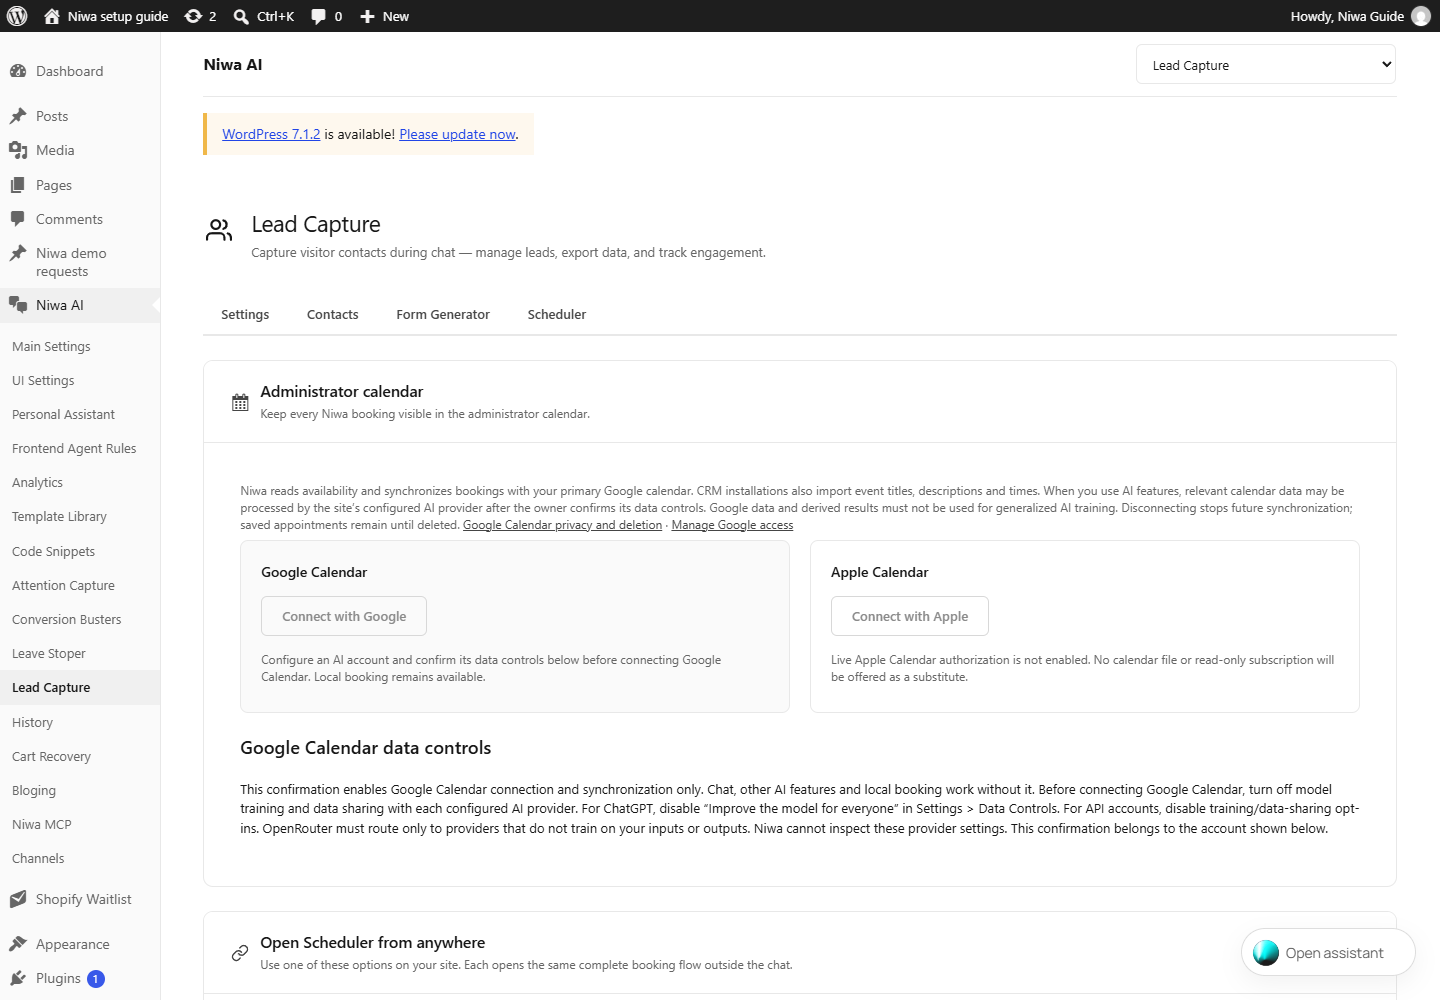
- Administrator calendar / Google data controls
- Review the displayed provider and consent text. Configure the account to exclude Google data from generalized model training, then save the confirmation if you agree. This consent controls Google calendar connection/sync; it must not be treated as the frontend-chat enable switch.
- Save data controls confirmation
- Saves the explicit confirmation for the displayed provider. It does not silently change settings in your OpenAI account; configure those there first.
- Connect with Google
- Starts Google authorization for the intended administrator calendar after the required data controls are confirmed. Choose the correct account, review permissions and return to Niwa.
- Send calendar connection link
- Sends the saved team member an invitation so they can authorize their own calendar. Verify the email destination before using it.
- Connect with Apple
- Disabled in this plugin version because live Apple Calendar authorization is not enabled. There is no working Apple connection to configure here.
- Connected calendar / Disconnect
- Once a provider is connected, review the selected account and calendar. Disconnect removes that integration; local Scheduler data is a separate system.
- Button shortcode / Text link shortcode / Existing button or menu link
- Copy [niwa_booking] into a Shortcode block for a booking button. Use [niwa_booking type="link" label="Book an appointment"] for inline text, or #niwa-booking as an existing button URL. All open the same booking flow outside the chat.
History2 controls
WordPress → Niwa AI → History
Search saved frontend conversations and select a session to read its messages. This is customer chat history, separate from the private admin agent’s execution history.
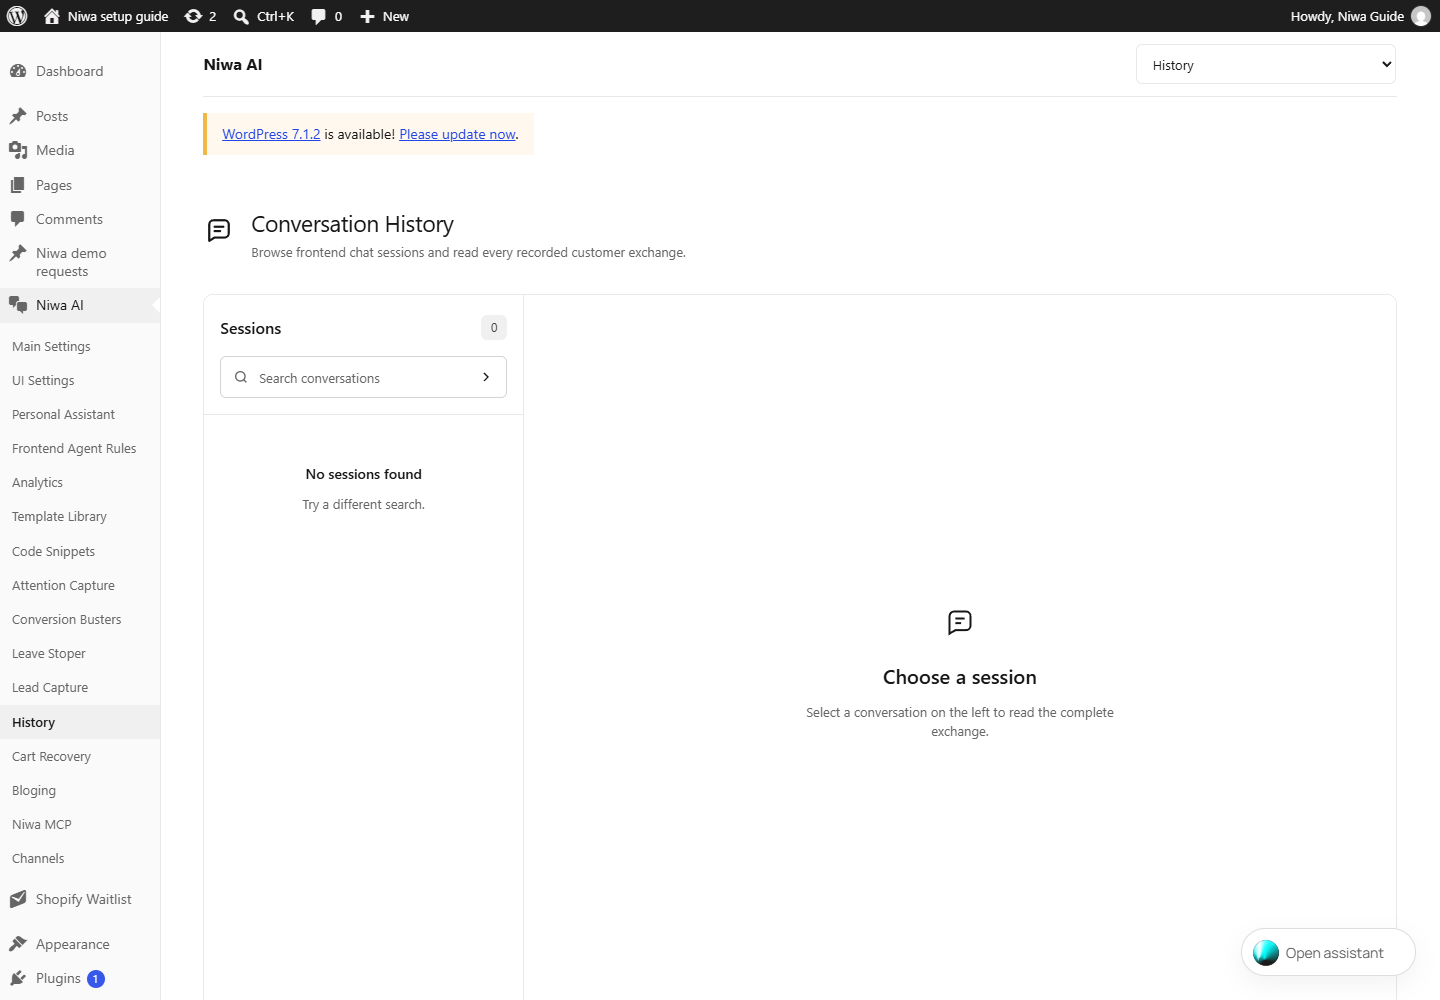
- Search sessions or messages
- Finds stored customer sessions or matching message text. Select a result to read the conversation.
- Session list / selected conversation
- Choose a session to load its recorded exchange. Empty results can mean no conversations have been recorded or the current search does not match.
Cart Recovery · General14 controls
WordPress → Niwa AI → Cart Recovery → General
Set reminder channels, delays and sender details. Enable only the stages you want. Manual developer tools can process real queued reminders, so use a test contact you control when testing.
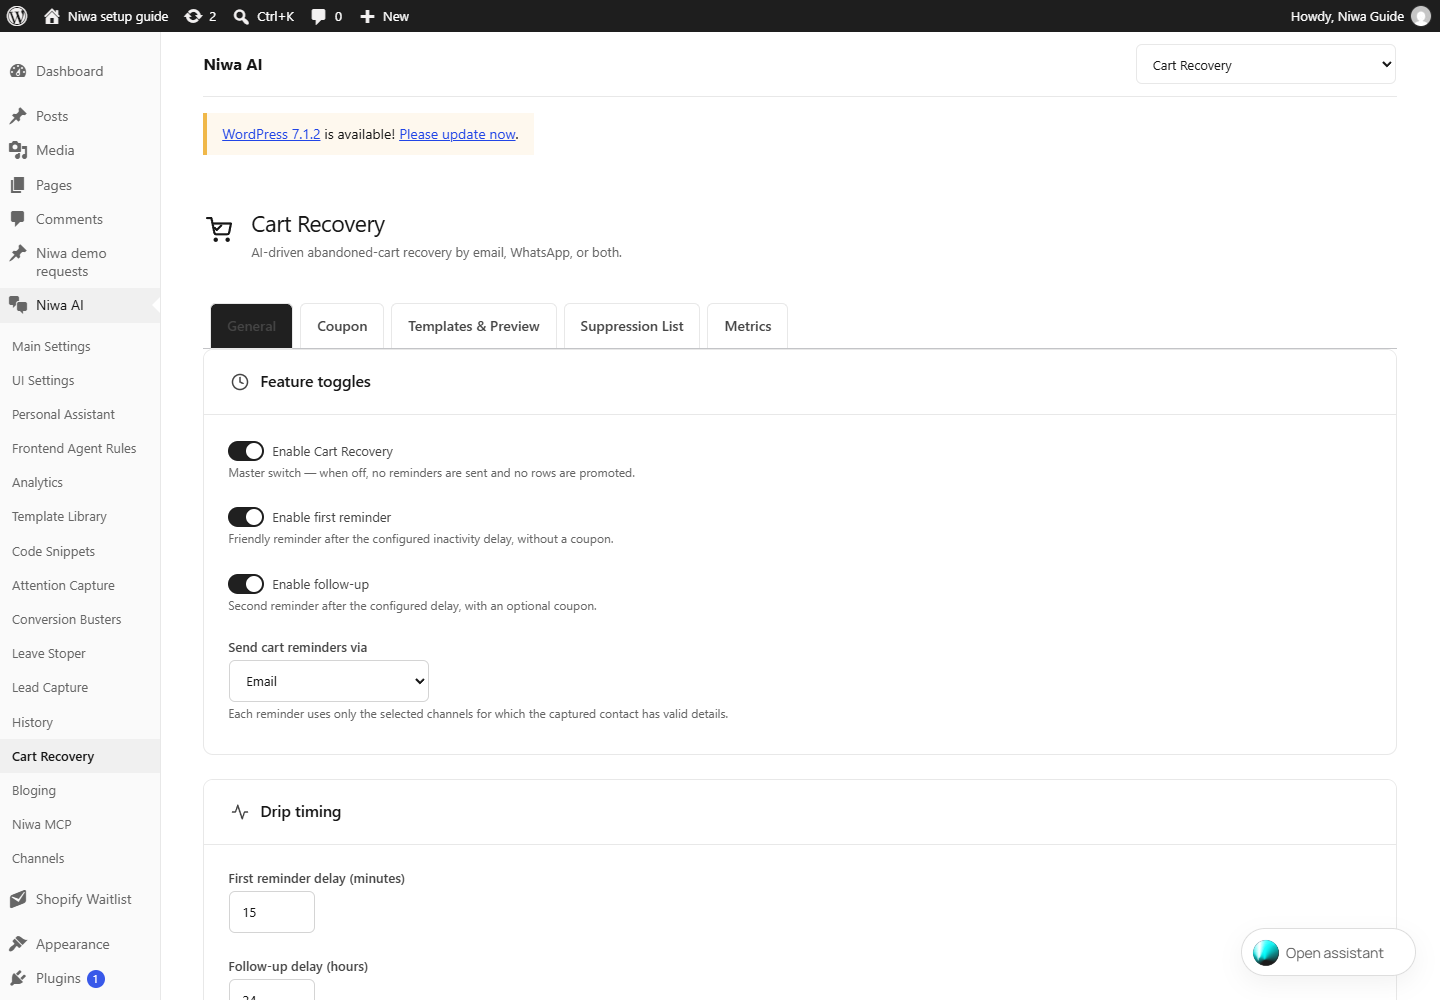
- Enable Cart Recovery
- Master switch. when off, no reminders are sent and no rows are promoted.
- Enable first reminder
- Friendly reminder after the configured inactivity delay, without a coupon.
- Enable follow-up
- Second reminder after the configured delay, with an optional coupon.
- Send cart reminders via
- Each reminder uses only the selected channels for which the captured contact has valid details.
- First reminder delay (minutes)
- Inactivity delay before the first cart reminder is eligible.
- Follow-up delay (hours)
- Delay configured for the follow-up reminder. Review this alongside the first reminder and the inactivity cap.
- Inactivity cap (hours)
- Rows older than this are auto-expired.
- Cooldown per contact (days)
- Minimum time before the same contact can enter another recovery cycle.
- From name
- Used when delivery includes Email. Leave empty to use the site name.
- From email
- Used when delivery includes Email. Leave empty to use the admin email.
- Store brand name
- Used in reminder content. Defaults to the site name.
- Save Changes
- Saves this Cart Recovery tab. Settings on other tabs have their own save action.
- Run tick now
- Processes eligible recovery work immediately. This can send real reminders; it is not a preview.
- Force-link shadow rows → my email, then tick
- Developer test action that associates shadow cart records with your email and runs recovery processing. It changes records and can send mail.
Cart Recovery · Coupon11 controls
WordPress → Niwa AI → Cart Recovery → Coupon
Configure the optional coupon included with the follow-up reminder. Check eligibility and value before enabling automatic recovery.
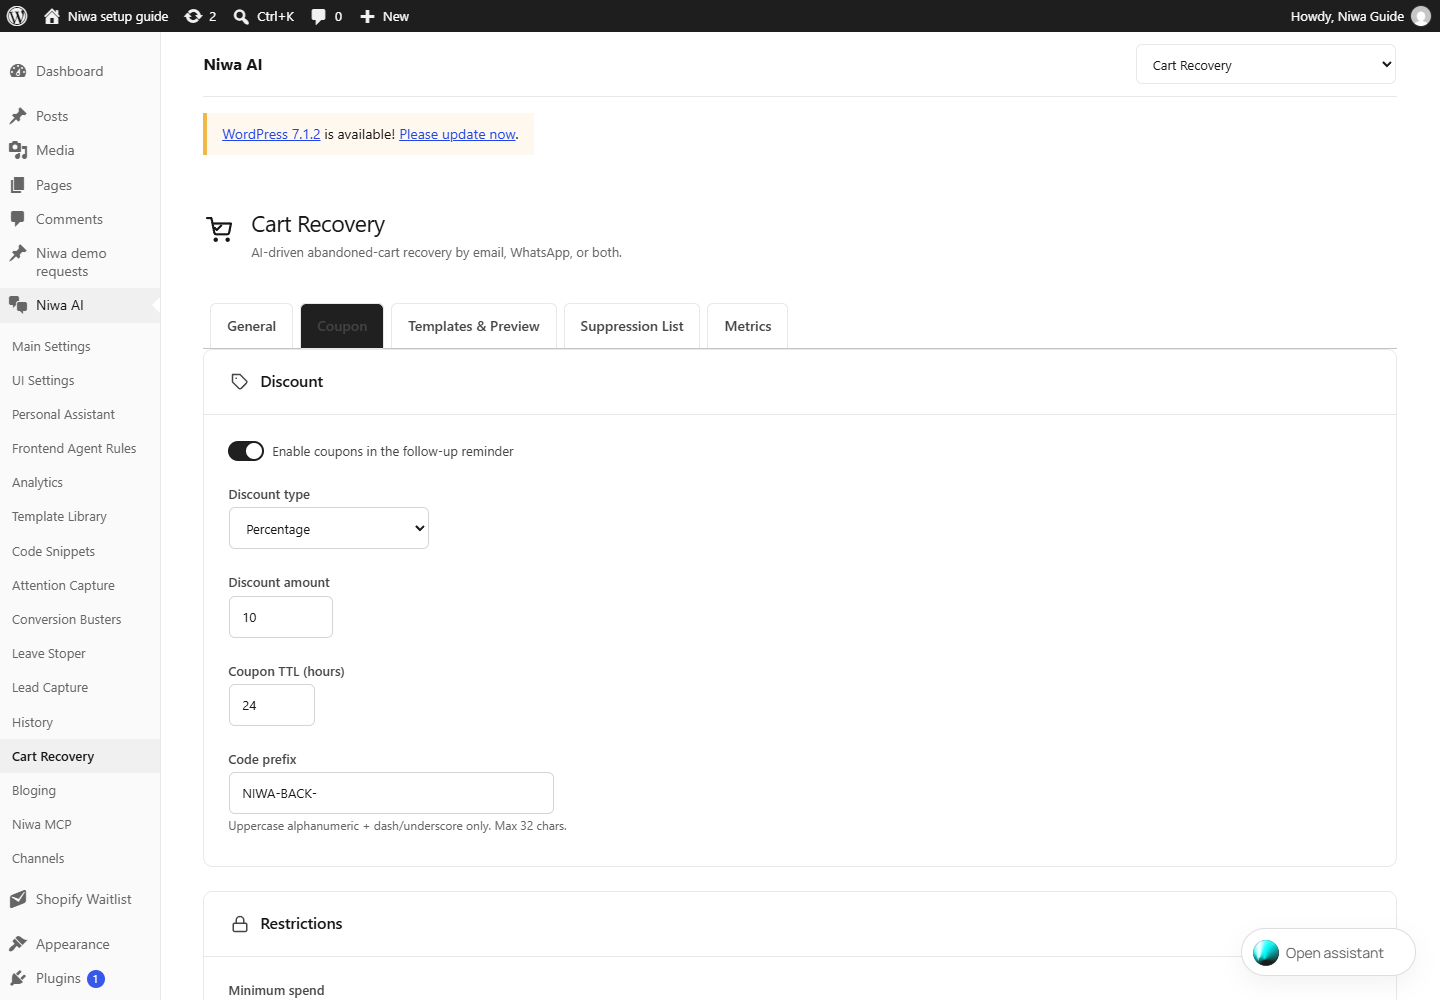
- Enable coupons in the follow-up reminder
- Includes an eligible recovery coupon with the second reminder.
- Discount type
- Choose a percentage or fixed-cart amount. The amount field uses the units of this selection.
- Discount amount
- The coupon’s percentage or currency value, depending on Discount type.
- Coupon TTL (hours)
- How many hours the recovery coupon remains valid.
- Code prefix
- Uppercase alphanumeric + dash/underscore only. Max 32 chars.
- Minimum spend
- Selects the minimum-spend rule applied to the recovery coupon.
- Restrict to abandoned cart products
- Limits the coupon to the products from that abandoned cart.
- Exclude sale items
- Prevents the coupon from discounting products already on sale.
- Cannot combine with other coupons
- Marks the recovery coupon for individual use, preventing coupon stacking.
- Grants free shipping
- Allows the coupon to grant free shipping where the WooCommerce shipping setup supports it.
- Save Changes
- Saves this Cart Recovery tab. Settings on other tabs have their own save action.
Cart Recovery · Templates & Preview11 controls
WordPress → Niwa AI → Cart Recovery → Templates & Preview
The first reminder and follow-up each have their own source, subject, HTML and plain-text content. Empty custom fields use the built-in localized template.
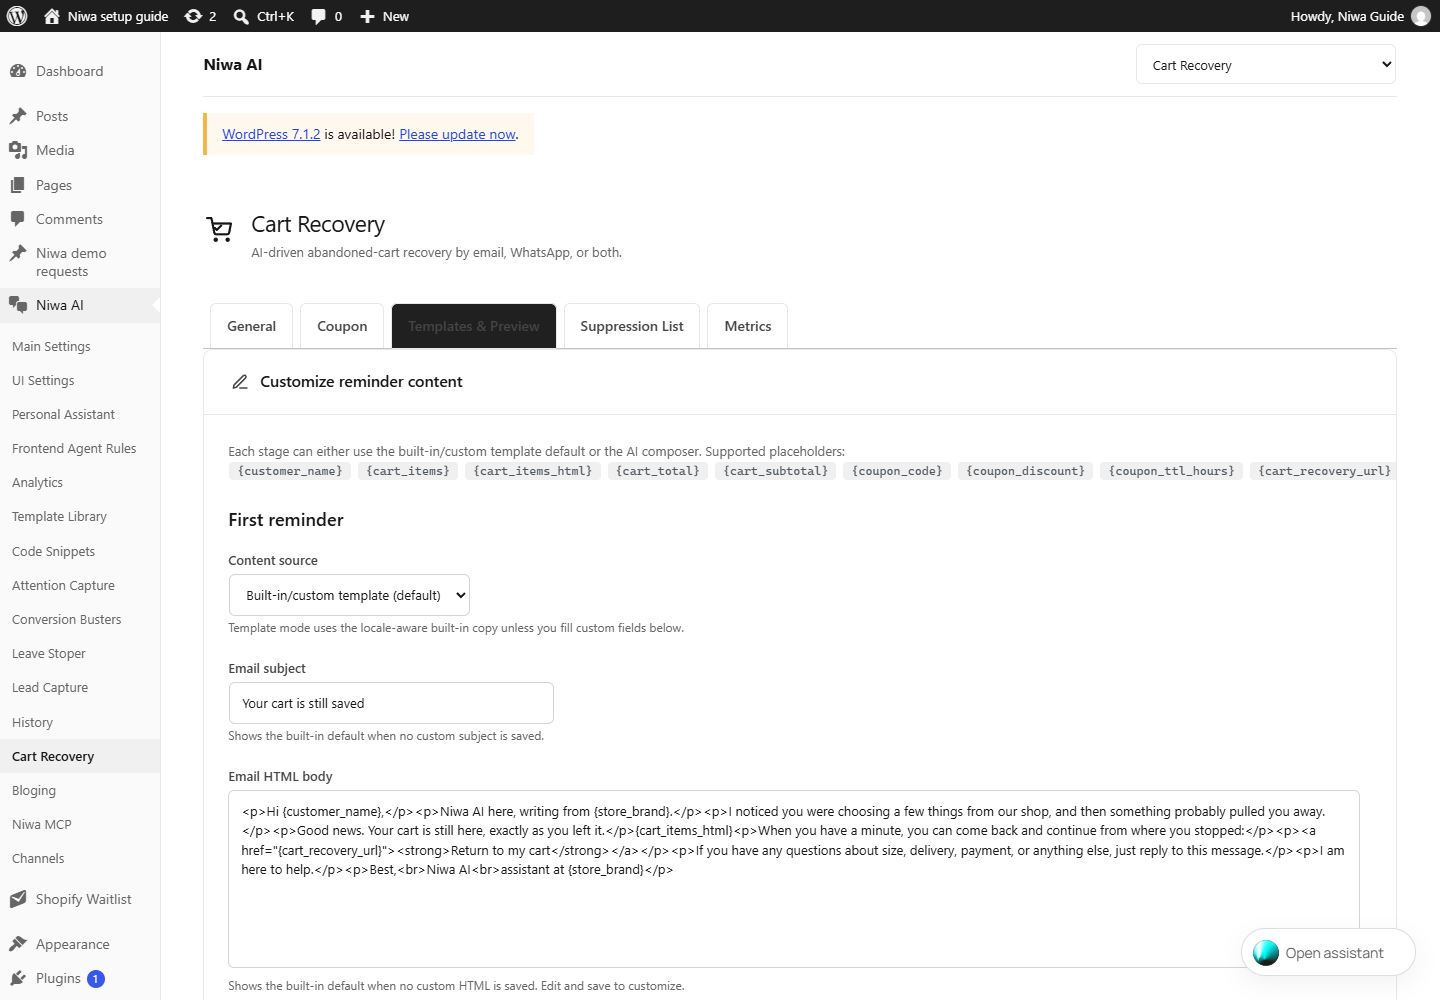
- First reminder · Content source
- Template mode uses the locale-aware built-in copy unless you fill custom fields below.
- First reminder · Email subject
- Shows the built-in default when no custom subject is saved.
- First reminder · Email HTML body
- Shows the built-in default when no custom HTML is saved. Edit and save to customize.
- First reminder · Plain-text / WhatsApp body
- Used for the plain-text email and as the WhatsApp message content.
- Follow-up · Content source
- Template mode uses the locale-aware built-in copy unless you fill custom fields below.
- Follow-up · Email subject
- Shows the built-in default when no custom subject is saved.
- Follow-up · Email HTML body
- Shows the built-in default when no custom HTML is saved. Edit and save to customize.
- Follow-up · Plain-text / WhatsApp body
- Used for the plain-text email and as the WhatsApp message content.
- Save Changes
- Saves this Cart Recovery tab. Settings on other tabs have their own save action.
- Preview controls
- Use the available preview to inspect both reminders and the selected locale. Preview content before using a test-send or runtime action.
- Template placeholders
- Use only placeholders listed by this screen. Preserve their braces so product, store, coupon and recovery-link values can be substituted.
Cart Recovery · Suppression List5 controls
WordPress → Niwa AI → Cart Recovery → Suppression List
Contacts on this list must not receive recovery messages. Review consent and opt-out status before removing an entry.
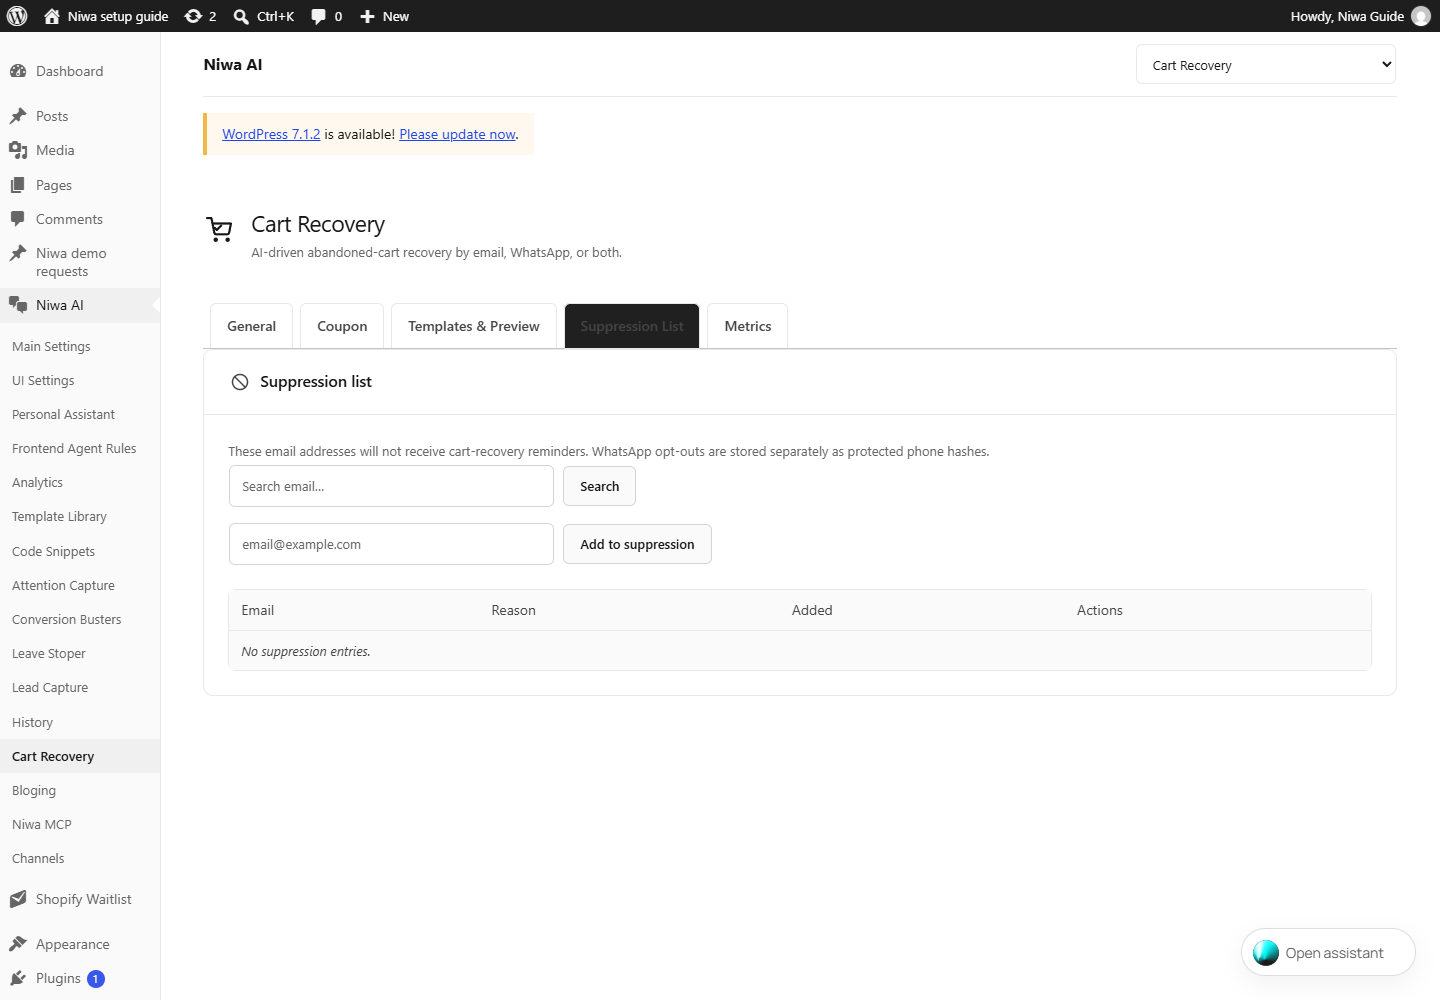
- Search email…
- Finds a suppressed contact by email address.
- Search
- Applies the email search to the suppression list.
- email@example.com
- Enter the email address that must not receive recovery reminders.
- Add to suppression
- Adds the entered email to the no-recovery list.
- Remove / unsuppress
- When a suppressed entry exists, its removal action permits recovery again. Confirm the contact’s consent before removing the suppression.
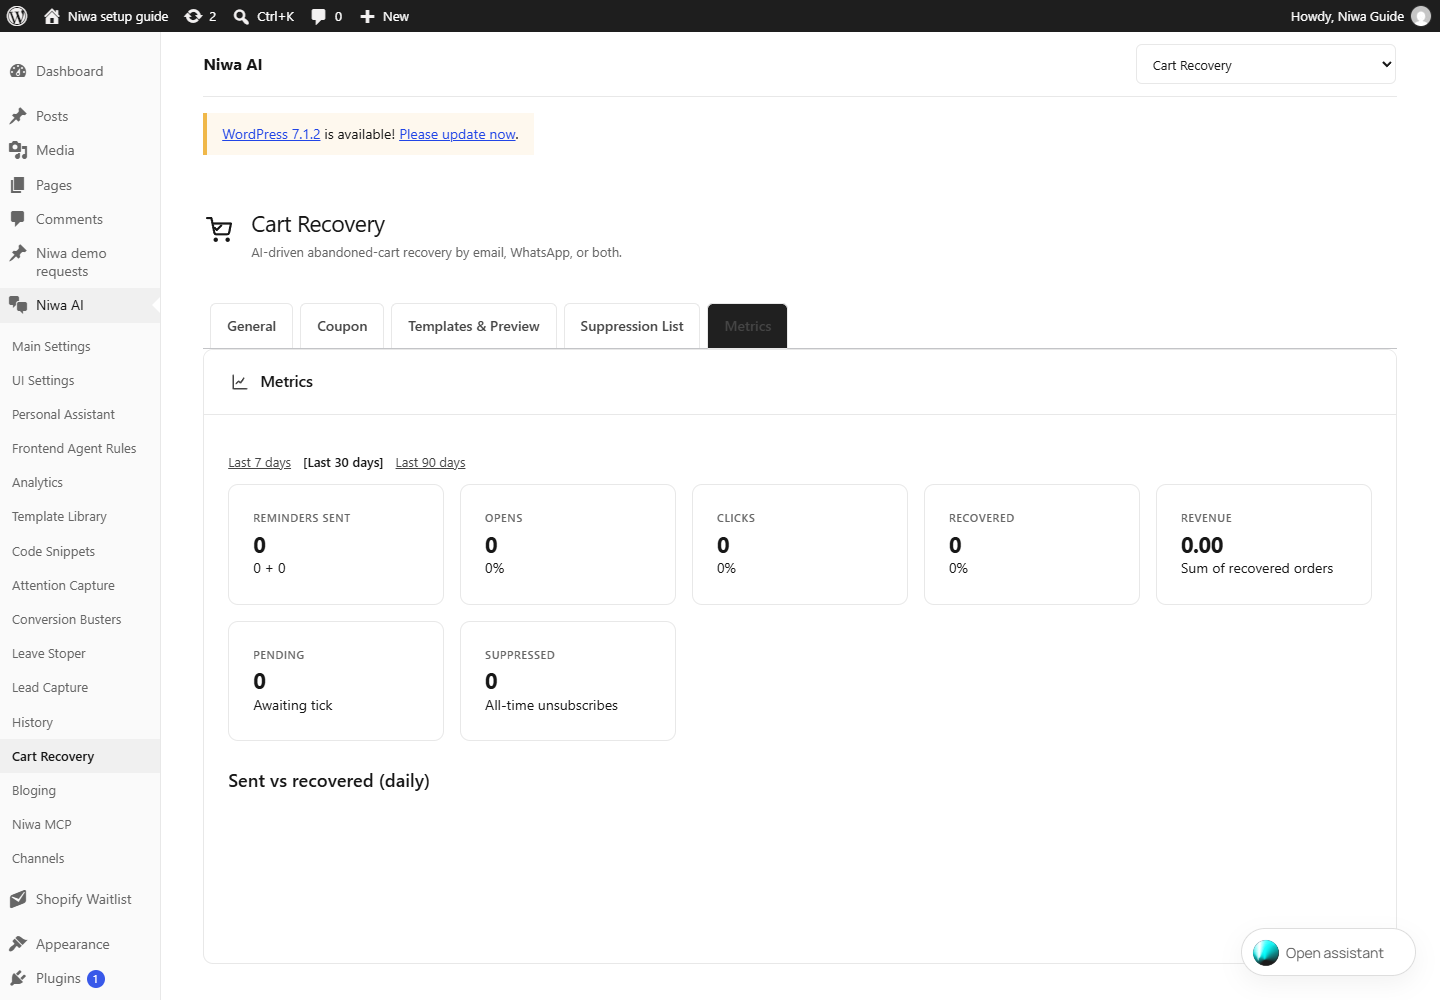
Cart Recovery · Metrics0 controls
WordPress → Niwa AI → Cart Recovery → Metrics
Inspect captured carts, reminder delivery and recovery results over the available reporting period. Zero values are expected on a new installation.
Bloging15 controls
WordPress → Niwa AI → Bloging
Set stock-image provider credentials and defaults used by Niwa’s blog tools. This settings page does not itself publish an article. Provider access and quotas are controlled by the provider.
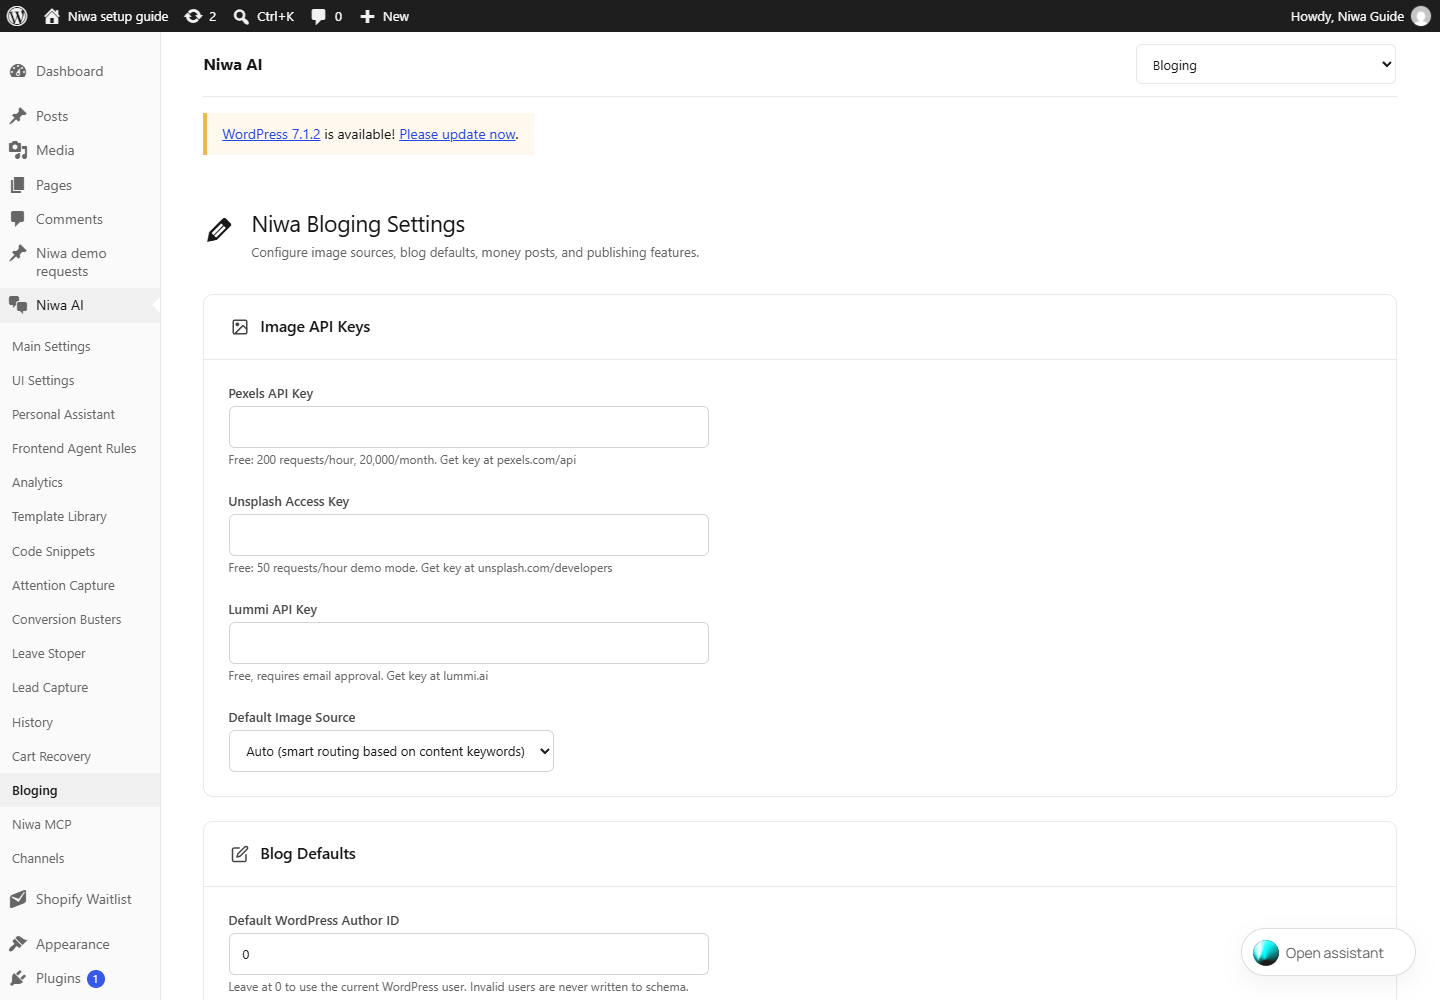
- Pexels API Key
- Create a key at https://www.pexels.com/api/ and paste it here. Provider quotas and permissions depend on your account.
- Unsplash Access Key
- Create an application at https://unsplash.com/developers and use its access key. Follow the provider’s image-use requirements.
- Lummi API Key
- Obtain API access from https://www.lummi.ai/ and enter the supplied key. Availability depends on provider approval.
- Default Image Source
- Chooses the preferred image provider used by blog-generation tools. Configure that provider’s credential first.
- Default WordPress Author ID
- Leave at 0 to use the current WordPress user. Invalid users are never written to schema.
- Accent Color
- Opens the color picker for generated blog accents.
- Accent Color Color value
- The saved accent color value. Choose a readable color that fits your theme.
- Default Language
- Any valid BCP 47 language tag; auto-detected from the WordPress site language on first use.
- Default Blog Category
- The default category used for generated articles. Match an existing category unless creation is explicitly permitted.
- + Add Money Post
- Internal links injected into blog posts as CTAs. Each entry needs a path, title, and description.
- Auto-generate TOC
- Automatically insert a table of contents at the top of blog posts.
- Add reading progress bar
- Show a horizontal reading progress indicator at the top of the page.
- Emit Niwa JSON-LD when Niwa owns schema
- Add BlogPosting/Breadcrumb data only when an active SEO integration does not already own the graph.
- Allow explicitly requested new taxonomy terms
- Off by default. The canonical quality gate is always mandatory; this setting only permits missing categories/tags to be created during execution, never during preview.
- Save Bloging Settings
- Saves image-provider credentials, article defaults and publishing preferences.
Niwa MCP7 controls
WordPress → Niwa AI → Niwa MCP
Connect an external MCP client to your own site. The MCP endpoint and a generated bearer token are different from the Codex OAuth model connection. Tokens grant administrator access.
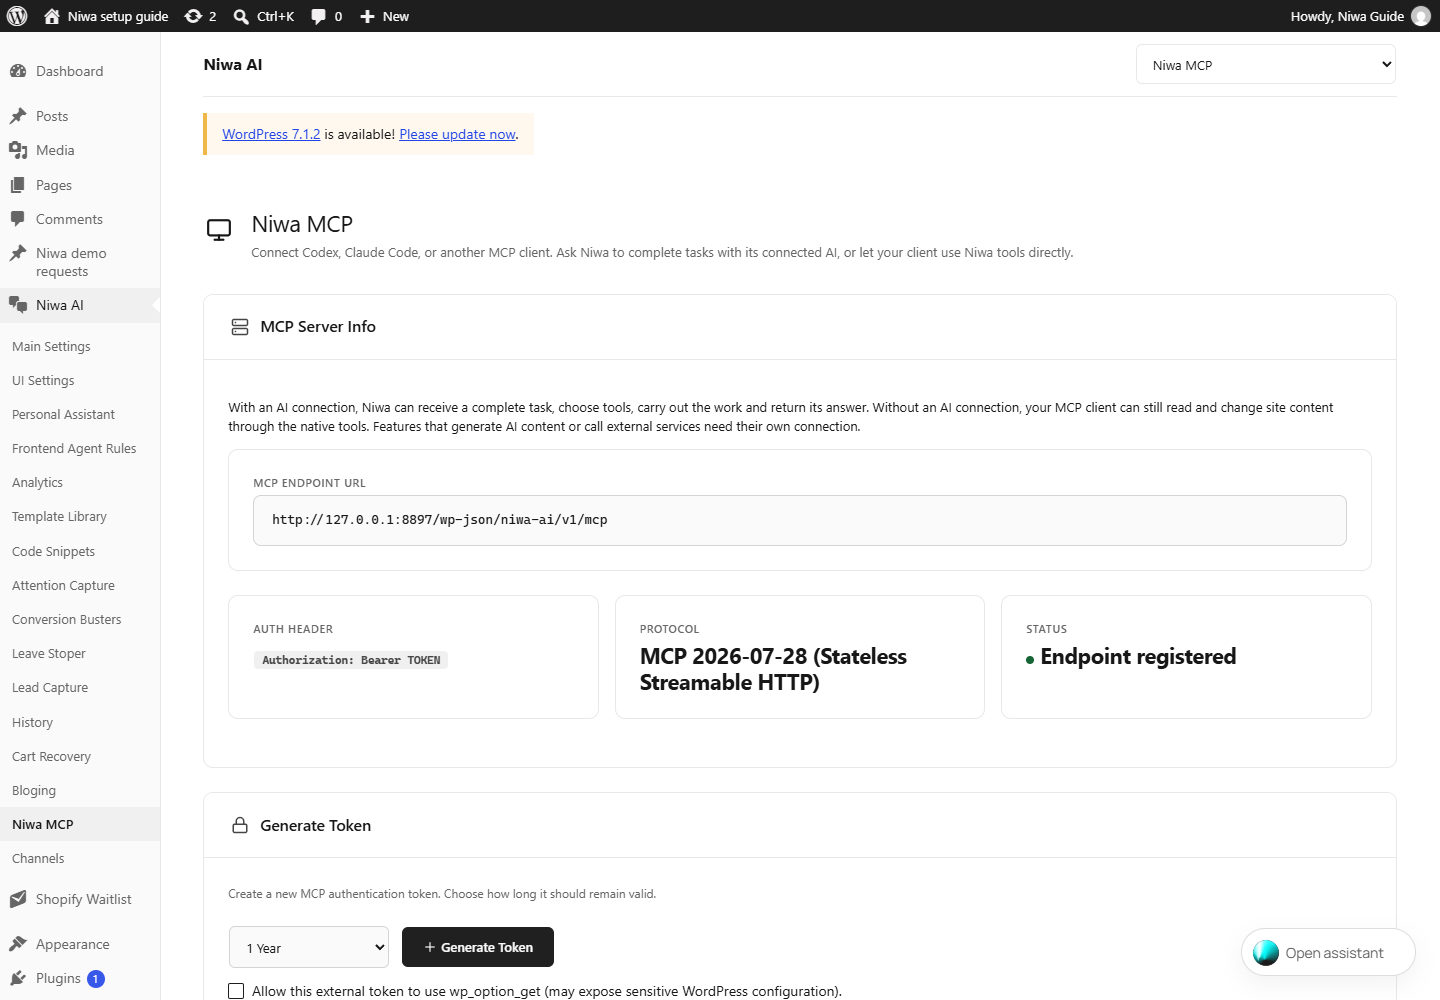
- Token lifetime
- Choose 1 Day, 1 Month, 1 Year or No Expiration. Prefer a bounded lifetime and revoke unused tokens.
- Generate Token
- Creates a new administrator-level MCP credential for the selected lifetime. Copy it into the intended client’s private configuration.
- Allow this external token to use wp_option_get (may expose sensitive WordPress configuration).
- Explicitly allows option reads for this token. Leave off unless the client needs this access; WordPress options can contain private configuration.
- Copy
- Copies the adjacent endpoint, credential or client configuration. Replace the token placeholder locally; keep real tokens private.
- MCP endpoint / Authorization header
- Use the endpoint shown for your own site and Authorization: Bearer followed by your generated token. Do not copy the localhost address from the screenshot.
- Active Tokens / Revoke
- Review active credentials and revoke ones you no longer use. Revocation stops clients using that token.
- Claude Code JSON / CLI / Codex configuration
- Copy the example for your client and replace YOUR_TOKEN_HERE privately. Start a fresh client session and test a read-only request. Model OAuth and MCP authorization are separate connections.
Channels · Connections & flows15 controls
WordPress → Niwa AI → Channels → Connections & flows
Connect Facebook Pages or Instagram professional accounts through the account owner’s Meta authorization. Requested permissions depend on the selected features. Connecting alone leaves automatic replies and blog sharing off.
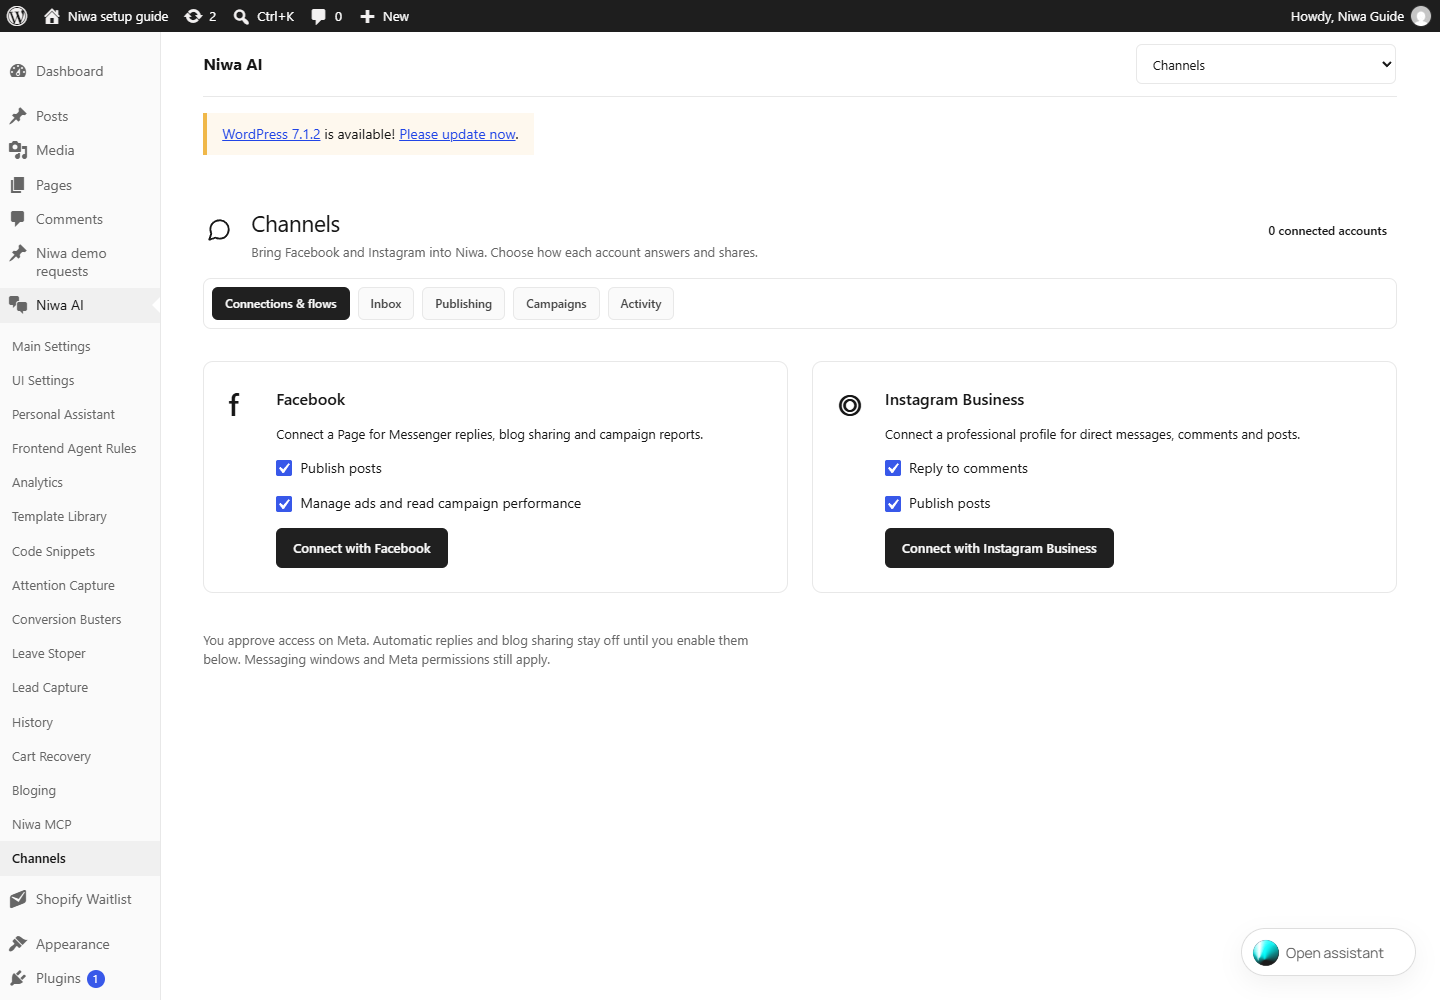
- Publish posts
- Requests publishing permission during the Meta connection. Automatic blog sharing has a separate switch after connection.
- Manage ads and read campaign performance
- Requests the advertising permissions needed for campaign management and reporting.
- Connect with Facebook
- Opens Meta authorization. Sign in as the account owner, review permissions, choose the intended account and return to Niwa. Automatic replies remain off until enabled.
- Reply to comments
- Requests Instagram comment-reply access. The connected account’s reply switches still control automation.
- Connect with Instagram Business
- Opens Meta authorization. Sign in as the account owner, review permissions, choose the intended account and return to Niwa. Automatic replies remain off until enabled.
- Choose accounts / Connect selected accounts
- After Meta approval, select only the Page or professional profile intended for this website, then confirm the selection.
- Let Niwa answer incoming messages
- Enables automatic replies for the selected connected account. Review its instructions first.
- Also answer Instagram comments
- Enables comment replies when the connected account has that permission.
- Instructions for this account
- Describes tone, products, support rules and when a human should take over for this specific channel.
- Add flow / event / intent / steps
- Choose the structural event, describe the customer intent and add the required actions. Intent descriptions are interpreted by meaning across languages.
- Share new published blog posts automatically
- Enables automatic sharing for future published WordPress posts on this account.
- Caption instructions
- Guides the wording of social captions generated for this account.
- Save account settings
- Saves replies, instructions, flows and sharing preferences for that account.
- Disconnect account
- Removes the selected social account connection from Niwa.
- Connection service configuration
- Service-level Meta app configuration is needed only on the installation that operates the connection service. Customer installations use Connect with Facebook or Connect with Instagram Business; they do not need to create their own Meta app.
Channels · Inbox4 controls
WordPress → Niwa AI → Channels → Inbox
Review incoming connected-account conversations. After connecting an account, send a test message from another account and inspect delivery here. Handoff and resume controls appear on existing threads.
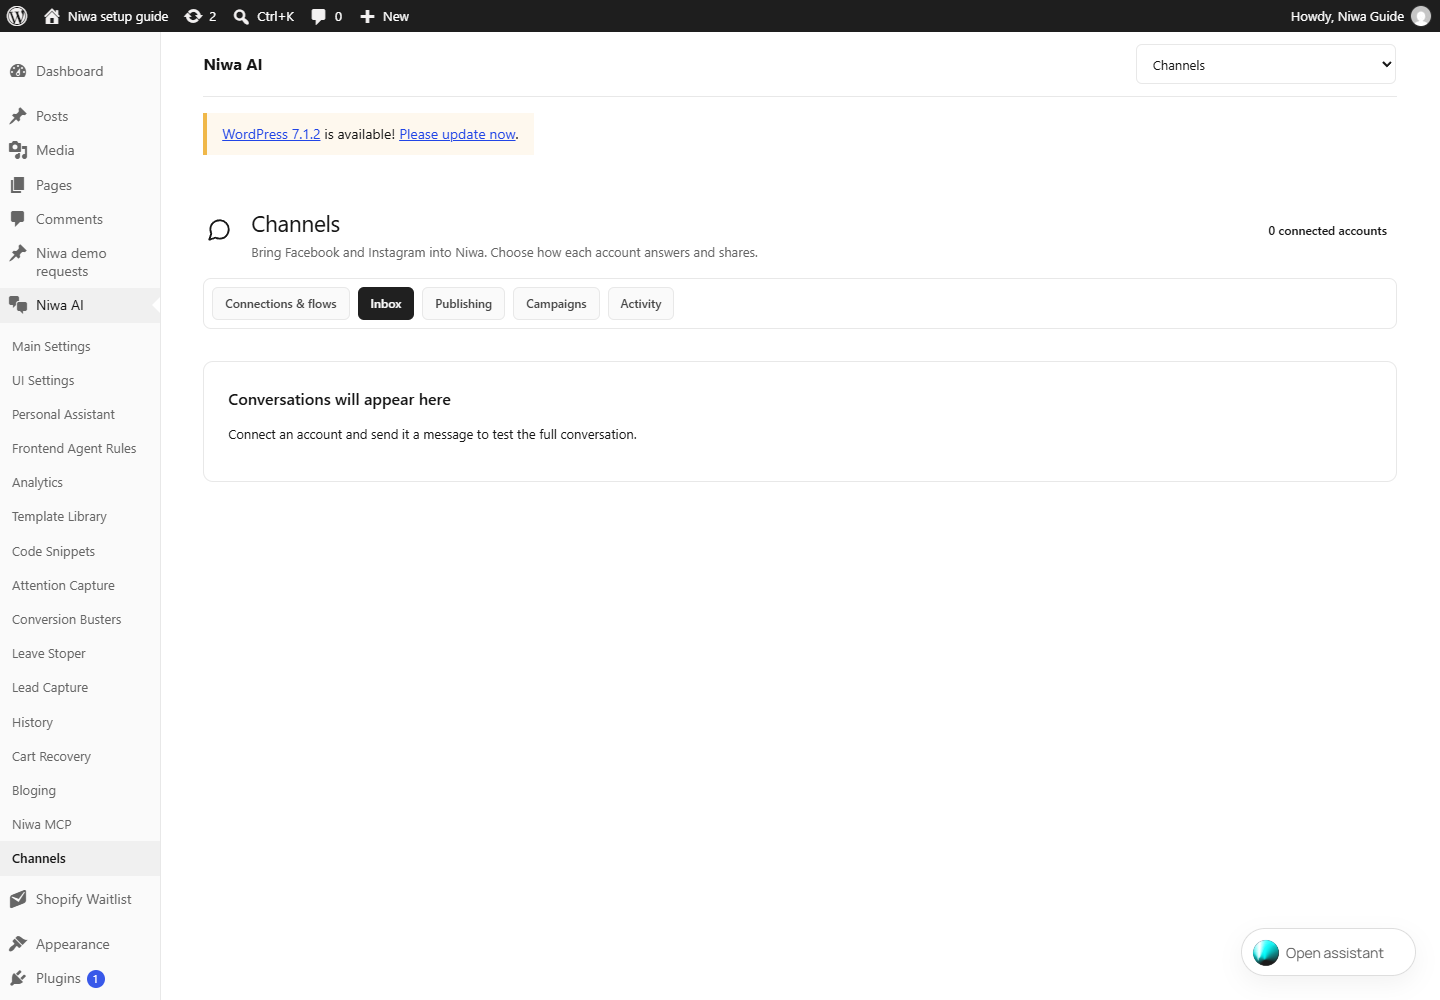
- Take over
- Pauses automated replies for the selected existing conversation so a person can respond.
- Resume Niwa
- Resumes automated replies on a paused conversation.
- Your reply
- The message you want to send to the customer in this selected thread.
- Send reply and pause Niwa
- Sends your written reply and pauses automation on that thread. This immediately communicates with the customer.
Channels · Publishing3 controls
WordPress → Niwa AI → Channels → Publishing
Manually share a published WordPress article to a selected connected social account. Check the destination before pressing Share article.
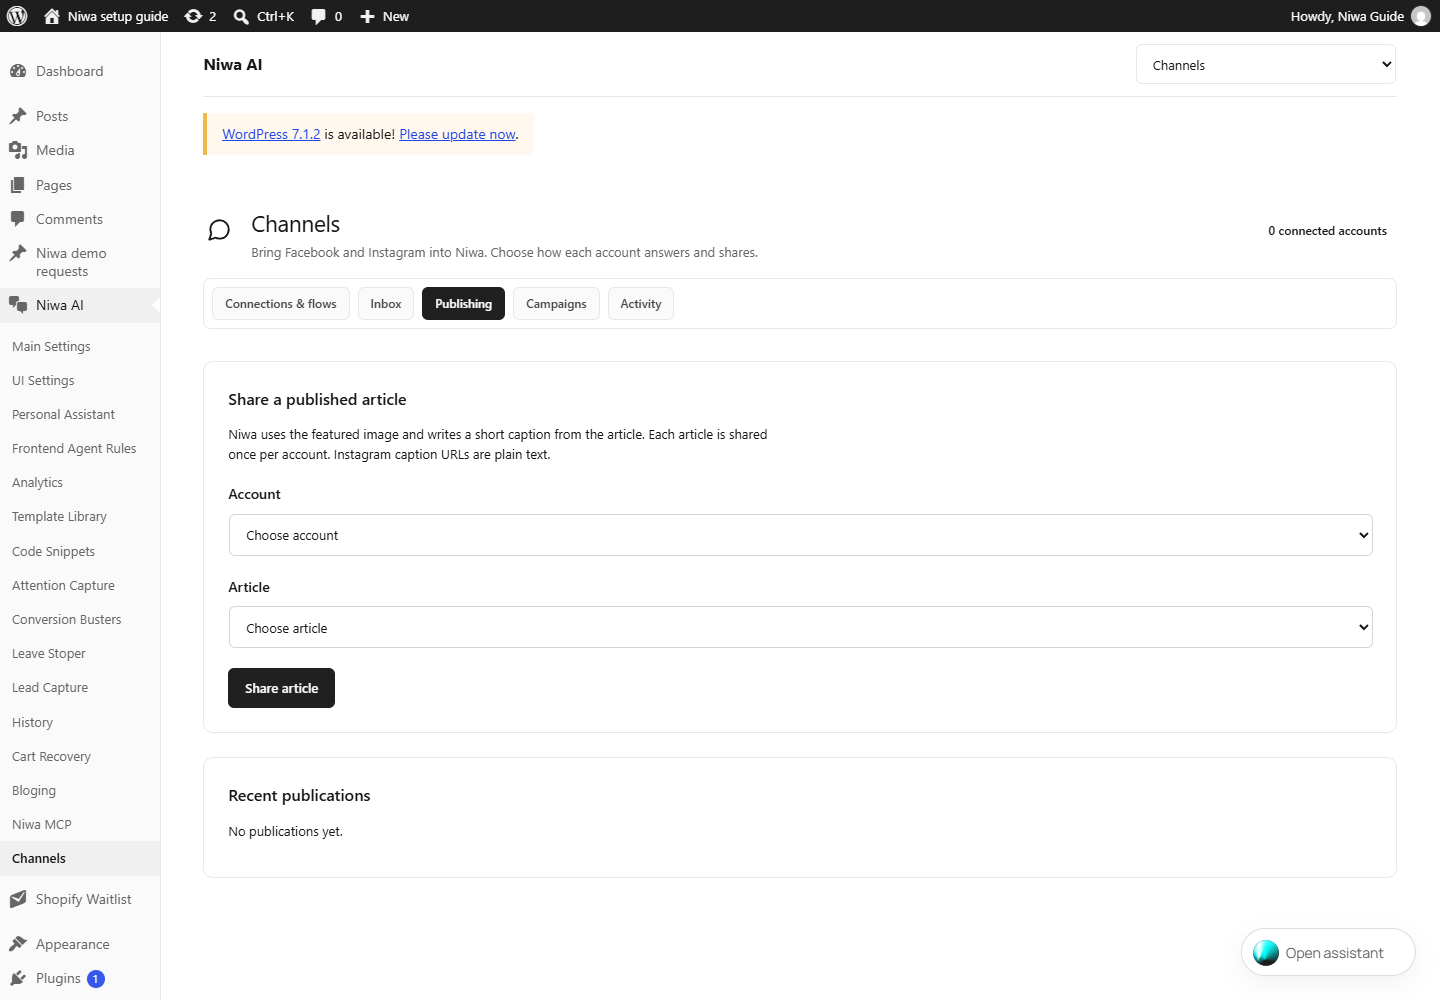
- Account
- Choose the connected social account that should receive this post.
- Article
- Choose a published WordPress article. Confirm the destination account before sharing.
- Share article
- Queues sharing of the selected article to the selected social account. This is a publishing action.
Channels · Campaigns1 controls
WordPress → Niwa AI → Channels → Campaigns
Read available campaign performance for accounts authorized for advertising access. Refresh results requests updated reporting; it does not create an advertising budget.
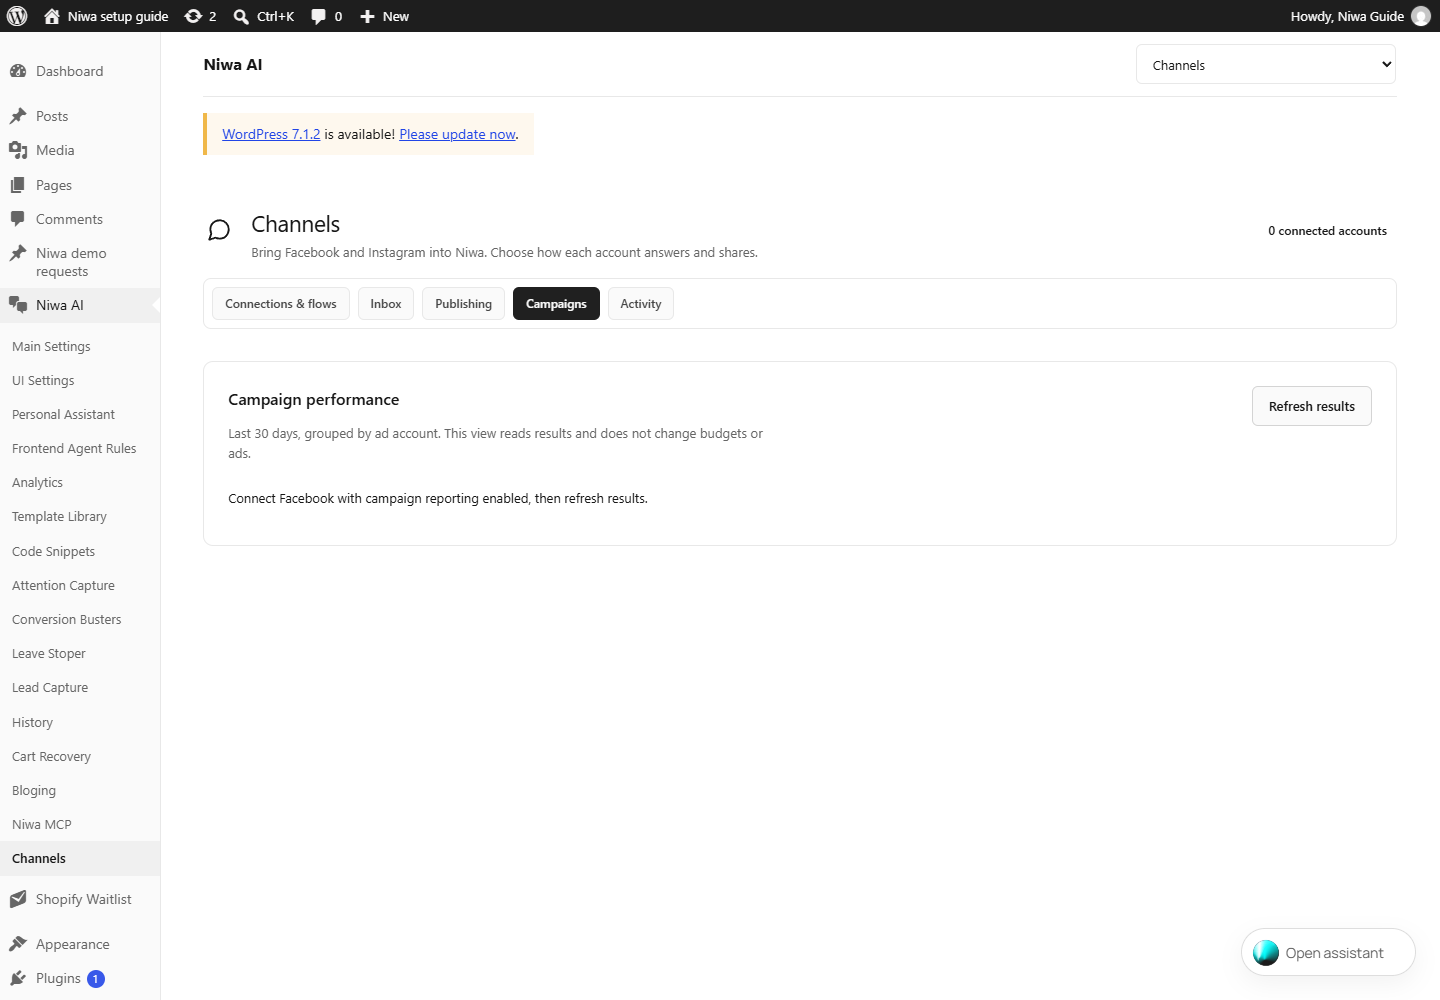
- Refresh results
- Fetches current campaign reporting for authorized accounts.
Channels · Activity2 controls
WordPress → Niwa AI → Channels → Activity
Inspect queued, completed and failed integration work. Use error details to distinguish permission problems, unavailable accounts and delivery failures.
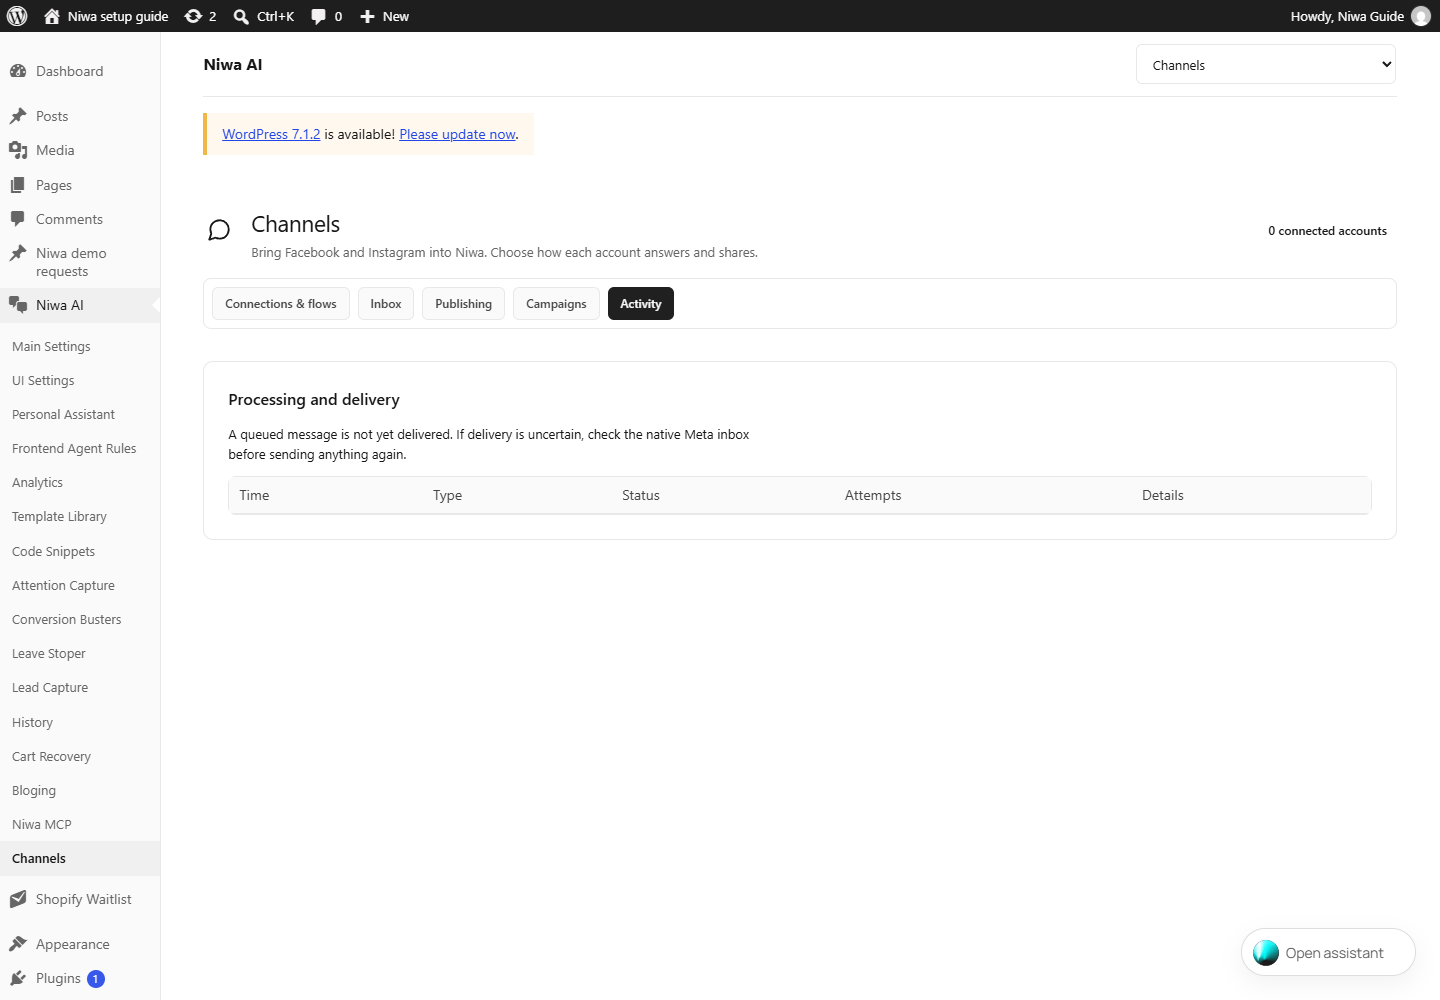
- Result of your check
- For uncertain delivery, open the native Meta inbox or feed and verify whether the item actually arrived. Choose delivered or not delivered based on that check.
- Record delivery check
- Records your observed result and releases later work. It does not resend the item. Avoid duplicate sends while delivery is uncertain.
Find the missing step.
- I entered my licence, but setup is still blocked.
- If confirmation is pending, check the exact inbox named on screen, including Spam, Junk and Promotions. Open the confirmation link, return to WordPress and reload. Use Re-send activation email if needed. The licence email and activation confirmation can be separate messages.
- OpenAI verification completed, but Niwa still says API Key.
- Return to Main Settings, select Codex OAuth under Connection Mode and click Save Auth Settings. A connected account in Standby is not the active connection. Personal Assistant has its own Founder Connection Mode. Check that too.
- The chat bubble is missing.
- In UI Settings, turn on Enable flyout chat and save. Check hidden-page rules, Centerstage Mode and device positioning. Clear your WordPress, host and CDN caches, then test in a private browser window. Your theme must call wp_footer().
- Telegram knows my ID, but will not execute requests.
- Copy your numeric ID to Owner Chat ID, or add it to Stock Managers for product-only access, then save. Start a new message. A Telegram username or phone number cannot replace the numeric Chat ID.
- Telegram receives nothing.
- Use the bot you created, press Start, and check its token and Telegram enable switch. Save Personal Assistant Settings. In Runtime, check webhook status and the last error. The site needs a publicly reachable HTTPS endpoint; localhost cannot receive Telegram webhooks.
- The WhatsApp QR is missing or expired.
- Return to Setup & Access and click Connect WhatsApp for a fresh code. Follow any host capability message shown there. The gateway needs the required process functions and runtime on the host. Scan with WhatsApp’s Linked devices scanner. Pairing alone does not grant your sender number admin access.
- The assistant does not know my products.
- Run Full Index + Embeddings in Main Settings and follow the counters. Check that products are published and there is no embedding error. Add business details, policies and sales instructions in Frontend Agent Rules.
- Bookings work, but Google Calendar does not sync.
- Open Lead Capture → Scheduler, save the calendar setup, complete the Google connection and review its data consent. Local booking and the Google connection have separate controls. Check the connection status before expecting external events.
Still need a hand?
Send your site URL, Niwa AI version, the screen name and exact error to niwa@niwachat.com. Include a screenshot with keys, tokens, QR codes and customer details covered.

Official service instructions and verification notes
- OpenAI: device-code authentication
- OpenAI: ChatGPT and Codex data controls
- OpenAI: API data retention
- Telegram: create a bot with BotFather
- WhatsApp: link a device
Plugin controls were checked against Niwa AI 0.13.1024. External services can change menus and account requirements. Connected-account controls are described separately from the unconfigured screenshots.

